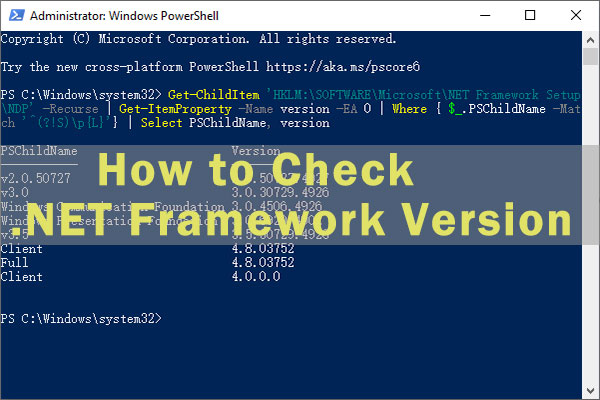
You can install and run multiple versions of the .NET Framework on your computer. When you develop or deploy your app, you may need to know which .NET Framework versions are installed on the user’s computer. In this article we will show you about check.net framework version.
The registry contains a list of the versions of the .NET Framework installed on the computer. The “.NET Framework” is a development platform composed of programming languages, libraries, and tools for programmers to build a variety of applications for desktops, laptops, tablets, web apps, games, etc. And it is very useful for us, then we have given below four ways to check .net framework for whether it is in our system or not.
Four ways to check .net framework:
Here are four ways to quickly find out the version of .NET on Windows 10. Whether you are a developer or an everyday user, Windows 10 provides at least four ways to check the .NET Framework version using File Explorer, Registry, Command Prompt, and PowerShell.
Using Registry Editor:
- From the Start menu, choose Run, enter regedit, and then select OK.
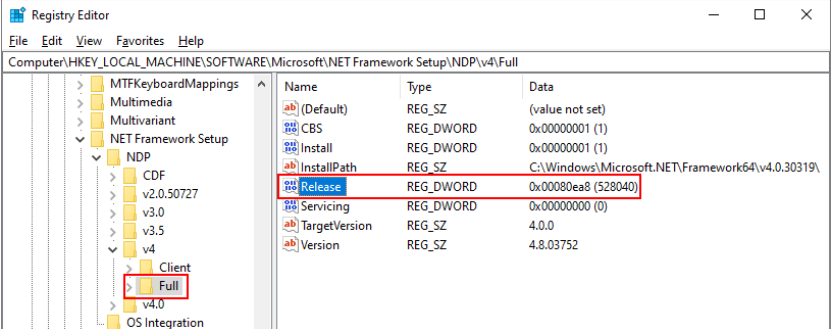
- In the Registry Editor, open the following subkey: HKEY_LOCAL_MACHINE\SOFTWARE\Microsoft\NET Framework Setup\NDP\v4\Full. If the Full subkey isn’t present, then you don’t have .NET Framework 4.5 or later installed.
- Check for a REG_DWORD entry named Release. If it exists, then you have .NET Framework 4.5 or later installed. Its value corresponds to a particular version of .NET Framework. In the following figure, for example, the value of the Release entry is 528040, which is the release key for .NET Framework 4.8.
Using PowerShell:
To check the .NET version with PowerShell, use these steps:
- You can use PowerShell to check the .NET Framework version on your computer –
- In your device, Launch PowerShell with Run as administrator.
- On the PowerShell window, type or Copy and paste the following command and press Enter
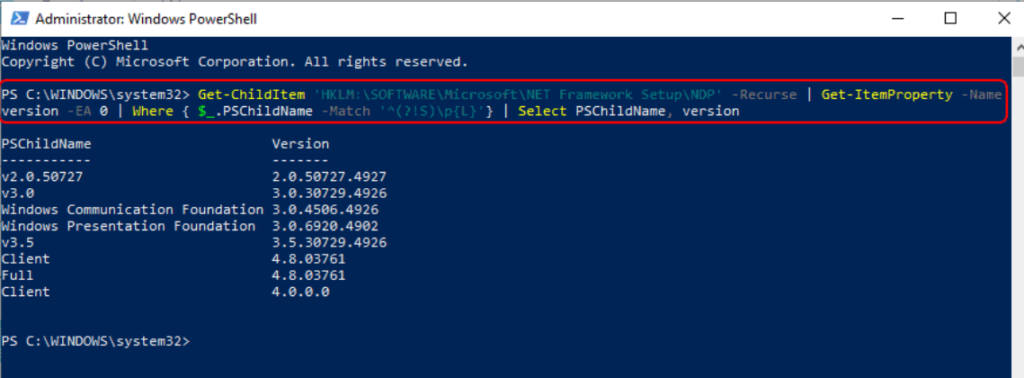
- Get-ChildItem ‘HKLM:\SOFTWARE\Microsoft\NET Framework Setup\NDP’ -Recurse | Get-ItemProperty -Name version -EA 0 | Where { $_.PSChildName -Match ‘^(?!S)\p{L}’} | Select PSChildName, version
- Here it displays a list of .NET Framework versions installed on your computer. The version that appeared in Client, Full version is the latest installed version. If the Full subkey is missing, then .NET Framework 4.5 or above isn’t installed.
Using File Explorer:
To use file explorer to check the .NET framework version on Windows 10, use these steps:
- Open File Explorer.
- Browse the following path:C:\Windows\Microsoft.NET\Framework
- Enter the folder with the latest version for example, v4.0.30319.
- Right-click any of the “.dll” files and select the Properties option.
- Click the Details tab.
- In the “Product version” section, confirm the version of .NET — for example, 4.8.4084.0.
- Once you complete the steps, the file details will reveal the framework platform’s version installed on the device.
Using command prompt:
To check the version of the .NET Framework with Command Prompt, use these steps:
- First of all, open Start.
- Search for Command Prompt, right-click the top result, and select the Run as administrator option.
- Type the following command to determine the version of .NET installed and press Enter:reg query “HKLM\SOFTWARE\Microsoft\Net Framework Setup\NDP” /sTo make sure that version 4.x is installed, use this variant of the command:reg query “HKLM\SOFTWARE\Microsoft\Net Framework Setup\NDP\v4″ /s
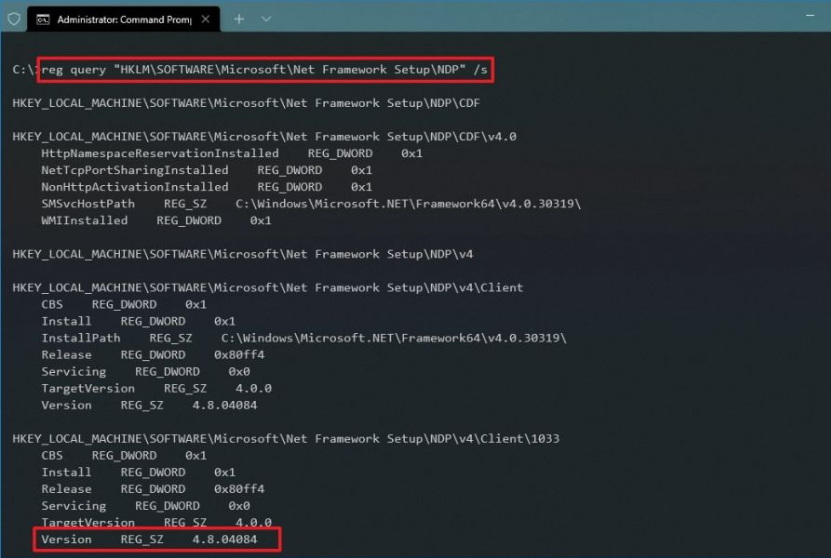
- Check the “Version” field to confirm the releases of the .NET Framework installed on Windows 10.
- Once you complete the steps, the versions of .NET running on the computer will be revealed.
In this article we have try to define “check dot net framework version”. Hope you are like it! Thanks for reading this article.