Test Mic on Streamlabs OBS
Audio quality is an extremely important part of your live stream, especially when it comes to microphones. with Streamlabs Desktop, there are a variety of different audio filters you can use to give your viewers a rich and pleasant sound when you are speaking into the microphone. Virtually every streamer around the globe knows about OBS (Open Broadcaster Software), a free open-sourced streaming and recording program. you shall find some of the most popular solutions to the issue of “obs microphone not working”.
How to monitor audio on OBS?
Follow these steps:
- Firstly, you need to set where you want to listen (or rather monitor) the audio.
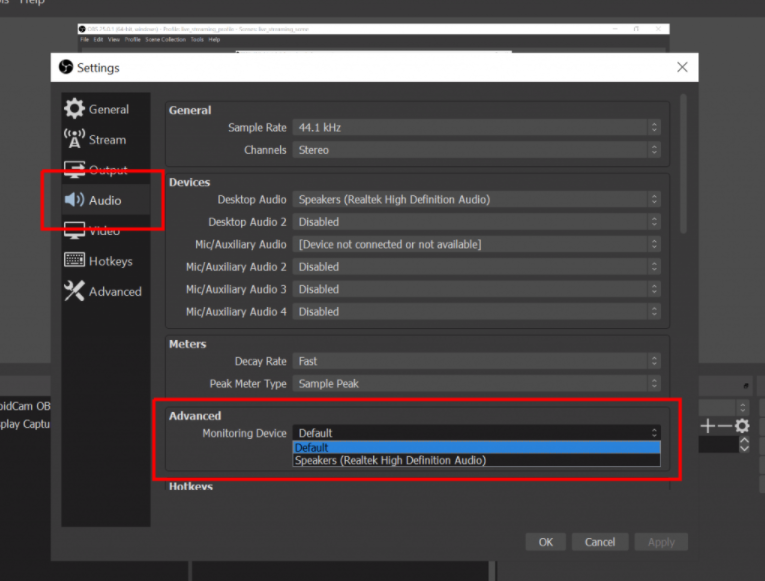
- Go to Settings and then click on the Audio tab and you will find a screen as depicted below.
- At Advanced section below the window, you will see the Monitoring Device dropdown menu.
- Then choose the device that you wish to monitor the audio. The default should be your PC speakers.
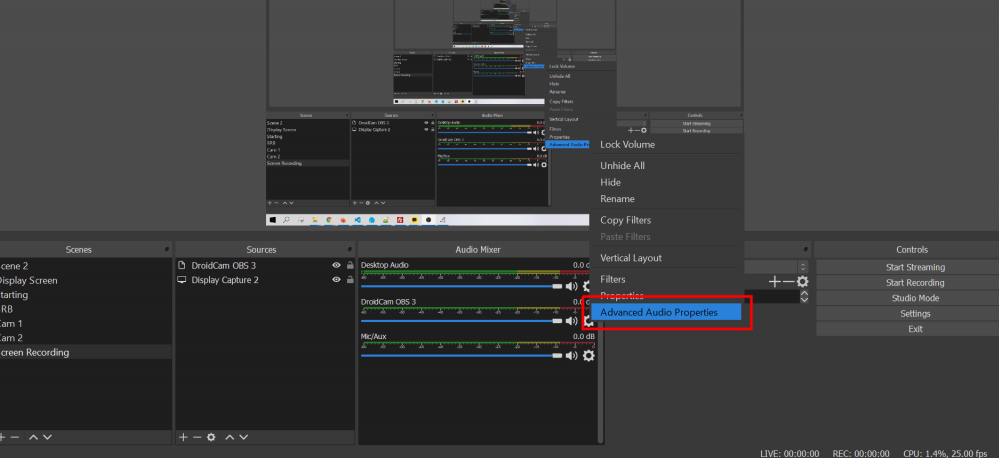
- Next, we need to enable the audio monitoring of a specific device.
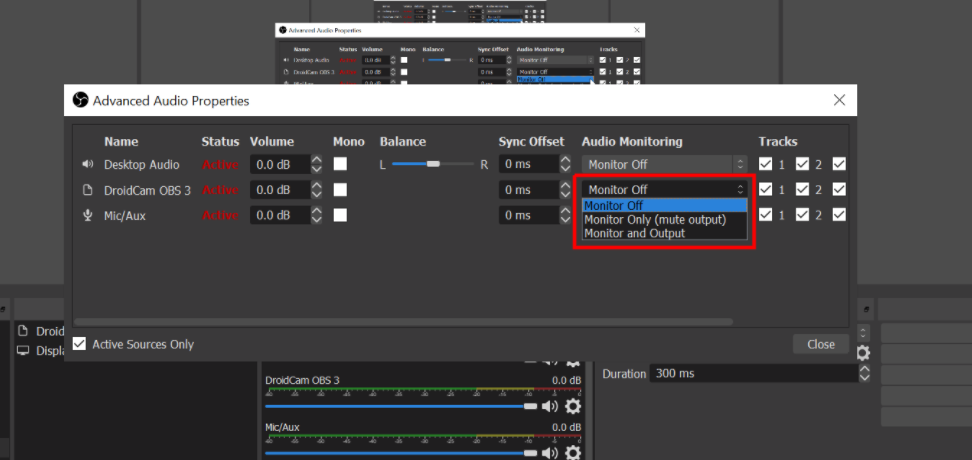
- On the main screen of OBS, under the Audio Mixer section, click on the cogwheel of the audio device and select Advanced Audio Properties as shown below.
- In the next screen as displayed below, under the Audio Monitoring menus, select how you want to monitor the specific audio source.
How to test mic on streamlabs obs with these settings?
As your microphone is your primary method of communication and content creation on stream. You can address most of these issues in OBS, Streamlabs OBS, or whatever digital or analog mixer you may use. Follow along with this guide and it should get your microphone audio to a better place.

- Open up the Sound menu in Windows. Under “Recording”, find your microphone, right click, and select “Properties”.
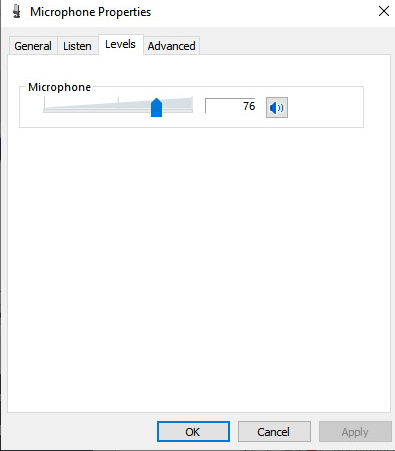
- In the “Microphone Properties” menu, select the “Levels” tab and make sure the mic is set to somewhere between 70 and 80%.
- You’re going to want to download a free VST package called ReaPlugs.
- You can download it here. Install the files.
- Go to OBS. From your audio mixer, click on the gear icon and select “Filters”.
- From the Mic menu, click on the “+” icon and add Noise Suppression from the list.
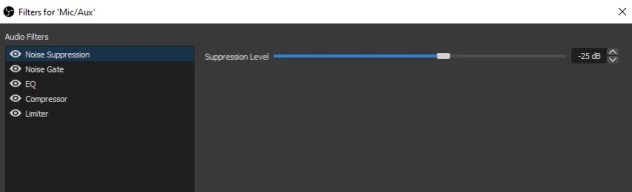
- Set your Noise Suppression level.
- Go back to the “+” symbol and add a Noise Gate.
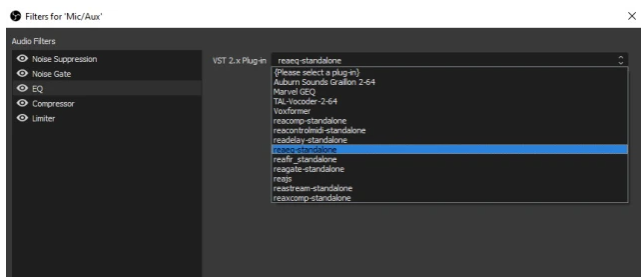
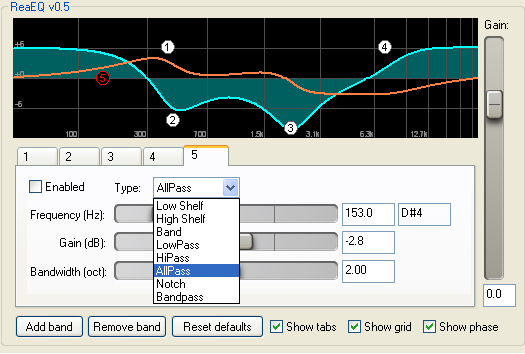
- Go back to the “+” symbol and add “VST 2.x Plug-in”. Then, select “reaeq-standalone” from the list.
- Then click on “Open Plug-in Interface.
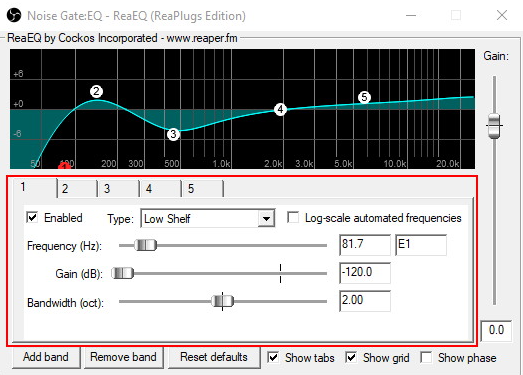
- Enter them in order of 1-5. By default, the EQ gives you four bands.
- You will need to “Add band” to get the fifth setting in there.
- Go back to the + and add a Compressor.
- Last step! Click on the “+” and add a limiter.
Other Best Streamlabs OBS Audio Tips & Settings:
- Choose Your Mic Carefully
- Listen to Yourself With Audio Monitoring
- Fix Audio Delay in Streamlabs
- Get Your Levels Just Right
- Prepare Your Room for Great Sound
More about Streamlabs OBS Audio Tips & Settings then click here….