HP Printers are great when they work, but when they don’t it can be extremely frustrating. Here’s how to solve some of the most common problems, including not printing at all through to blocked nozzles and other issues. Printers can run reliably for many years and thousands of prints, but they can also malfunction or stop working entirely.
Today, we are going to give you a step-by-step guide on how to resolve the issues associated with HP printers not printing on laser and inkjet printers. But first, let us discuss why you are encountering this problem to at least give you an idea of how to fix it.
There are several reasons that we assume to be responsible for not printing pages.
- HP printer cartridges are empty/running low
- Dirty cartridges and printheads
- Faulty or incompatible cartridges and papers
- Wrong printer settings
- Color printing is disabled
- The printer driver is not working properly
How to Fix: HP Printer Not Printing
Solution 1: Performing basic checks
Before we move on with proper technical workarounds, it is advised that you implement these basic checks on your setup.
- Check the status of the connection between your printer and your computer. If you are using a network connection, make sure all the details (IP address and ports) are aligned with your printer’s configuration.
- Perform a power cycle of the entire setup (your computer and the printer) before you move on. There may be some misconfiguration which might induce unknown problems. Turn all the modules off, take out the power cord from the devices and let them sit for ~10 minutes before plugging everything back in.
Solution 2: Cancelling All Print Jobs
Another workaround is canceling all print jobs which are submitted to the printer and then restarting the printer. This will prove to be a soft reset to the system and might solve any discrepancies in it.
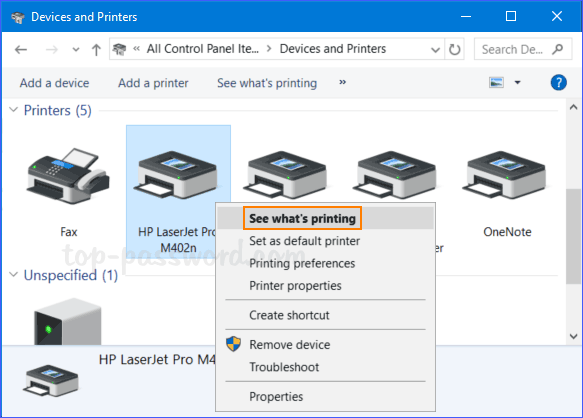
- Navigate to Devices and Printers, right-click on the printer and click See what’s printing.
- On the new window which opens up, click on Printer and click Cancel all documents.
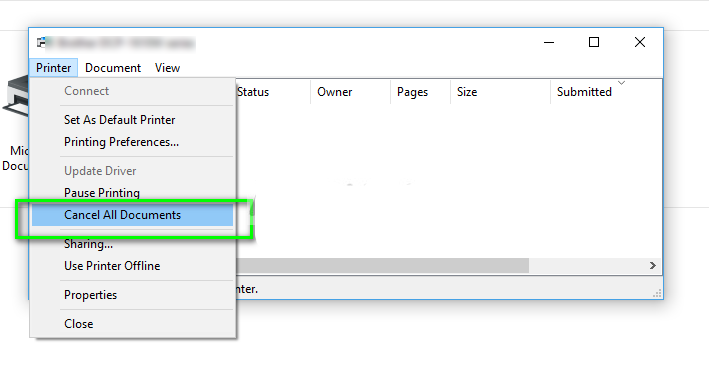
- Now you should check if you can print perfectly.
Solution 3: Unclog the Print head (Automatic Cleaning)
When it comes to inkjet printers, you can unclog the print head using the printer’s automatic cleaning cycle. You can activate this cycle from your printer’s control panel or at the Printer Properties from your computer’s Control Panel.
The process prompts your printer to discharge excess ink out, softening and removing clogs on the print head. Select the deep cleaning function option if the simple cleaning doesn’t work in unclogging the print head.
Solution 4: Unclog the Print Head (Manual Cleaning)
If the automatic cleaning method fails, you can also opt for a manual cleaning approach. Keep in mind that there are two kinds of print heads. There’s a print head that’s integrated from the cartridge, and there’s also a detachable type.
Avoid exposing and cleaning the sponge area of the ink tank when cleaning removable print heads. To prevent any direct contact of ink on our skin, use protective gloves throughout the process. Here’s a step-by-step guide on cleaning a printhead manually:
- Open the Ink Cartridge Carriage and uninstall each Ink Cartridge unit from its slot. Carefully take out the Print Head from the Carriage.
- Wipe off any congested and dried ink on the Print Head using a clean, lint-free cloth damped in warm water. Keep on cleaning the Nozzle area until there’s no more black ink sticking on the fabric.
- Soak the printhead in a bowl with warm water for 10 minutes. Do not use boiled water. Put a clean paper towel at the base and place the print head above it while it soaks.
- Take out the print head from the bowl, and wipe off any water and moisture using a dry lint-free cloth. Place the printhead on top of a paper towel and allow it to air-dry for 15 minutes. Reinstall the print head back to the Carriage once it’s fully dry.
- Conduct a Nozzle check to confirm if the print head is clean before you start printing.
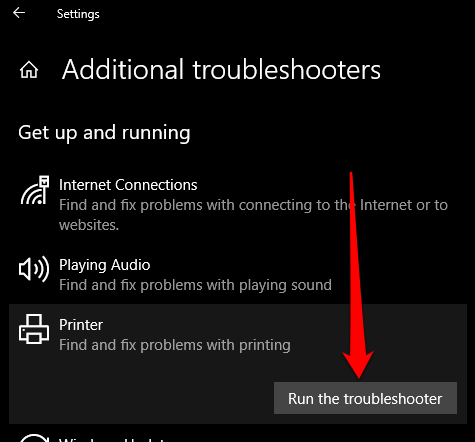
Solution 5: Run the Windows Printer Troubleshooter
If you’re still getting blank printouts, you can use the built-in printer troubleshooter utility to automatically detect and resolve printer issues.
- Right-click Start > Settings > Update & Security.

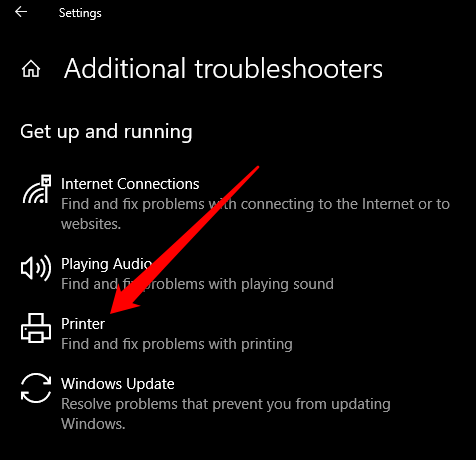
- Select Troubleshoot > Additional Troubleshooters and then select Printer under the Get up and running section.
- Next, select Run the troubleshooter to begin.
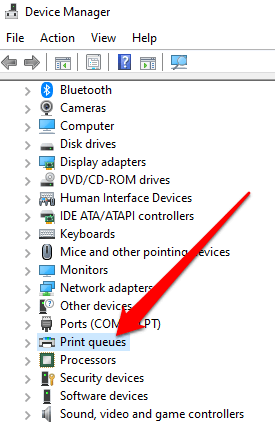
Solution 6: Update the Printer Driver
To resolve this, you may need to update the printer driver or uninstall and reinstall it back so as to get the newest version of the driver. You can update your printer’s drivers by visiting the device manufacturer’s official page and downloading the available driver updates. You can also update your printer driver via the Device Manager.
- Right-click Start > Device Manager and select the Print queue section to expand it.
- Right-click your printer’s name and select Update Driver.
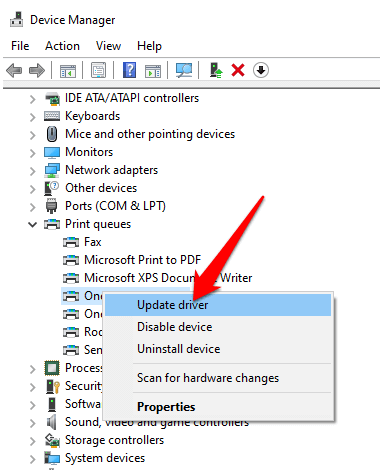
- Select Search automatically for updated driver software.

Wrapping It Up
Getting problematic prints from your HP printer can be very irritating, especially if you have tight deadlines and need to print a lot of documents. However, you can quickly solve these issues using the solutions we mentioned here.