Windows Defender Firewall helps prevent hackers and malicious software from gaining access to your PC through the internet or a network.
On Windows 10, Microsoft Defender Firewall is supposed to be a feature that helps to check incoming and outgoing network traffic to allow or block traffic based on predefined rules to protect your device from unauthorized access .
Although it is recommended to keep this feature enabled, there are many reasons to disable the firewall. For example, if you want to use another firewall solution, you’ll need to test the network or app connection.
Whatever the reason, Windows 10 allows you to enable and disable the firewall using Windows Security, Control Panel, Command Prompt, and even PowerShell.
How to enable your Windows Defender Firewall ?
Windows Defender Firewall helps to prevent hackers and malicious software from accessing your PC via internet or network. Your organization may require you to turn it on before you can access their network resources from your device.
Few easy steps to enable Windows Defender Firewall :
- Go to Start and open Control Panel.
- Select System and Security > Windows Defender Firewall.
- Select Turn Windows Firewall on or off.
- Select Turn on Windows Firewall for the domain, private, and public network settings.
How to turn off Windows Defender Firewall using Control Panel ?
- Open the start menu and type control panel in the search bar. Click on the Control Panel app to proceed.
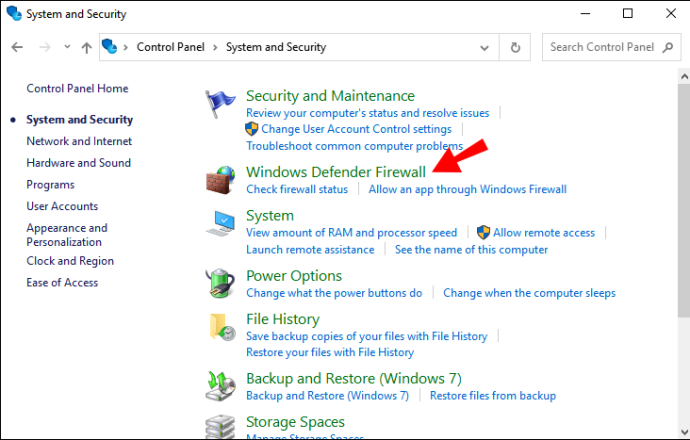
- Select the System and Security tab in Control Panel.
- Click Windows Defender Firewall to open the menu and continue the process of disabling.
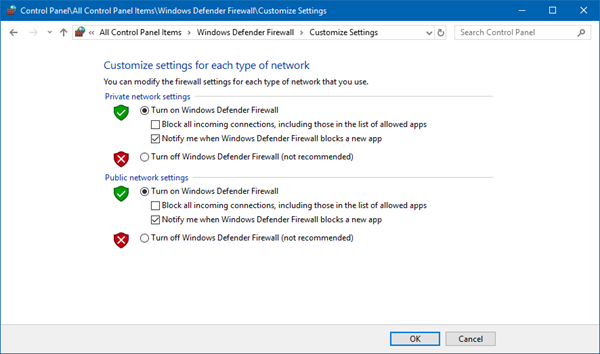
- This menu will inform you whether private or public networks are connected to the firewall. Click on Turn Windows Defender Firewall on or off option which is present in the middle-left corner.
- Since the firewall is active here on public networks, only the public network settings need to be changed or you can change both the settings if your network connections change from time to time. Simply select Turn off Windows Defender Firewall and click OK.
- Windows will prompt you with a confirmation that the firewall has been turned off for your PC.
How do you disable Firewall on Windows 10 using Windows Security ?
To disable the firewall on Windows 10, use these steps :
- Open Windows Security.
- Click on Firewall & network protection.
- Click the network to disable the firewall.
- Turn off the Microsoft Defender Firewall toggle switch to “disable the firewall Windows 10.”
Once you complete the steps, the firewall will be disabled for the network profile you’re currently using. If you want to disable the firewall for all networks, make sure to turn off the security feature for all the profiles, including “Domain network,” “Private network,” and “Public network.”
Disable the Firewall in Windows Vista & Windows XP –
Windows Vista :
The Windows Firewall can be turned off in Windows Vista through the Control Panel, similar to how it’s done in other versions of Windows.
- Select Control Panel from the Start menu.
- Choose Security from the category list.
- Select Windows Firewall.
- Choose Turn Windows Firewall on or off on the left side of the window.
- Open the General tab and select the bubble next to Off (not recommended).
- Select OK to apply the changes.
Windows XP :
Directions for turning off the Windows XP firewall is significantly different than it is in newer versions of Windows, but it’s still fairly simple.
- Go to Start and then Control Panel.
- Select Network and Internet Connections.
- Choose Network Connections under the or pick a Control Panel icon section.
- Right-click or tap-and-hold your network connection and choose Properties.
- Open the Advanced tab and select Settings.
- Choose the Off (not recommended) radio button.
- Select OK in this window and then OK again in the Properties window of your network connection. You can also close the Network Connections window.
Enable firewall using Windows Security –
To enable the firewall on Windows 10, use these steps :
- Open Windows Security.
- Click on Firewall & network protection.
- Click the “Turn on” button from the network profile to enable the Windows 10 firewall. (Or click the Restore settings button.)
- After you complete the steps, the Windows 10 firewall will enable again on your device.