Multi-Factor Authentication(otherwise known as MFA or ‘two-step verification’) is a security feature included with Office 365 that protects your Office 365 account. Here is the method to setup mfa using mobile phone.
here are three authentication options available for Multifactor Authentication.
- SMS Message – You will be sent a text message containing a verification code when you attempt a log-in. Enter the verification code provided into the sign-in interface.
- Mobile Application Push – This option pushes a pop-up notification to the authenticator app on your smartphone or tablet to approve or deny.
- Mobile Application OAUTH – The authenticator app generates a 6-digit verification code that updates every 30 seconds. This is useful in scenarios where you may be in an area with poor cell coverage.
Setup Multi Factor Authentication
- Please install the Microsoft Authenticator app from your supported AppStore on your mobile phone or mobile device. app for various supported platforms:
- Android
- iOS
- Windows Phone
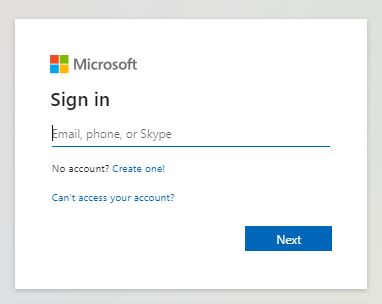
- Open your web browser on your workstation/laptop/surface and go to aka.ms/mfasetup and Click ‘Sign In’
- Enter your email address and click ‘Next’
- Please enter your usual network login password and click ‘Sign In’:
- You will be redirected to the following page.
- You will now see the Additional security verification/Multi Factor authentication setup page and have several options.
- Choose ‘Mobile App’ and select ‘Receive notifications for verification’. Click ‘Set Up’
- The following pop up box will appear, displaying a ‘QR’ code
- Open the Microsoft Authenticator app on your phone.
- Tap + > Work or school account or choose ‘Add account’ from the options menu. Note: On first run, you may be asked if you would like to add an account. Please skip this. It is important that you choose ‘Work or school account’ if presented with the option and that you do not select any other account type..
- Use your phone to scan the QR square that is displayed on your computer screen.
- Your account will be added automatically to the app and will display a six-digit code.
- Switch back to your computer and click ‘Next’.
- Now wait for the ‘Checking activation status’ text to finish configuring your phone.
- On your computer, ensure that ‘Receive notifications for verification’ is selected and click ‘Next’
- Switch back to your phone and you’ll see a notification for a new sign in.
- Go to the Microsoft Authenticator app.
- Tap Approve to allow it.
- Back on the computer, follow any prompts that you might see such as adding a mobile number.
- You will now be redirected to an ‘Additional Security verification web page’. You can add or amend details to this page as required and add further methods of Multi Factor Authentication as required. Once you are happy with the details entered you can safely close the window.
From now on, whenever you have a new sign in or add your Office 365 work or school account to an app, you’ll open the Authenticator app on your phone and tap Approve.
