
How do you keep all the cables inside the computer clean and tidy? It’s actually quite simple! Here is the most complete guide on how to manage a cable on a PC.
Anyone who knows what a DIY PC building hobby is about knows that artificial cable routing is not an easy task. Forced combat cables can be as challenging as breaking a wild tree.
Gone are the days when everyone was ruthlessly throwing away and hoping for the best: Cable management is not so much an aesthetic choice, but rather a source of benefits, not just for aesthetic purposes. It was a painful task, but it was worth the time and effort.
Here’s a simple guide on how to lure these wild bundles of cables and connections to an unnecessary, fresh computer that’s worthy of pride and one you want to show off so everyone can be amazed.
Benefits of Cable Management PC
Airflow
More than blowing up your computer to look like a futuristic computer station pulled straight from the worst sci-fi movies of the 80’s, good cable management speeds the process.
Twisted cables that are not controlled lead from one corner of the cabinet to the other and restrict airflow, resulting in higher temperatures. As we all know, heat is the enemy of a well-functioning PC.
By routing and managing cables so that they do not interfere with the natural movement of air inside the computer, you can allow the fans to do their job and control the hardware temperature.
Easy Upgrading and Maintenance
Upgrading is especially easy if cabling is not available to access the PCI-E port or install a brand new SSD. Adding a new component to a computer with little or no cabling is like digging through a dense forest with a rusty machete.
Careful cable routing detects free paths to ports and shafts, which simplifies and speeds up engine upgrades and maintenance.
Pre-Planning
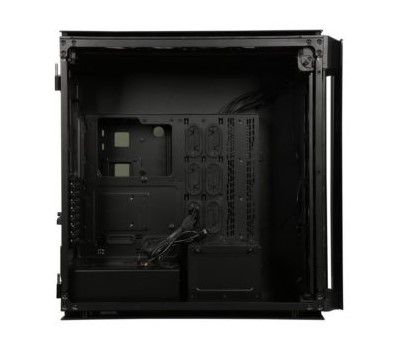
Case
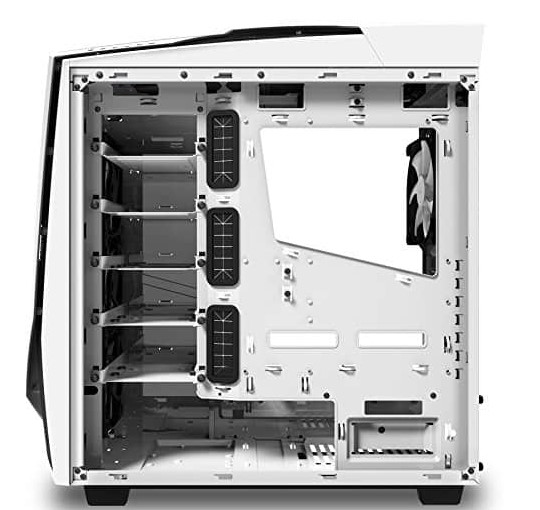
Not all cases are equal. Some manufacturers are aware of the natural struggle for proper cable management and design their enclosures using cable holes and brackets, which leads to a hidden space behind the motherboard’s charging dot.
When you start a new building, you save a little on the road and buy a case that is right for the purpose. Observe the amount of space between the back panel and the system board bay: if you have a set of components, the more space, the better.
Likewise, the overall size of the case affects how successfully the cable is handled. The wider housing is always easier to handle, but requires longer cabling. So plan as much as you can.
Modular PSU
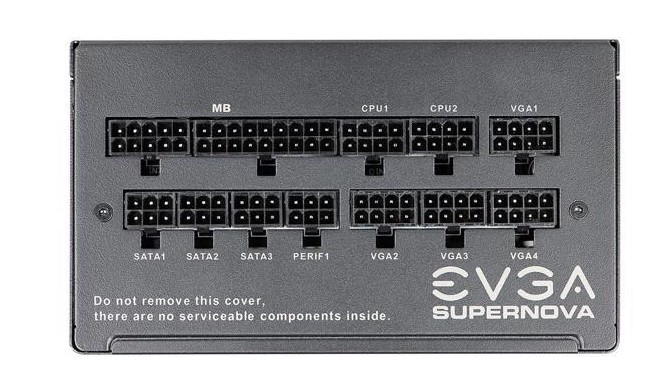
They give you the option to choose which cables go to and from the PSU, instead of tangling the wires connected to their non-modular counterparts. Unnecessary, unused cabling should also be managed, and the transition to modulation completely eliminates this problem.
Component Placement
Regardless of the agreements made by the manufacturer, specific components will not be shaken once they are placed in their predetermined position. However, others, such as SSDs, HDDs and GPUs, can be placed in different slots and slots for better cable management.
Locate the cable hole on the system board / housing and place the parts close together to shorten the part of the cable that is not routed behind the outlet. As and if possible, position the components so that their individual connections are not pushed into the same cable hole.
Equipment
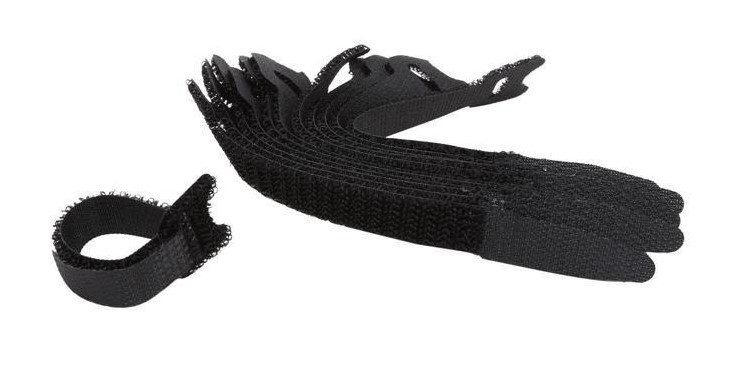
Avoid standard plastic cable ties for the only reason that once you install them, they can no longer be used, made a mistake or experimented with expensive effort – not to mention environmental aspects. Instead, choose modified ESD-compliant tires, swivel tires, sleeves, combs and Velcro straps.
Don’t be afraid to use ESD compatible tape to secure unnecessary cables without twisting as you like using the tapes on the back of the motherboard tray. Buy a color ribbon that matches your PC business, and if you’ve already agreed on a specific color scheme, buy something that matches other dominant colors.
Cable management aims to make your computer look classy and stylish; The tape works wonders at the end of the watch.
Although maintaining short cables is a central principle of good cable management, sometimes hand guidance options – especially in terms of location and availability of cable openings in the cabinet and motherboard – mean that longer length can be an advantage instead of a negative.
Extension cords that snap the end of existing cords can add even less throughput to achieve the perfect hole and unify the entire computer.
Cable Management Best Practices and Strategies
Start Fresh
Cable management is like moving to a new home: no one will be pleased to clean up the mess and repaint the furniture left behind by previous residents. Cable management is very similar. Before you begin, disconnect all cables and replace the installation components as described above.
The Motherboard Tray
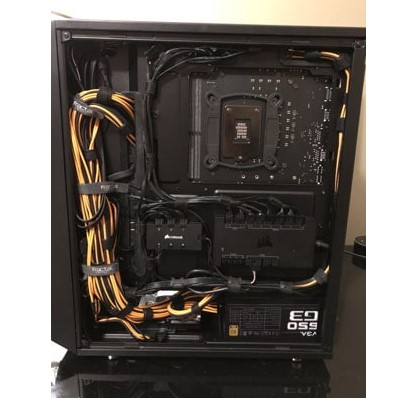
The cable manager’s best friend is the socket on the motherboard – or, to be precise, the hole behind it, where the cables can be removed from view. Pass the cables through the cable openings in the socket and direct them to their final destination, making sure that the small cable is as exposed as possible for the housing.
Although the socket is good for storing cables, the hole on the back should be smooth, if not more. Don’t turn everything around and call it a day: come up with the most logical cable routes through the back of the socket.
Use cable shears and handles attached to the case – attach a cable tie to secure a set of cables, for example. For a clean look, try to control the contour of the case frame as much as possible.
Group small threads with strings and combs to keep things clean. Do the same with larger PSU cables with sleeves and velcro straps.
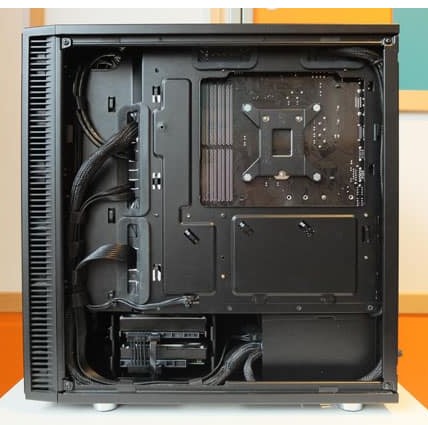
Give Every Cable The Attention It Deserves
From now on, it will be a matter of experimentation to find the most logical way for all cables. Give each cable the attention it deserves by finding the best route. You’ll be amazed at how easy it is to pay attention to attention to detail instead of trying a quick fix.
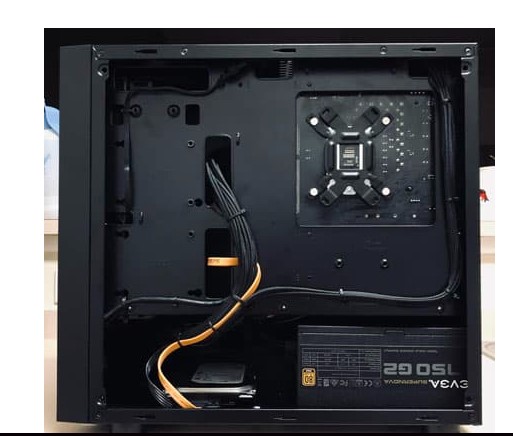
From there, create systematic access to every piece of hardware, always starting with the annoying front panel and the trunk cable that connects to the motherboard. Then continue to handle larger PSU cables to the CPU and motherboard, hard drives, and SATA SSA cables. Finally, deal with expansion cards such as the GPU.
Access the nearest cable hole for each component by going to the back of the charger and then back through the nearby cable hole where it connects to the component. This is especially true for PSU cables.
Use the entire length of cables to limit the connection. Quilting or quilting is one of the biggest pitfalls of cable routing because ordering and shaping a neat cut can be a dream come true.
It is no less important to cover fans, coolers and coolers at all costs, as this can restrict airflow.
Don’t forget the tape or tape until you are sure the cables are in the best condition. There is nothing worse than securing all the cables to find a better layout.
Cable Management Is An Art
To the displeasure of those involved in cable management, it is no well-kept secret that only a beginner is known for the steps of the occult initiative.
Cable management is an art, a process of trial and error, in which experimentation and patience bring the best results. Just as an artist who works on design after designing his project fine-tunes and improves his work, cable management follows a simple formula, the more time you spend, the better the result.
Patience is critical, as is the level of lateral thinking. This process will often result in multiple hardware removal and replacement to find the best route for the cable set, using a small amount of ESD tape on the connectors.group to see that the cable tie will work better in a particular situation. You always feel like you’ve taken two steps back to move one step forward. You can be sure that it is part of the process and the reward is more than a few hours of failure.