If your printer is prints blur, fainted, or unclear printout, then it’s quite possible that the nozzles of your printer’s print head require cleaning. Fortunately, the printer gives you the option to clean the printer’s print head and nozzle by using its Head Cleaning utility.
The good news is that printheads are generally pretty easy to clean! Today we take a look at how to clean printer heads. Read on to find out more.
Step 1: Clean Printer Heads for Windows
If you have a Windows machine, follow these steps to get to start the printer heads cleaning process.
- Open the Control Panel and click on “Devices and Printers”
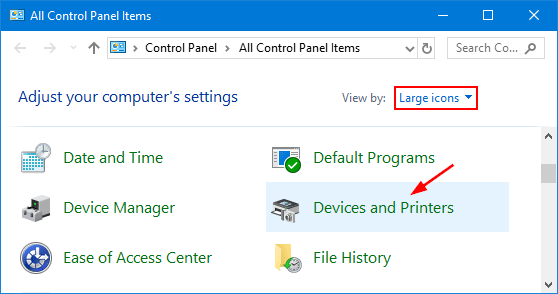
- In the Devices and Printers window, locate your printer. Right-click on your printer and select ‘Printing preferences’.

- In the Printing Preferences, click on the ‘Maintenance’ tab.
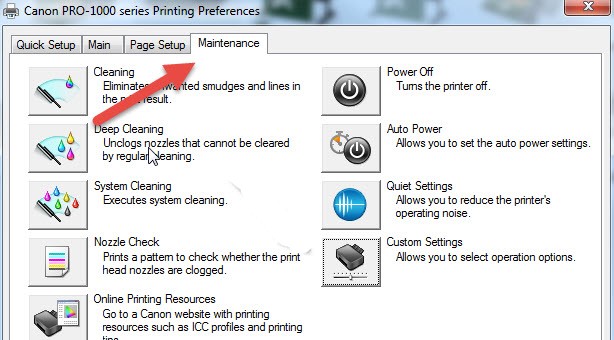
- Click on the option that says “Clean Ink Cartridges”, “Clean Heads”, “Clean Nozzles”, or “Clean Cartridges” (the wording may differ, depending upon the printer)
Step 2: Clean Printer Heads for Mac
For those who have a Mac machine, the following generic steps should apply.
- Go to System Preferences and click on “Printers & Scanners”
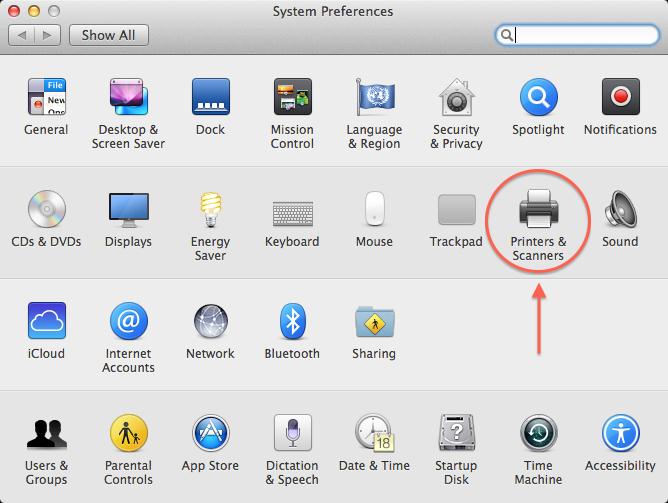
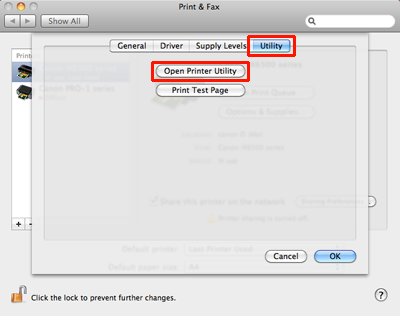
- Click on the printer you wish to clean, then click “Options & Supplies”
- Select the “Utility” tab and click “Open Printer Utility”
- Click on the “Cleaning”, “Deep Cleaning”, “Head Cleaning”, or “Cartridge Cleaning” option (the wording may differ, depending upon the printer).
Step 3: Manually Clean a Printer Heads
Supplies: Waterproof container, dry paper towels, lint-free cloth, filtered/distilled hot water
- Place dry paper towel into a waterproof container and fold as needed, so the paper towel sits on the bottom of the container.
- Completely submerge the paper towel with hot water.
- Remove ink cartridges via the access panel and place the sticker side down on the paper towel.
- Where you removed the ink cartridges, look for a grey latch to release the print head and pull up and out to remove.
- Wet lint-free cloth lightly and gently wipe away ink on the print head nozzle.
- Place the print head in a container with wet paper towels and let soak for at least 10 minutes with the print head nozzle facing down.
- Remove print head from the bath and let rest on a dry paper towel with the nozzle facing up for at least 15 minutes or until dried completely.
- Reinstall print head, secure release latch, and reinstall ink cartridges.
- Run the automatic cleaning function on the printer and check the test page for improvements.
Conclusion:
We hope this blog post has helped you learn a little more about how to clean your printer heads. A clogged printer head can generally be remedied using a few simple steps, and you should be back to printing pages in no time!