In this article, we will give you a full guide on how to connect from your phone with a wired and wireless printer.
Step 1: Print From Phone Via OTG
To print from your phone, first of all, you have to check the requirements.
- You should have a USB OTG (On-The-Go) cable or adaptor.
- Your android phone or tablet should be compatible with an OTG cord.
- Make sure your printer cord can be connected to the OTG cord.
Now, if you fulfill all the requirements, you are good to go.
- Plug the printer cord into the electric switch and turn it on.
- Now, you have to connect the OTG adaptor or OTG cord to the end of the printer’s USB cable.
- After that, you have to connect the USB cord to your phone.
- Now, you should see a pop-up on your android phone.
- You have to activate the plugin which pops up on your phone by tapping “OK”. If the plugin doesn’t appear on your phone, you may need to download it from Google Play Store. All printer brands have their own dedicated app.
- Now, choose the file you want to print. It can be a photo or a document file.
- If it is a photo, then select “More” and then click on “Share”.
- The print option will appear here, so click on print, and you are done.
Step 2: Print From Phone Using Wi-Fi Direct
Wi-Fi direct is a simple way to print from your mobile phone wirelessly. Your printer should support Wi-Fi Direct to use this feature.
- Go to the settings of your phone. Now, find “Network & Internet” and open it.
- Open Wi-Fi and click on “Wifi Preferences”.
- Click on “Advances Wi-Fi settings” and open WiFi Direct.
- It will start scanning for the printer. To connect with the printer, accept the connection.
- Now, choose the file you would like to print, and click on share. A dialogue box will pop up, choose the print option from here, and choose the printer you wish to print with.
- If you want to print photos, go to Google Photos or open your phone gallery.
Tap on the share, and choose the “Print” option, select the printer and configure the settings like Color Print or Black and White, and then click on print, the photo will be printed.
Step 3: Print Using Google Cloud Print
The majority of phones are preinstalled with Google Cloud Print. If your phone doesn’t have one, you can download Google Print manually. You will then have to add your printer to your device under the same shared Wi-Fi network.
- Launch Google Print from your Phone
- Go to Settings, select Printing, and then locate and add your printer
- Launch the app you’re printing from and then tap the three dots indicating additional options (typically found in the upper right corner).
- Locate and select the Print option
Step 4: Print Using Default Print Service
- If you don’t want to download any third-party apps or plugins on your phone to print a simple file, then you can use the default print service on your phone.
- Most android phones have a default print service, which can be activated in settings.
- So you have to make sure the service is enabled. And be sure that the WiFi printer and phone are connected to the same local network.
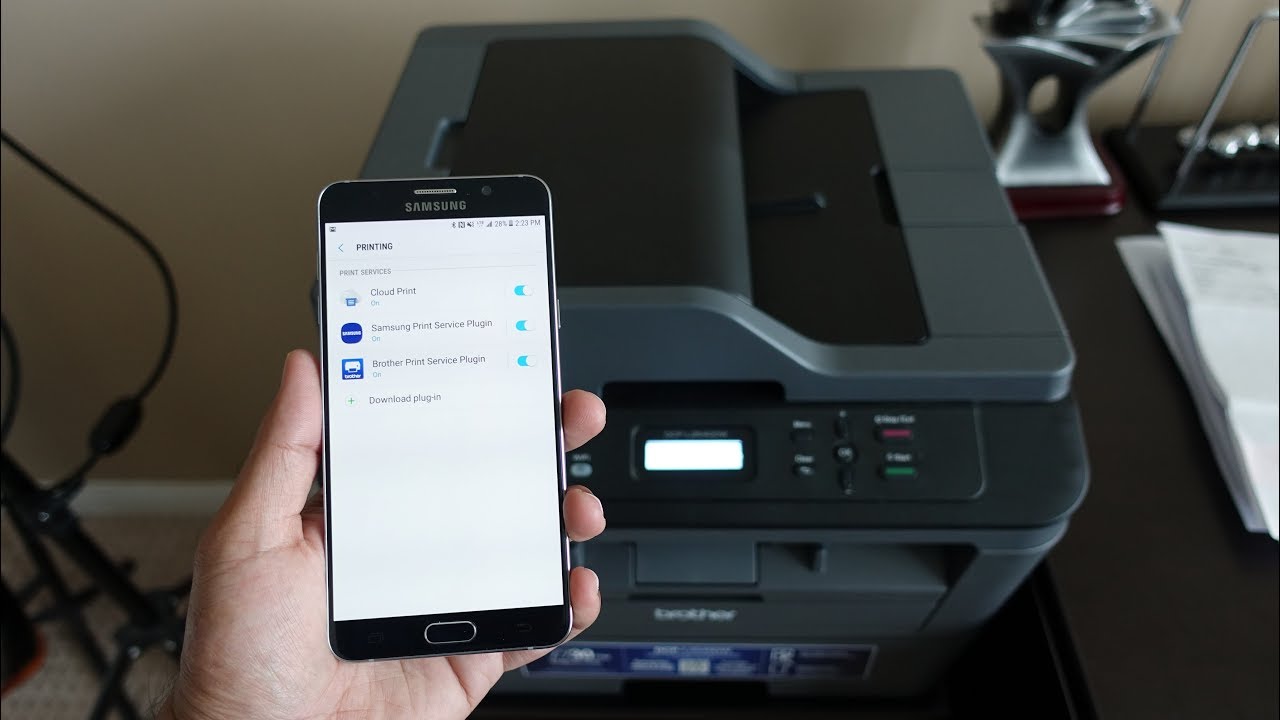
- To enable the default print service, go to your phone settings “Printing” section.
- This option can be found under phone Settings>>Connections>>Connection Preferences or More Connection Settings>>Printing>> Print Services.
- After connecting the printer to the same Wifi network, click on Default Print Service.
- The service will be started and will scan for the printers connected to your Wifi network.
- Now, the printer will show up in the list. Connect to it by tapping on the option that popped up on your screen, and the printer will be successfully connected to your phone.
- To print anything from your connected printer, just select the file and click on the “Share” option, a new dialogue box will pop up.
- From there, select Print, and the photo or file will be printed.
So, in this way you can successfully print from your phone to a wired or wireless printer. If you have a Tab you can follow the same procedure as described above.