Having a wireless printer offers you the convenience of printing from any connected device, in your work or home network. But, connecting a wireless printer isn’t always easy and in fact, can feel like a really complicated task.
Does it all sound exciting to you? Are you curious to find out how you can go about this? Then you are reading the right article. Read on to find out how wireless printing works and how it can help change your view about printing.
Steps to Connect your Wireless Printer to Wi-Fi
Once you go through the following noted steps, you can effort-freely connect your wireless printer to your Wi-Fi. Hence, lets’ start doing the same:
Step 1: Connect Your Wireless Printer To Wi-Fi With WPS
- Make sure the printer is on and within range of your Wi-Fi network.
- Press the Home button on the touchscreen, then press and hold the Wi-Fi button.
- Press the LAN Wireless setup button, then press OK.
- Select your Wi-Fi network from the list and enter your password, then press OK.
- The Power and Wi-Fi light will stop flashing once you’re connected.
Step 2: Connect Your Wireless Printer To Wi-Fi With WPS
- Make sure your printer is on and within range of your Wi-Fi network.
- Press and hold the Wireless button for five seconds or until the wireless light flashes.

- After about a minute, press and hold the WPS button on the router until the Wi-Fi light blinks.

- Once the light stops flashing, you’re connected.
Steps to Add Wireless Printer for Windows and Mac
After successfully connecting your wireless printer to your Wi-Fi network, it is required to add it to your windows to get it to work. Here’s how to add your wireless printer for both Windows and Mac devices. Follow the given points:
Step 1: Add a Wireless Printer to Windows
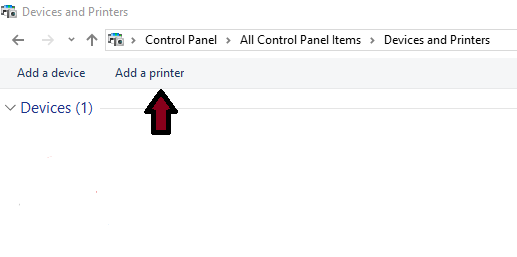
- Start by going to the Start menu and selecting Settings > Devices > Devices & Printers.

- Select Add a printer and then wait for your device to show up on the list.
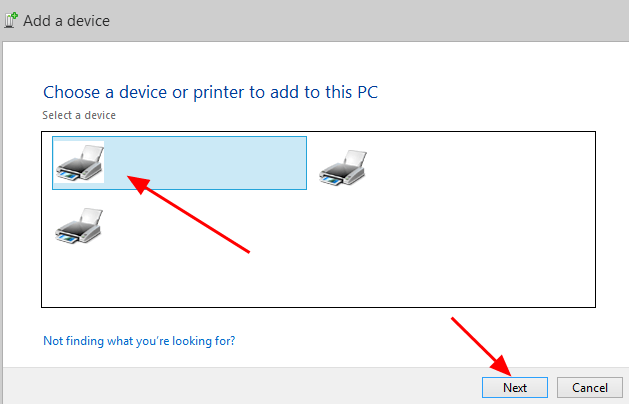
- Select Add a network, wireless or Bluetooth printer (skip to the next step if you don’t have this option).
- Wait for a while to your computer to search, then select your wireless printer from the device list, and click Next.
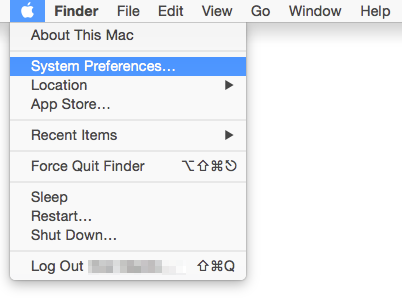
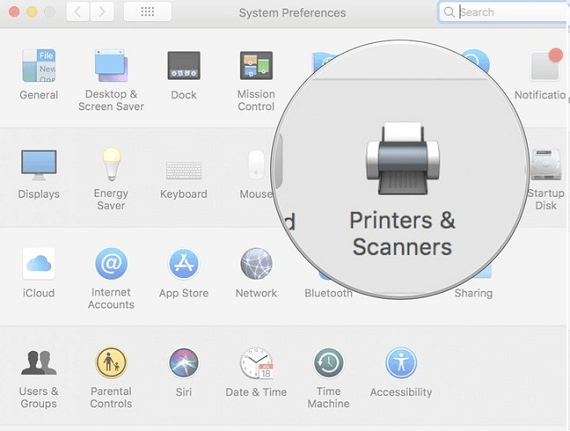
Step 2: Add a Wireless Printer to Mac
- Go to the Apple menu and then select System Preferences.
- Now, from the next screen, select the ‘Printers and Scanners’ option.
- Thereafter, from the next screen, select the ‘+’ sign from the left bottom corner.
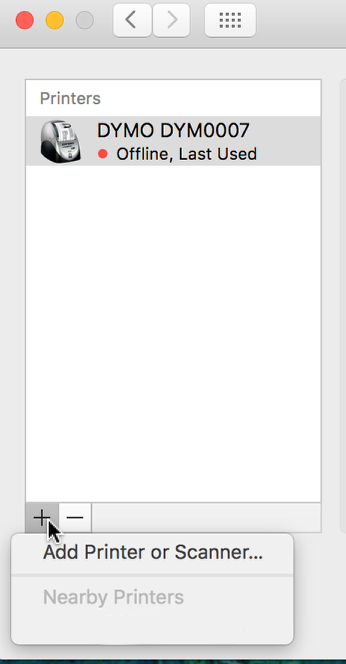
- Carefully select your printer from the provided printer list and click on “Add”.
- Now, in the end, your wireless printer is successfully added to your mac device.