In this article, we will discuss about how to remove laptop keys safely and properly.At some point in the life of your PC or laptop keyboard, you may find that you need to remove a key to clean underneath it or replace it. Whether you spilled something on your keyboard, or a key stopped working and you need to take a look underneath to see what’s going on, it’s important to remove keys properly so as not to damage the keyboard. This can be accomplished with a special tool called a keycap puller, or you can use household tools that you already have at home.
Laptop keys:
Laptops are harder to replace parts for or upgrade any internal hardware. However, laptop keys are heavily used in many day-to-day tasks and may have crumbs or dirt underneath them. If you need to clean out a dirty or worn key, here is a step-by-step guide on how to remove laptop keys. While you can purchase keyboard key removal tools, you can also easily remove laptop keys using a flat head screwdriver. When cleaning your laptop keys, all you will need is some compressed air, rubbing alcohol, and cotton swabs. Removing your laptop keys is possible but should be done as infrequently as possible to prevent the keys from malfunctioning. However, if something is spilled on the laptop, removing some or all keys to clean underneath them will be necessary. To safely remove your laptop keys, and reattach them, follow the steps below.
Remove laptop keys steps:
Steps to remove the keys to your laptop, you’ll need a small flathead screwdriver or knife:
- Turn off your laptop and make sure you are doing this in a well-lit area.
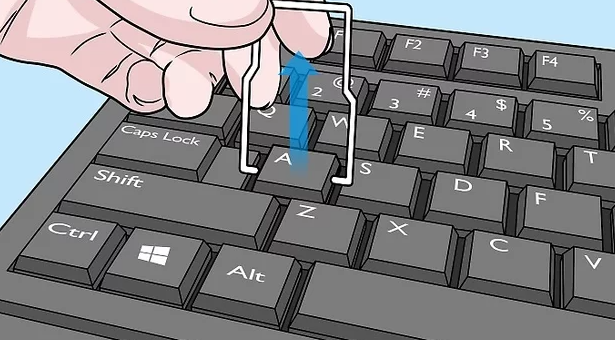
- To remove the keycap from your laptop keyboard, carefully place the end of your fingernail or flathead screwdriver or knife under the corner of any letter or number and gently lift it up.
- To save time, it is better to start deleting keys from left to right. However, remember to do the letters and numbers first as they are easier to pick out.
- However, some keys may not be fully ejected when you try to eject them. You can use a small nail or your fingers to fix it.
- Keep all the keycaps you removed in a bowl or container so you don’t lose them.
Take extra care when removing large keys, including Tab, Caps Lock, Shift, Space Bar, Backspace, Enter, and Forward Slash, as they are attached to a small metal pin. Take a little effort and be extra patient while removing them.
After cleaning your keyboard, put your keys back in their correct position.
Methods to take off the keys to your laptop:
Method1: Remove Keys with a Keycap Puller:
These small items are designed to be wrapped around the keys so that they can be removed without causing any damage to them or the switch they are on.
Keycap pullers come in plastic and wire types. The wire variety is considered better than the plastic variety because they are more Durable and less likely to scratch the keys. These varieties will work fine for removing keys.
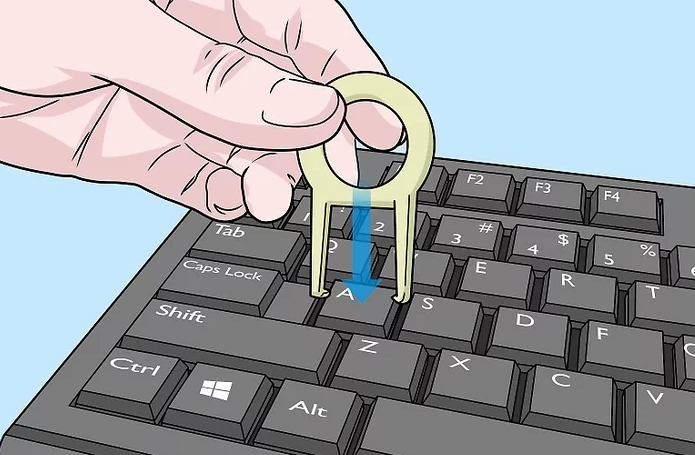
- Slide the sides of your keycap puller under the sides of a key. If you are using a plastic keycap puller, with a wire keycap puller, you will need to twist the handle while the prongs are under
- The key to hooking the ends of the wire is under the two corners of the key.
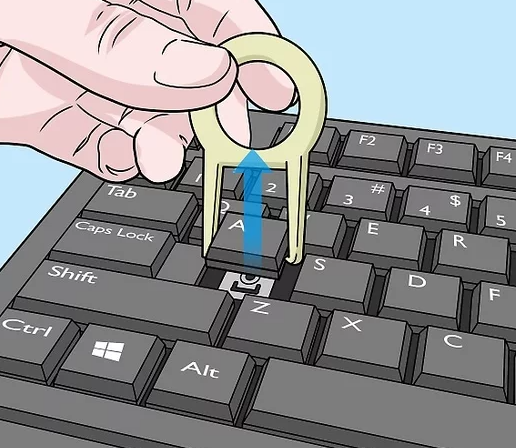
- Pull the keycap puller up to remove the key. The key will slide right under the switch it is attached to. if you need
- To remove more than one key, take the key you just removed with the keycap puller and repeat the process.
Method2: Using Household Tools:
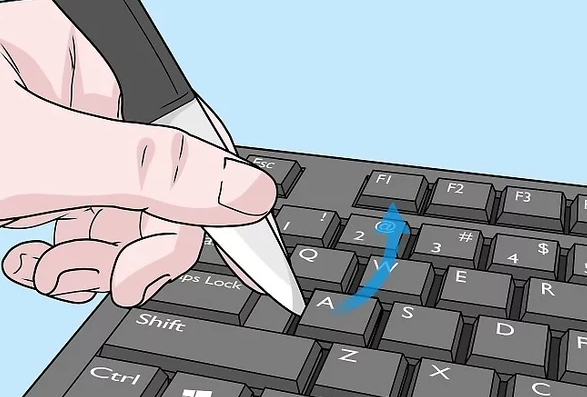
Use a flathead screwdriver or butter knife as an alternative to a keycap puller. Make sure that the screwdriver or knife blade will fit underneath the keys on your keyboard. Remember to be careful if you are using a knife so you don’t cut yourself! A screwdriver or knife can easily scratch your keys and keyboard, so keep this in mind if you are worried about some small superficial damage your keyboard.
Improvise a homemade keycap puller with a paperclip. As an alternative to a knife or flathead screwdriver, you can shape a paperclip to work just like a keycap puller. Unbend the paperclip completely, then reshape it into a “U”, and then bend the ends inwards so that they can hook under a key in the same way a keycap puller works.
- Slide your chosen keycap puller alternative underneath a key and pry it off. Gently apply upward pressure with your chosen tool until the key starts to lift off. In some cases the key may not come off entirely with the tool, so finish pulling it off with your fingers.
- Work slowly as you pry up the keys so that you don’t end up launching them into the air, never to be found again!
Method3: Cleaning and Replacing Keys
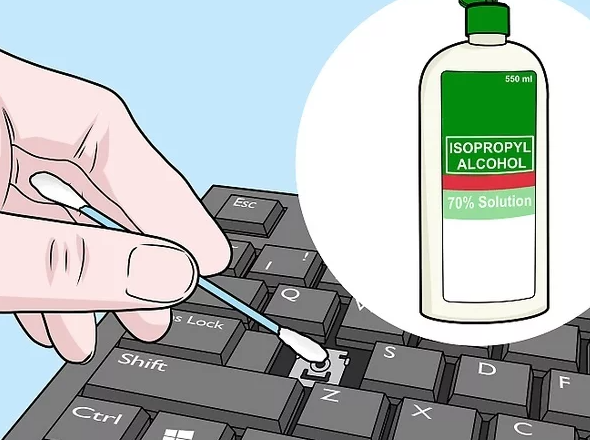
- Clean underneath the keys you removed. Moisten a cotton swab with water or rubbing alcohol to clean underneath the key. Wipe away any dirt or sticky spots in those hard-to-reach places under the key.
- If it looks like anything is damaged underneath the key, you should take your keyboard to a computer repair shop for inspection.
- Clean the keys you removed with soap and water. If you are washing keys, make sure to dry them off completely before attaching them back onto the keyboard.
- If you are replacing the keys with new ones, you can just throw away the old keys.
- Snap cleaned keys or replacement keys back onto the keyboard. Press down evenly on all sides of the key to snap it back into place.
- You will hear a click and feel the key pressing down normally when it is attached properly.
I hope these article is helpful to you , These method to solve how to remove laptop keys?
Thank you!!