Resetting your Macbook Air is easy, but should only be done if you have trouble using the computer or if it’s running very slowly. Once you reset your Macbook Air, you’ll need to restart it and then set up your preferences again. This doesn’t affect any of your personal files, apps, or information.
How to Reset MacBook Air Without Losing Data?
If you’re unfamiliar with the process of performing a factory reset on your MacBook Air, follow the steps below to ensure that all of your information is backed up and the reset is done properly.
Step 1. Backup your Data
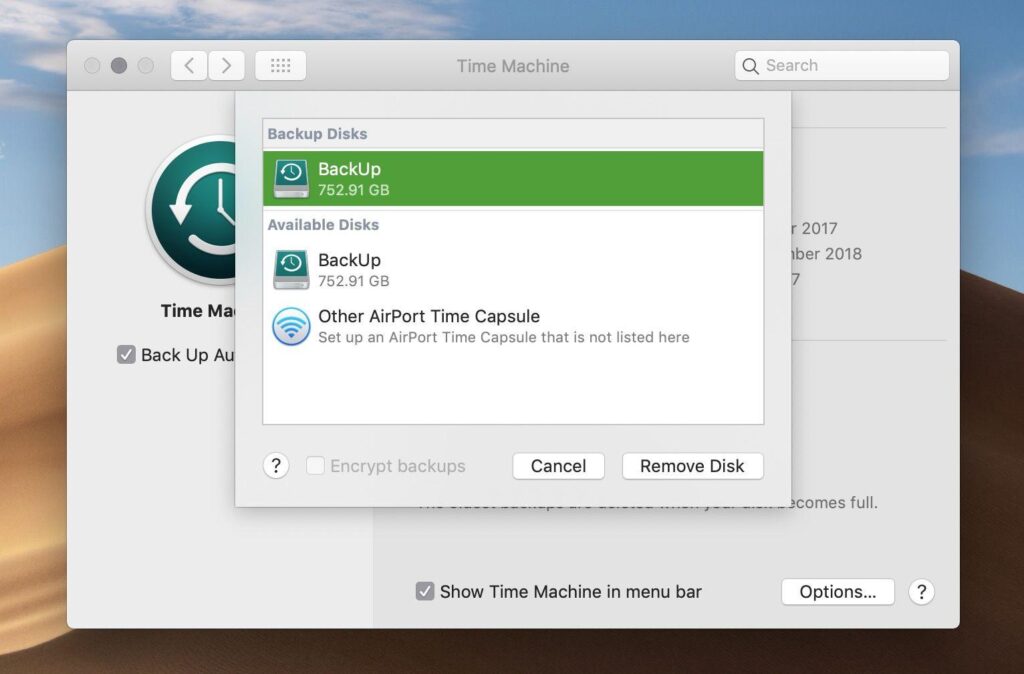
Apple includes its own backup software, Time Machine as part of the macOS. It’s an exceptionally easy-to-use solution. All you need to do is plug in an external storage device, hard drive, or SSD, and start backing up with Time Machine.
We have a step-by-step guide to backing up with Time Machine here, but essentially you just need to do the following:
- Plugin hard drive or SSD (alternatively you can use a NAS drive).
- You should see an alert on your Mac asking if you want to use the drive with Time Machine. Click Use as Backup Disk.
- If you don’t see the alert, make sure the drive is formatted correctly – it needs to be Mac OS Extended (Journaled), if it isn’t read this.
- If you still don’t see the alert, open System Preferences > Time Machine and choose Backup Disk.
- Choose the storage device and click Use Disk.
Step 2. Factory Resetting Your MacBook Air
Once you have made up your mind to reset MacBook air, then follow these steps to perform a factory reset MacBook air quickly and efficiently.
- Power on your Mac, then immediately press Command (⌘) and R until you see an Apple logo or another picture.
- If prompted, choose a user whose password you know and input their administrator password.
- Select “Disk Utility” and click “Continue“. In Disk Utility’s sidebar, select the drive you want to erase from the list.

- Click the Erase button in the toolbar, then input the necessary information:
- Fill in the disk name.
- Select the format.
- Choose the scheme if required.
- The disk removal will take a few minutes. Once it is completed, close Disk Utility to return to the utilities window.
Step 3. Restore Files from the Backup
- Connect your Time Machine backup disk to your computer and turn on your Mac.
- Go to ‘Finder’ > ‘Applications’ > ‘Utilities’ > ‘Migration Assistant‘ and click ‘Continue‘.
- In the Migration Assistant window, choose ‘From a Mac, Time Machine backup, or startup disk’ and click ‘Continue’.
- Select your Time Machine backup and click ‘Continue‘.
- Choose the backup you made in step 1 from the list of available backups.
- Select the category/categories to transfer and click ‘Continue’. Then wait for the process to finish.