If you have a Brother printer and want to set it up so that you can print wirelessly from your laptop or mobile device, here’s how to setup wifi on Brother Printer. You will need the following items to begin this process: an existing wireless router, an Ethernet cable, access to the printer control panel, the printer software CD (if it came with one), your computer, and your mobile device or laptop.
Before you Setup Wifi on Brother Printer
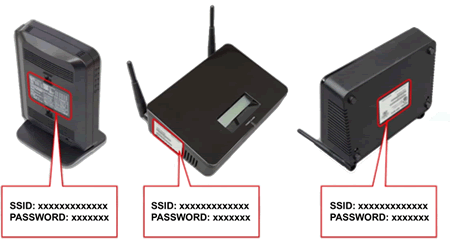
You must find out the wireless network settings of your wireless router or access point. Check and write down the current wireless network settings below (you will need this information later):
- Network Name (also known as “SSID” or “ESSID“)
- Network Key (also known as “Password“, “Security Key“, or “Encryption Key“)
Your Brother machine supports the use of the first WEP KEY only. If you are using a router that is using more than one WEP KEY, enter the KEY used for the first WEP KEY.
How to Connect Brother Printer to WiFi Direct?
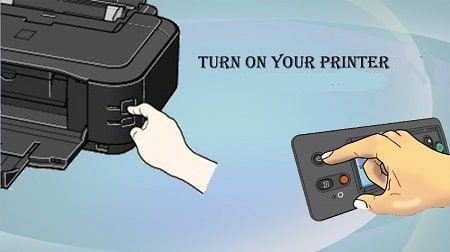
- Connect the power cord to your Brother printer and then connect it to an AC power outlet (electrical socket).
- Turn your Brother printer on.
- On the machine’s display (hereinafter called LCD), press Settings(Settings) > All Settings > Network > WLAN > Setup Wizard.
- When Switch Network interface to wireless? or Enable WLAN? appears, press Yes.
- This will start the wireless setup wizard. To cancel, press No.
- The machine will search for your network and display a list of available SSIDs.
- If a list of SSIDs is displayed, press the Up or Down arrow key to display the SSID to which you want to connect, and then press the SSID.
- Press OK.
- Enter the Network Key. When you have entered all the characters, press OK and then press Yes to apply your settings.
- The machine will attempt to connect to the wireless device you have chosen.
- If your wireless device is connected successfully, the LCD displays Connected.
- If the connection fails, the machine will print your machine’s wireless status report. Check the error code on the printed report.
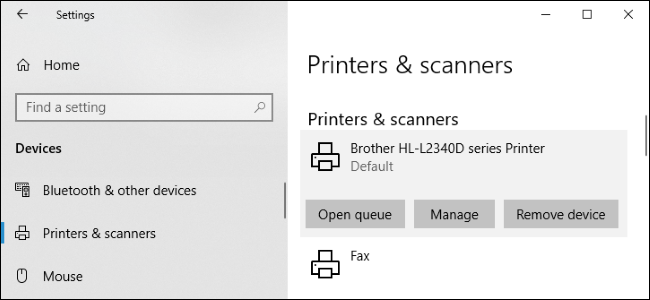
Add Your Brother Printer to Windows
Before you begin, double-check your wireless router/ access point’s SSID (Network Name) and password (Network Key).
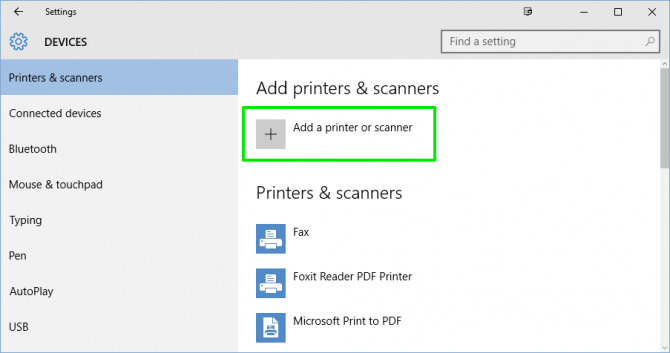
- In the Windows Search Box, form Printers and Scanners.
- Select Printers and Scanners from the drop-down menu.
- Select Add a Printer from the drop-down menu.
- If your Brother printer does not exist, pick “The printer that I want isn’t identified.”
- Use a USB cable to connect the printer to the computer (laptop).
- Click Next after choosing the last choice, “Add a local printer or network printer with manual settings.”
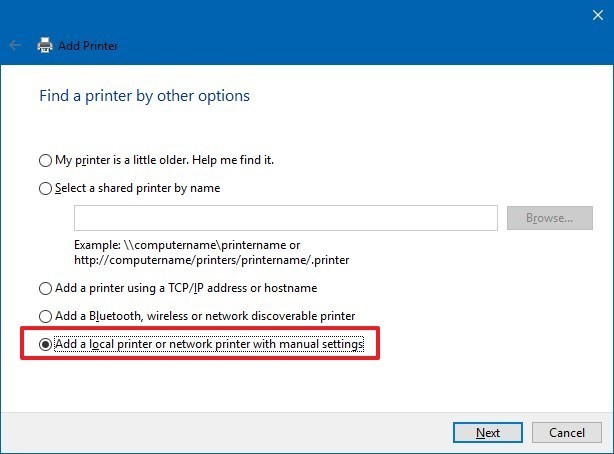
- Press Next after choosing Utilizing an existing port.
- Choose the Manufacturer (Brother) from the left menu and the model number of your printer from the right menu, then click Next.

- If desired, change the Printer Name and click Next once more.
- To ensure that the Brother Printer is attached to the machine, print a test file.
