Booting refers to the act of starting the computer. Desktop, Laptop and Tablet. There are two common methods available to access the HP boot menu – by pressing a combination of buttons and by giving commands through some devices. In short, booting is the process of preparing your device for use.
How to Access the HP Boot Menu Key ?
Before we talk about the process, you should know that the boot menu can be easily accessed even before entering the operating system. You can actually access the boot menu every time you start your system. You can also load other OS and apps to access this menu option manually and make necessary changes.
Here are the basic steps you can take to enter the boot menu on your HP computer :
- Turn on or restart the HP computer.
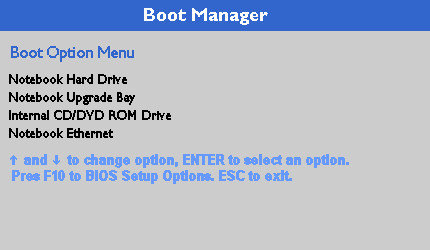
- Immediately press “Esc” or “F9” to enter the boot menu.
- Wait for the HP Boot Menu to appear.
What is HP Boot Option ?
Option 1. HP Desktop Startup Menu
The boot options menu of HP laptops and desktops is slightly different. To learn more about the HP Desktop Menu, refer to the following :
- F1 (System Information) : This will show you the basic details of your system like product name, manufacturer, serial number, SKU number, BIOS date and revision, processor type, etc.
- F2 (System Diagnostics) : This option includes a series of tests so that you can check for hardware and related failures.
- F9 (Boot Device Option) : This gives you UEFI boot sources like network cards and Windows boot manager as well as legacy boot sources like USB flash drives, hard drives, DVD/CD etc.
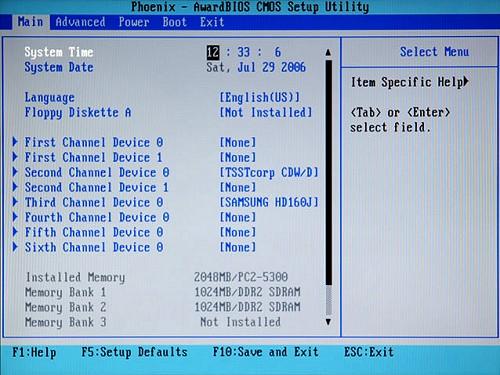
- F10 (BIOS Setup) : By selecting this option, you can easily exit UEFI and enter BIOS. You will be provided with 5 tabs to change the BIOS settings of your PC.
- F11 (System Recovery) : With this option you can reset your system. This option can help you solve many issues like inaccessible boot device.
- F12 (Network Boot) : With this HP boot menu option, you can boot directly from the network drive.
Option 2. HP Laptop Startup Menu
- F1 (System Information)
- F2 (System Diagnostics)
- F9 (Boot Device Options)
- F10 (BIOS Setup)
- F11 (System Recovery)
In laptops, only the F12 (Network Boot) HP boot menu is missing from Windows 10, but the rest of the process will be the same as on the desktop.
Data Recovery from HP Boot Menu
Sometimes, when HP computer OS crashes or becomes unbootable, you may need help performing data recovery from HP boot menu.
If your computer is currently bootable or inoperable, you can turn to bootable data recovery software for help. Here, EaseUS Data Recovery Wizard with bootable media can help. It allows you to create bootable media and boot HP from its boot menu to thoroughly scan and restore all valuable hard disk files.
You can use this powerful data recovery software to recover data from dead HP laptop hard drive.
Process 1. How to Create a Bootable Disk
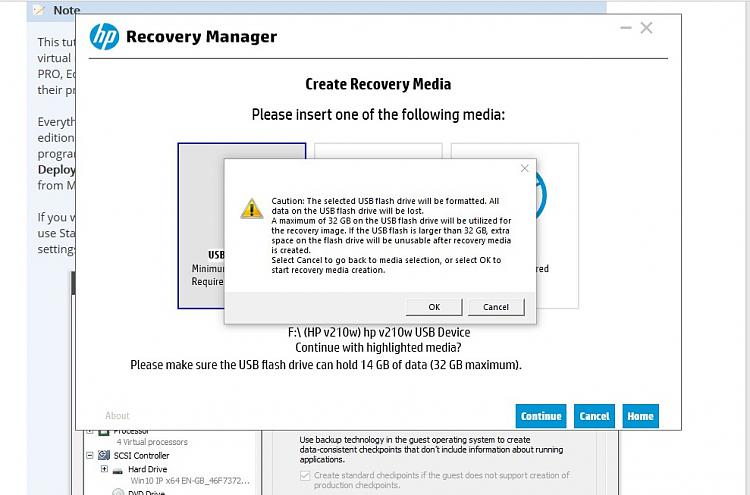
Prepare a blank USB. If you have important data on it, copy the data to another device. When you create a bootable disc, the data on the USB will be erased. EaseUS Data Recovery Wizard WinPE Edition will help you create a bootable disc.
Connect USB drive to PC, launch EaseUS Data Recovery Wizard WinPE Edition. Select the USB drive and click “Create” to create a bootable disc.
Process 2. Boot from a bootable USB
Connect the bootable disc to the PC that won’t boot and change your computer’s boot sequence in the BIOS. For most users, it works fine when they restart their computer and press F2 at the same time to enter BIOS.
Set the PC to boot from “Removable Devices” (bootable USB disks) or “CD-ROM drives” (bootable CD/DVDs) beyond the hard drive. Press “F10” to save and exit.
Process 3. Recover data from hard drive that won’t boot
When you boot from USB, you can run EaseUS Data Recovery Wizard from WinPE bootable disc. Select the drive you want to scan to find all your lost files.
Click “Scan” to start the scanning process.
Recover data from computer or laptop. After the scan is complete, you can preview all recoverable files, select target files, and click the “Recover” button to restore your files. You are better to save all the recovered data in some other place to avoid data overwriting.