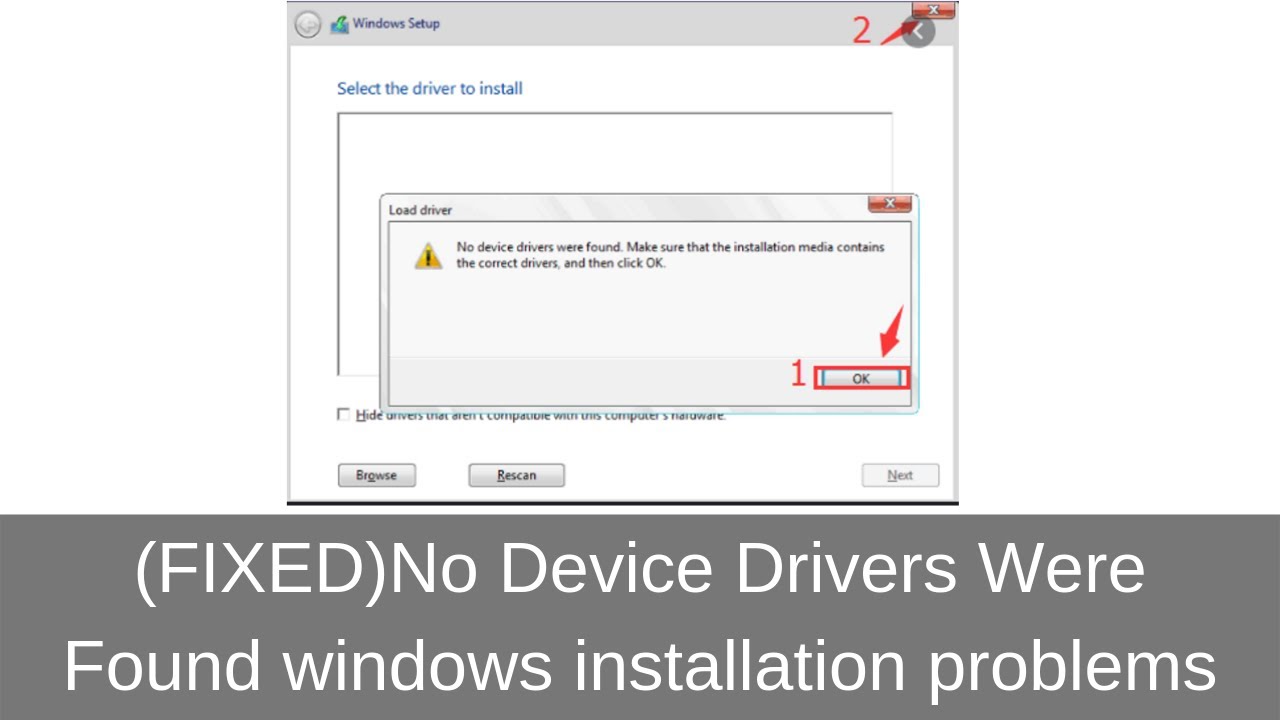
“No Device Drivers were found” error occurs on windows 8 when users try to either reinstall their current operating system or when they install a new one using DVD or USB installation storage device.
Why No Device Drivers were found error occurs during USB installation on Windows 8?
- Due to incomplete Windows 8 files or maybe some files are missing Check the size of ISO that you have downloaded ( ACTUAL SIZE Around 2.8 GB for windows 8-32 bit and Around 3.6 GB for windows 8-64 bit)
- This error occurs when installing Windows 8 to make USB bootable.
Solutions to Fix “No Device Drivers were found” error on Windows 8 Installation USB
1. Connect to the USB 2.0 Port
To install the new operating system on your computer to USB 3.0 if you have plugged the USB installation media, you will need to disconnect it and connect to the 2.0 port to resolve this error.
2. Set the Partition to Active
To resolve this error set the partition where you want to install Windows as active.
Steps to Set the Partition to Active:
- Insert the installation media storage device and start your PC.
- Now, you will see a Select your keyboard layout window, then select the one you want to use.
- Tap on the ‘Troubleshoot’, then click on the ‘Advanced Options’ and tap on the ‘Command Prompt’.
- In the Command Prompt window, type ‘diskpart’ command and press ‘Enter’.
- Now, type ‘select disk X’ and press ‘Enter’. Type ‘list partition’ and press ‘Enter’.
- At last type ‘select partition X’ and press ‘Enter’.
- ‘X’ stands for the name of the disk in command ‘select disk X’ and the X in command ‘select partition X’ where you intend to install Windows to. After this, type ‘active’ command and press ‘Enter’.
- Now type ‘Exit’ command to close command prompt window and reboot your computer.
3. Create a New USB Device
This error could be due to drivers not burning successfully or any damage to the USB device so try burning another copy of the operating system to resolve this error. Keep your serial key with you for this process as it can be used only once.
Steps to creating a Windows 8 installation USB:
- Open Microsoft’s official website in your browser and download the Media Creation Tool.
- Open the downloaded file called ‘MediaCreationTool.exe’ in order to open the installation file and initiate the process.
- Click ‘Accept’ to agree on terms set by Microsoft.
- Click on the radio button to choose the ‘Create installation media (USB flash drive) for another PC’ from the initial window.
- The language, architecture, and edition of the bootable drive will be chosen based on your computer’s settings, but you should uncheck the Use the recommended options for this PC in order to choose the correct settings for the PC which is encountering the error (if you are creating this on a different PC).
- Now, tap on ‘Next’ and tap on the ‘USB drive’ option.
- Tap on ‘Next’ and select the drive from the list.
- Tap on ‘Next’ and the Media Creation Tool will proceed to download the files necessary to install create the installation device.
- Try installing your Windows 8 operating system using this drive and check the error is resolved or not.
4. Turn on the xHCI hand-off Option in BIOS
This allows the BIOS to manage USB devices and ports when the xHCI hand-off option is disabled, and it allows the operating system to manage them when enabled. To solve this error the xHCI hand-off option needs to be enabled.
Steps to enable the xHCI hand-off Option in BIOS:
- Press ‘Windows’ shortcut key, click on the ‘Power’ Button and select ‘Shut down’ option to turn off your PC.
- Again turn on your PC and press BIOS key to enter ‘BIOS’ settings. The BIOS key is typically displayed on the boot screen, saying “Press _ to enter Setup.” Common BIOS keys are F1, F2, Del, Esc and F10.
- Go to ‘Advance’ tab and click ‘USB Configuration’ and click ‘enable’ option to turn on the xHCI hand-off Option.
- Now, navigate to the ‘Exit’ section and select to Exit Saving Changes. This will proceed with the computer’s boot. Make sure you try to run the installation again.
- Once you find the correct settings, set it to Enabled. Go to the ‘Exit’ section and select to Exit Saving Changes. This will proceed with the computer’s boot. Make sure you try to run the installation again.
- Finish the process and revert the settings to their original state after you have successfully installed Windows 8 on your computer.
5. Set the Boot Device to Your USB
Sometimes your computer tries to boot from your HDD, ignoring the previously included Windows installation media resulting in poor reading of the device. To resolve this error set the Boot Device to Your USB.
Steps to Set the Boot Device to Your USB:
- Press ‘Windows’ shortcut key, click on the ‘Power’ Button and select ‘Shut down’ option to turn off your PC.
- Again turn on your PC and press BIOS key to enter ‘BIOS’ settings. The BIOS key is typically displayed on the boot screen, saying “Press _ to enter Setup.” Common BIOS keys are F1, F2, Del, Esc and F10.
- Go to ‘Security’ tab, choose ‘Secure Boot Configuration’ and hit ‘Enter’.
- Before you can use this option, a warning appears. Press ‘F10’ to continue to the Secure Boot Configuration menu.
- Now, choose ‘Secure Boot’ by using the down arrow key and modify the setting to Disable by using the right arrow key.
- Choose ‘Legacy Support’ by using the down arrow key and modify the setting to Enable by using the right arrow key. Press F10 in order to accept the changes.
- Choose ‘File’ menu by using the left arrow key, Choose ‘Save Changes and Exit’ by using the down arrow key, then hit Enter to choose option ‘Yes’.
- The Computer Setup Utility closes and the computer restarts. When the computer has restarted, use the power button to turn the computer off.
Here we have described all the different solutions to fix “No Device Drivers were found Windows 8 Installation USB”. Hope you have found solution to your problem! Thanks for reading this. If you want to know more details about “Turn on Print Spooler Windows 8. Click Here