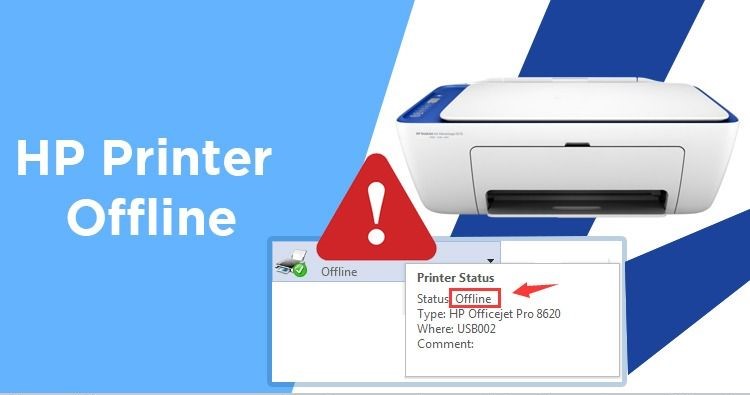
When you try to print from your computer and the HP printer isn’t printing, it can be frustrating! There are several reasons why an HP printer may be offline, but in most cases, the issue can be resolved quickly and easily. Here are some simple steps to troubleshoot the problem and get your hp printer back online.
Why Does my HP Printer Say it’s Offline?
There are several reasons why your printer might be showing an offline status. If you’re seeing a red light on your printer, it could mean that you have low ink or paper. If you’re having trouble connecting to a wireless printer, there could be an issue with your router or connection to your home network. To figure out why your printer is offline, check out our troubleshooting guide below!
Fix Hp Printer Offline Status in Windows
You can fix the issue of the HP Printer showing offline in Windows using the various solutions that have been discussed below:
Method 1: Check Printer Connection
Before doing anything, first, you should check if the communication between the printer & PC is properly set up. There can be something wrong with the USB cable or USB port, or network connection if connected wirelessly.
- Shut down your PC and power off your printer. Remove all the cables connected to the printer (even the power cable) and then press & hold the power button of the printer for 30 seconds.
- Again connect all the cables and then make sure the USB cable from the printer is properly connected to the USB port of the PC. You could also switch the USB port to see if this resolves the problem.
- If your PC is connected via an Ethernet port then make sure the Ethernet port is working and the connection to your printer & PC is proper.
- If the printer is connected to a PC via a wireless network then make sure the printer is connected to your PC network.
Method 2: Change the Printer Status
- Press Windows Key + R then type control printers and hit Enter to open Devices and Printers.
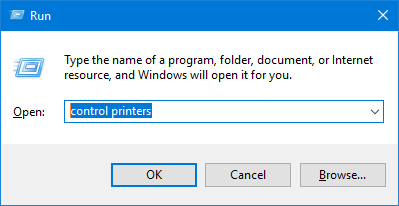
Note: You could also open Devices and Printers in control panel by navigating to Control Panel > Hardware and Sound > Devices and Printers.
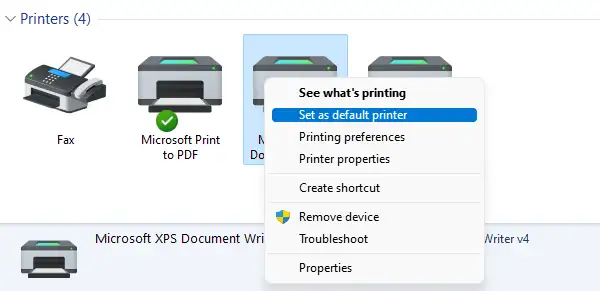
- Right-click on your printer and select “Set as default printer” from the context menu.
- Then again right-click on your printer and select “See what’s printing“.
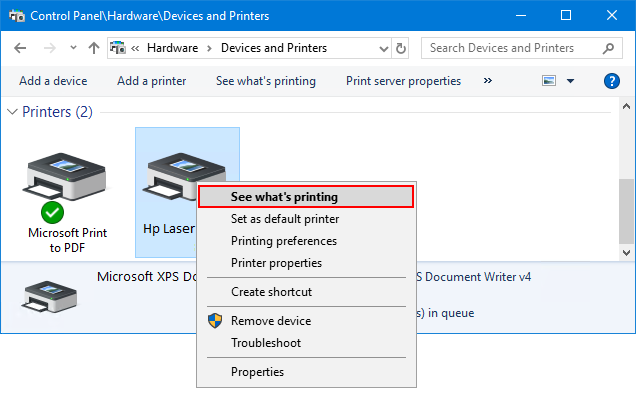
- You will see the printer queue, see if there are any unfinished tasks, and make sure to remove them from the list.
- Now from the printer queue window, select your Printer and uncheck the “Use Printer Offline” option.

- Similarly, uncheck the “Pause Printing” option, just to make sure everything works fine.
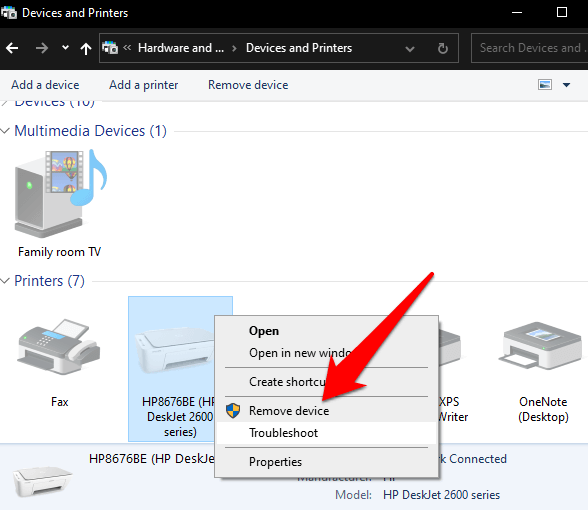
Method 3: Remove and Reinstall your printer
There might be the installed printer driver is not compatible with the current windows version or the printer driver is outdated or corrupted. Let’s try to uninstall the current printer driver and download and install the latest printer driver from its manufacturer’s site.
- First, turn off the printer and Disconnect your printer’s USB cable from your PC.
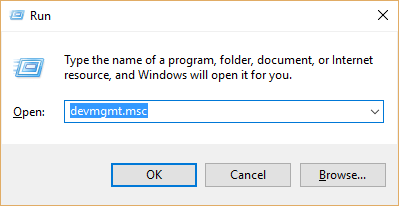
- Press Windows Key + R then type “devmgmt.msc” and hit enter.
- Expand printers and scanners, then right-click on the installed printer driver and select uninstall the device.
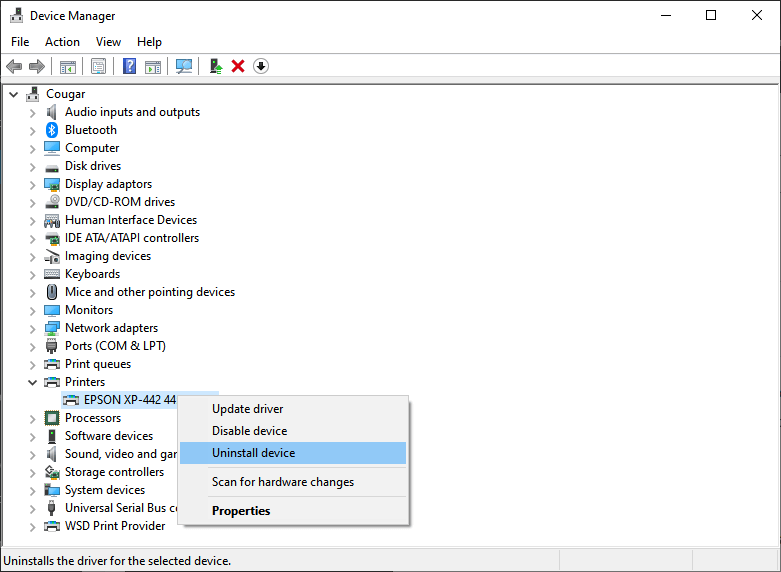
- Click uninstall again when it prompts for confirmation, and make sure Checkmark deletes the driver software for this device.
- Once the printer drivers are uninstalled, restart your system.
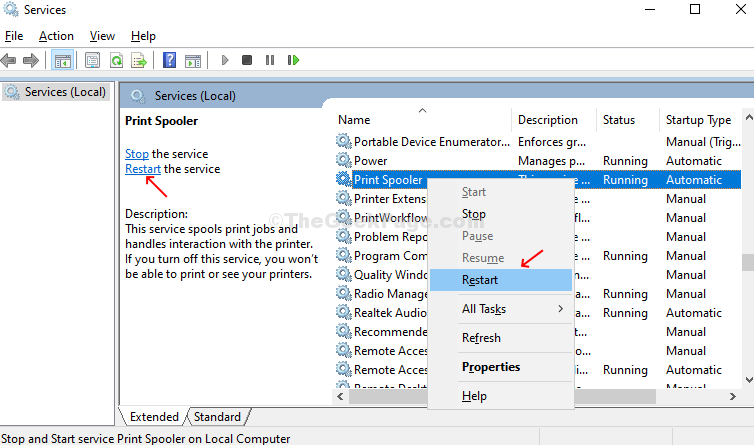
Method 4: Restart the Print Spooler service
The print spooler service handles the print jobs on Windows computers If the service is stuck or not started you might experience printing problems.
- Press Windows Key + R type services.msc. Press Enter or click OK
- This will open the windows services console, locate the Print Spooler service, right-click it and choose Restart from the menu.
- If the print spooler service is not started right-click and select properties, here change the startup type automatic, and start the service next to service status.
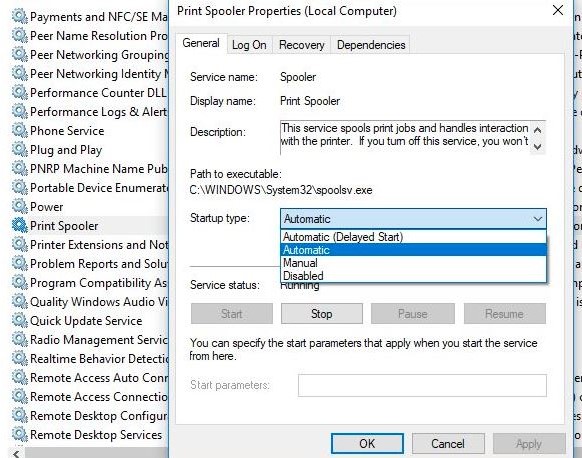
- Click apply and ok to make save changes, restart your PC and check if the problem is solved.
Method 5: Clear Print Spooler Files
It’s another working solution to fix most printer problems including the HP printers in an error state. Here we reset the print spooler service and clear the print spooler field that might be corrupted and cause the print job stuck or the HP printer in an error state.
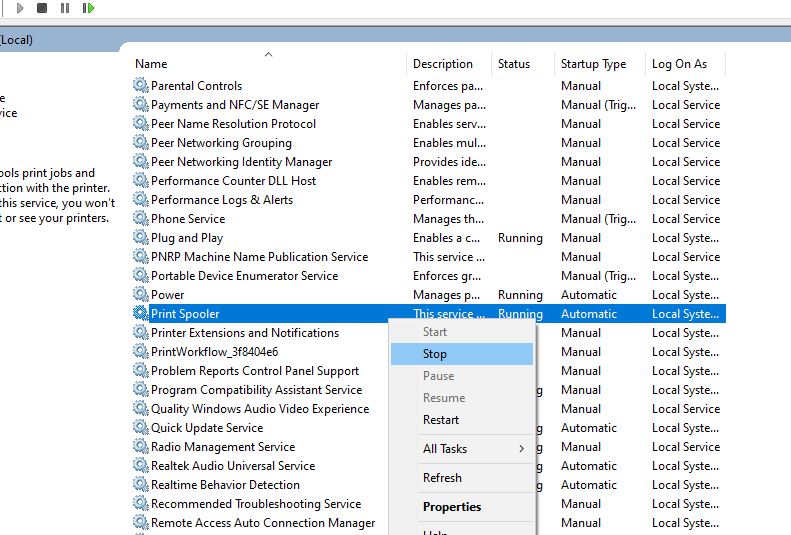
To clear print spooler files first we have to stop the print spooler service to do this:
- Press Windows key + R, type services.msc, and click ok to open the windows service console,
- locate the print spooler service, right-click on it select stop from the context menu.
- Now press Windows key + E to open file explorer and Navigate to C:\Windows\System32\Spool\Printers
- Delete all files inside the printer folder, to do this press Ctrl + A to select all then hit the delete button.
- Next, open the following path C:\Windows\System32\Spool\Drivers\w32x86 and delete all data inside the folder.
- Again go to the windows service console, right-click on print spooler service select start from the context menu.
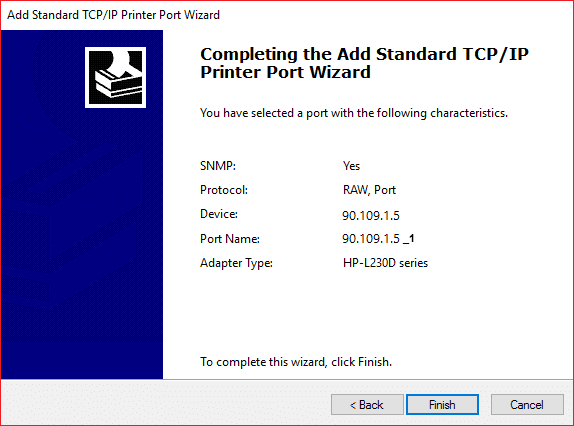
Method 6: Add a Second Printer
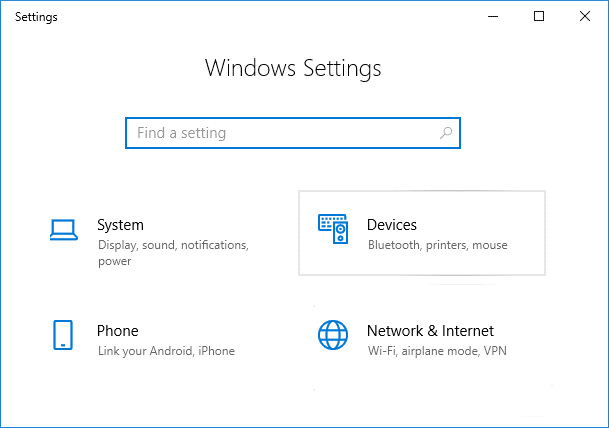
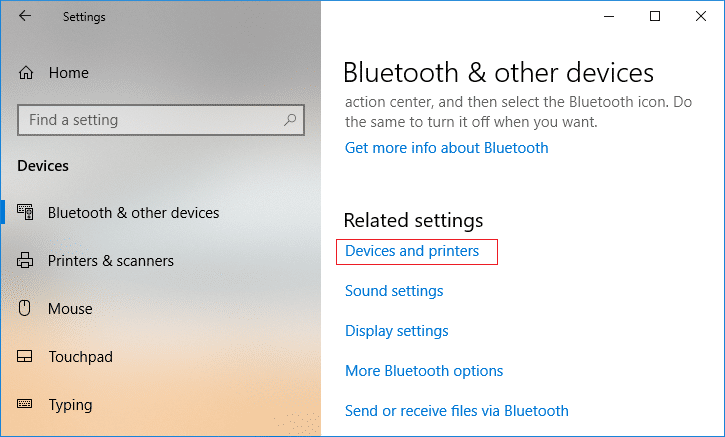
- Press Windows Key + I to open Settings then click on Devices.
- From the left-hand menu click on “Bluetooth & other devices“.
- Now from the right window pane click on “Devices and printers“.
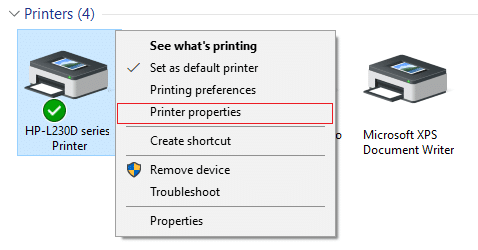
- Right-click on your printer and select Printer properties from the context menu.
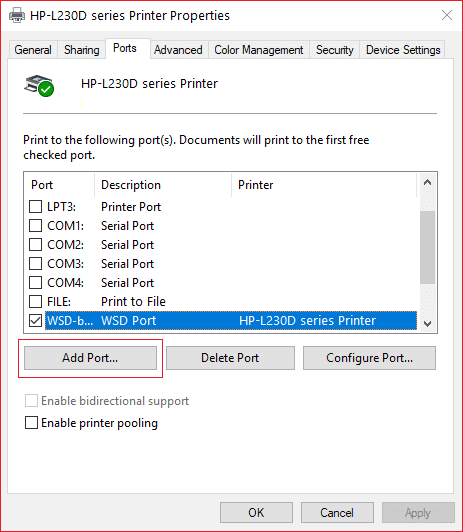
- Switch to the Ports tab then click on the “Add Port…” button.
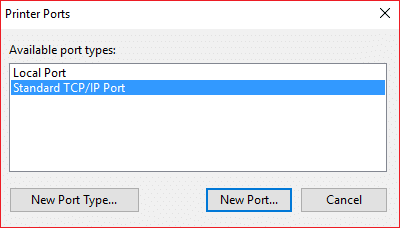
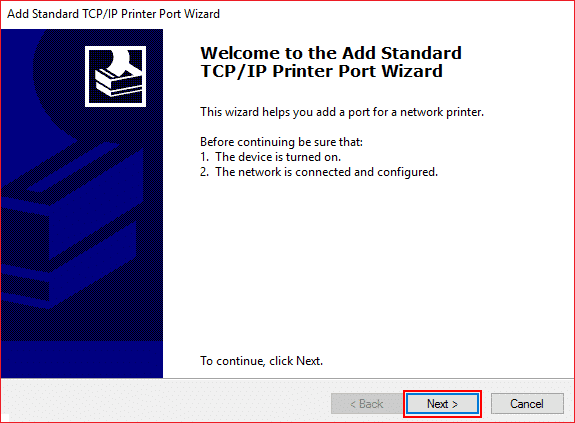
- Select “Standard TCP/IP Port” under Available port types and then click the New Port button.
- On the Add Standard TCP/IP Printer Port Wizard click on Next.
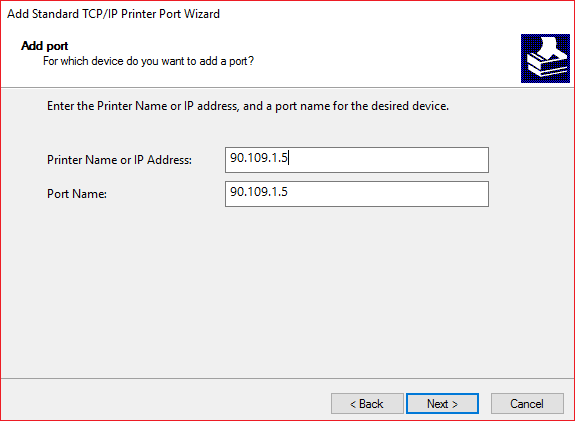
- Now type in the printer’s IP Address and Port name then click Next.
- Once you successfully added the Standard TCP/IP Printer, click Finish.