One of the best ways to grow your youtube channel and build your brand into an authority on the internet is by creating your own live channels. This allows you to interact with your followers, answer questions, and most importantly, engage in real-time instead of just uploading new content once or twice a week. Starting a YouTube live stream isn’t exactly straightforward. If you’re unclear about youtube live channels, you’ve come to the right place.
What is YouTube Live?
YouTube Live is a live-streaming service. It allows users to stream events that are happening around the world in real time. Not only can you view these streams, but if you have a camera and an internet connection, you can broadcast your own event through the LIVE service.
With over 1 billion active users and hundreds of hours of content uploaded daily, youtube has become the second largest search engine in the world after google, making your youtube live channel a very powerful marketing tool if used correctly.
How to start streaming with YouTube Live?
Before you start live streaming on YouTube, make sure you have set up your channel and all your devices to go live.
Step 1: Enable Live Streaming
Before you can go live on YouTube, you must enable live streaming on your device or devices.
- Open the YouTube app on your device.
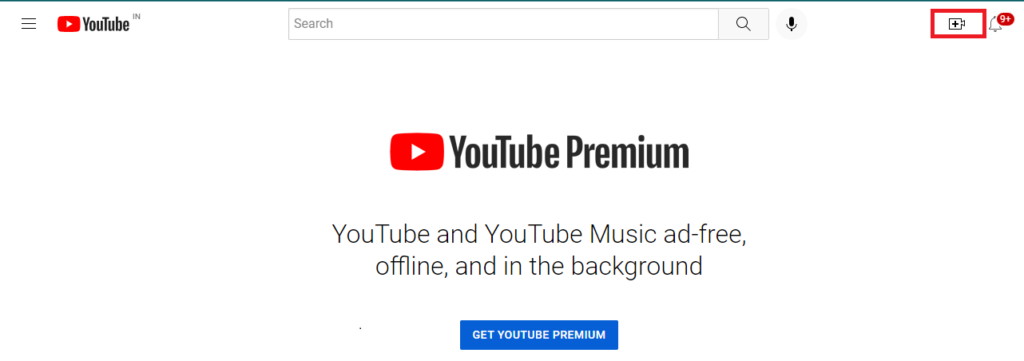
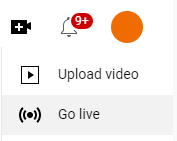
- Click on the Create symbol at the top.

- Select Go Live.

- Then, verify your channel (if you haven’t already)
- Wait until live streaming is enabled (this may take up to 24 hours)
Note: You need at least 1,000 subscribers to enable live streaming on mobile.
Step 2: Choose a Stream Type
YouTube lets you live-stream using one of three different recording options. Let’s look at each briefly and when to use it.
- Mobile: This is a good option for vlogging or sharing quick updates on the go.
- Webcam: With this option, all you need to go live is a computer and a webcam.
- Encoder: This is ideal for gaming streams, concerts, business events, podcasts, and interactive presentations.
Step 3: Start live streaming
On mobile or tablet
- Open the YouTube app.
- Go to Create → Go → Tap More.
- Tap Go Live to start streaming.
- To end your live stream, click on Finish.
Use a computer and webcam
- Sign in to YouTube.
- Click on Create → Go Live → Webcam.
- Then, add a title and description, and set the privacy.
- Click on Next to capture a thumbnail with your camera.
- Ensure you’ve selected the right webcam and microphone.
- Click Go Live to start streaming.
- Click on Edit to adjust settings for privacy, monetization, live chat, add tags, and more.
- Tap End Stream at the bottom when you’re done live streaming.
Use an encoder
- Sign in to YouTube.
- Click on Create → Go Live to enable live streaming.
- Tap Stream on your left and click on Create Stream.
- Install an encoder.
- Connect any additional hardware, such as cameras and mics.
- Connect your encoder by entering your YouTube Live server URL and stream key.
- Start streaming!
What you can and can’t stream on YouTube Live
The content of your Livestream should adhere to YouTube’s Community Guidelines and Terms of Service. If you fail to meet the guidelines, YouTube may restrict your content or remove it from the platform altogether.
Additionally, a restriction on your Livestream may result in a strike on your YouTube channel, which can prevent you from going live for 14 days.
FAQ {Frequently Asked Question}
Livestream does not require viewers to pay for a Livestream subscription if they only want to watch an event that an organization is hosting on the Livestream.
Stream live and local TV from channels like ABC, CBS, Fox, NBC, HGTV, TNT, Univision, and more, including sports, news, and shows in English and Spanish.
