Domain Name System Server prevents you from browsing the Internet If the DNS server is not responding in Windows 10, you can try to change the server manually. Installing the latest drivers can also be a good solution to this problem. DNS (Domain Name System) is a directory of records for the Internet. A DNS server associates a domain name with an IP address, because names are much easier for users to remember than numbers. When the DNS servers are inaccessible, you cannot access your favorite sites.
If you encounter the “DNS Server Not Responding windows 10” error, it’s likely that your ISP’s default DNS server may be temporarily down, configured incorrectly in your settings, or perhaps Have moved to a new server. Below is a list of several solutions to fix this error.
To fix DNS server not responding error on Windows 10
1. Change the DNS server manually:
- Open Network Connections.
- Then pressing Windows Key + X on your keyboard and choosing Network Connections option.
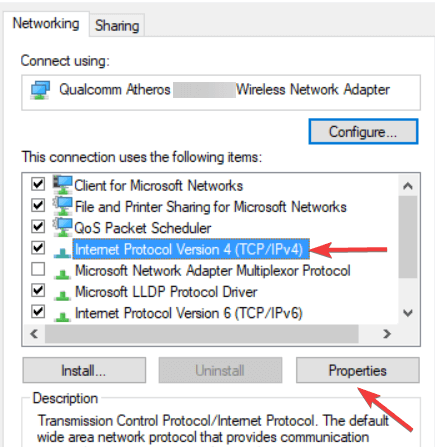
- Locate your network connection, right-click it and choose Properties from the menu.
- When Properties window opens, select Internet Protocol Version 4 (TCP/IPv4) and click the Properties button.
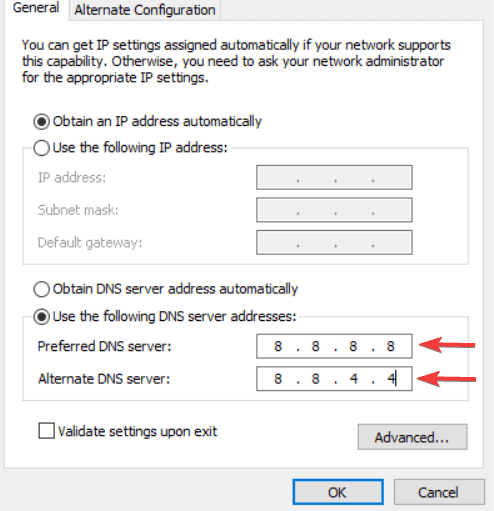
- Now select Use the following DNS server addresses option.
- As Preferred DNS server enter 8.8.8.8. As for Alternate DNS server, you need to enter 8.8.4.4. If you want, you can also use 208.67.222.222 as Preferred and 208.67.220.220 as Alternate DNS server.
- After you’re done, click OK to save the changes.
2. Uninstall Your Network Drivers:
To fix “DNS server is not responding” error on your Windows 10 system, follow the steps below:
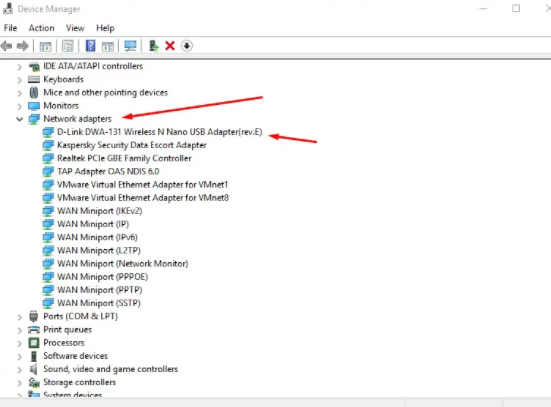
- Open “Device Manager”.
- Click on it to launch the device manager. Once you do that, scroll down to expand the “Network Adapters” as shown below.
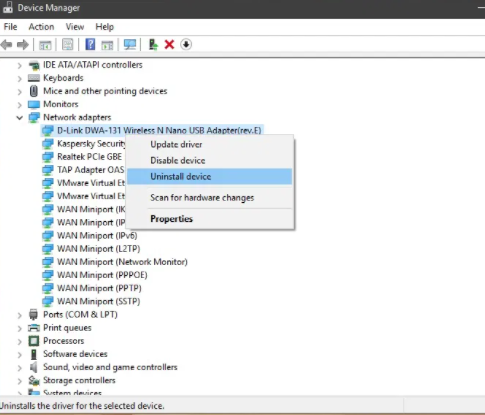
- Right-click on your active network connection and uninstall the driver.
- Finally, right-click on any other adapter option and click on “Scan for hardware changes“. The driver should just re-appear. If not, then disconnect your WiFi adapter/cable connection and re-connect.
3. Flush the DNS Cache:
To clear the DNS cache, follow the steps below:
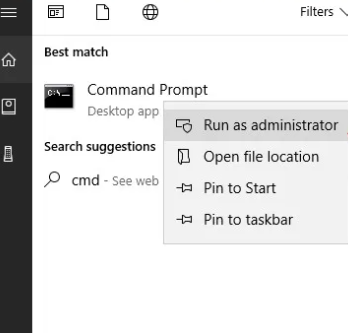
- Run the command prompt as an administrator.
- Then type in the following commands as shown in the image:
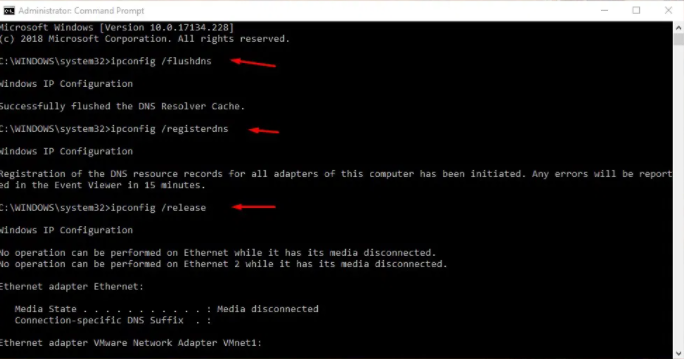
ipconfig /flushdns
ipconfig /registerdns
ipconfig /release
ipconfig /renew
- You have successfully cleared the DNS Cache.
- Now, check if the error has been resolved.
4. Update your network adapter driver:
Follow below steps to update your network adapter driver:
- First of all download and install Driver Easy.
- Then run driver easy and click the Scan Now button.
- Now driver easy will then scan your computer and detect any problem drivers.
- Click Update All to automatically download and install the correct version of all the drivers that are missing or out of date on your system.
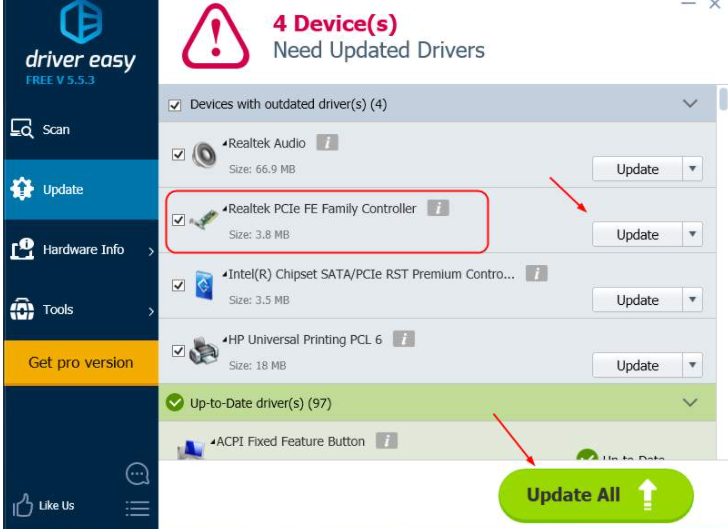
- After updating your network adapter driver, please restart your computer. Try to access the website you want to go to again and see if it succeeds.