If you have an Epson printer, you know how difficult it can be to clean Epson Printer heads on your device. However, that’s not because they are hard to clean – it’s because most Epson printer owners don’t know how to properly and safely clean their printer heads. To find out more about cleaning Epson printer heads, read on!
Method 1: Cleaning the Print Head Using the Printer Buttons
- Make sure no printer lights are indicating errors.
- Load a few sheets of plain paper in the product.
- Hold down the color cleaning button for 3 seconds to start the cleaning cycle, which lasts around 1 minute.
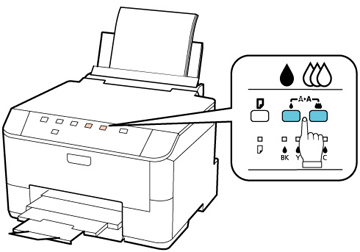
The power light flashes throughout the cleaning cycle and stays on the green when the cleaning cycle is finished.
- Run a nozzle check to confirm that the print head is clean.
Method 2: Clean Epson Printer Heads Manually
Now, let’s start with the following steps to clean Epson printer heads manually.
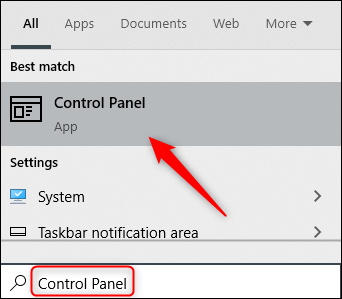
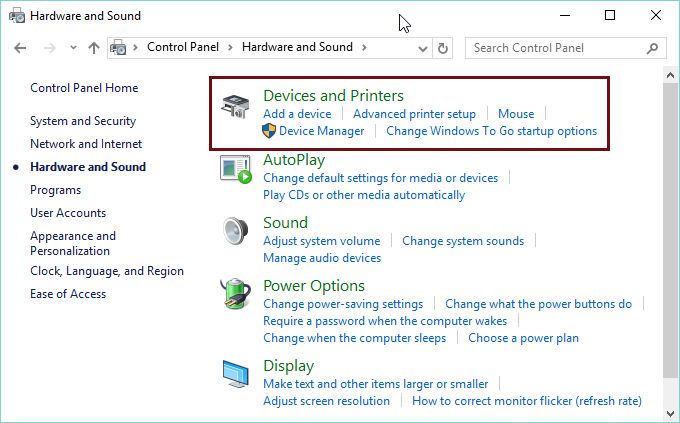
- Firstly, open the Start menu and then type Control panel.
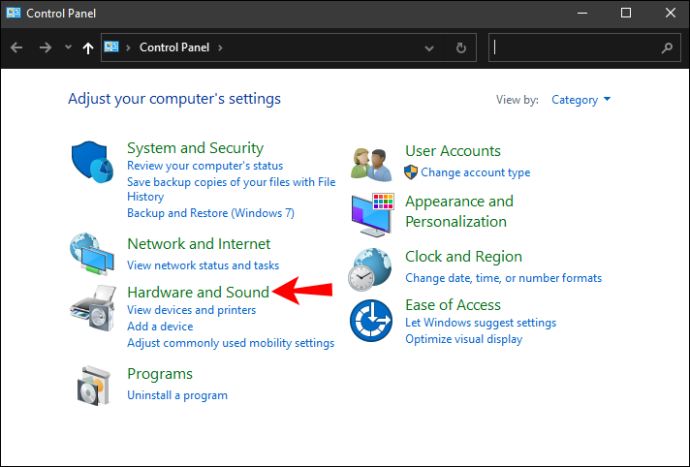
- As the Control Panel window opens into the pop-up menu, select the Hardware, and Sound tab.
- Next, choose and then select the Devices and Printers option.
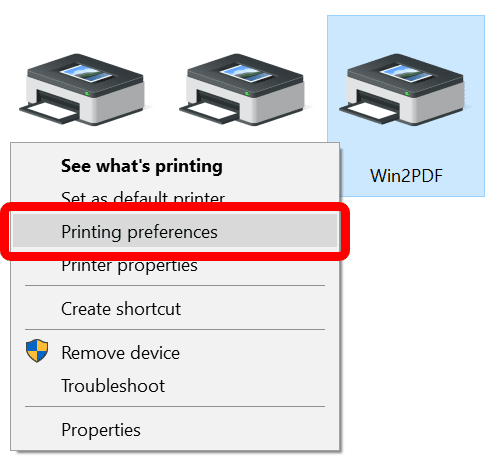
- Select the type of printer you want to clean.
- Then right-click on the printer icon, then select Printing Preferences.
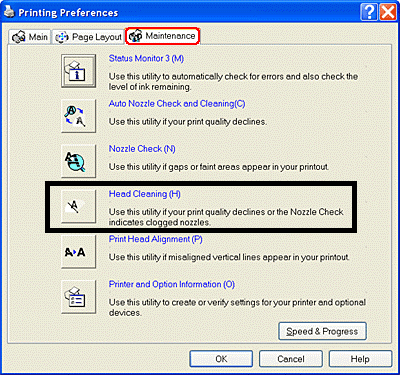
- Now in the Pop-Up menu displayed, select the Maintenance option.
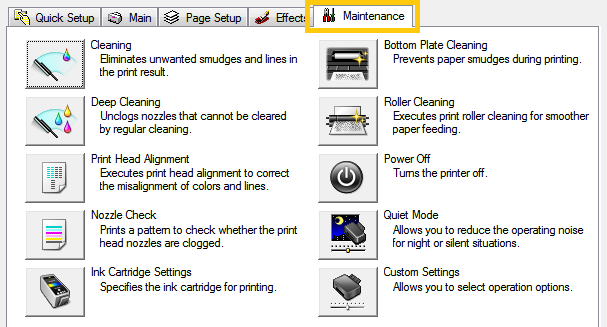
- Next, click on the head cleaning option and further this process will take a few minutes to complete.
Method 3: Clean the Epson Printer Heads
After arranging all the necessary things for the cleaning process, perform the steps given below in the same order as they have been mentioned.
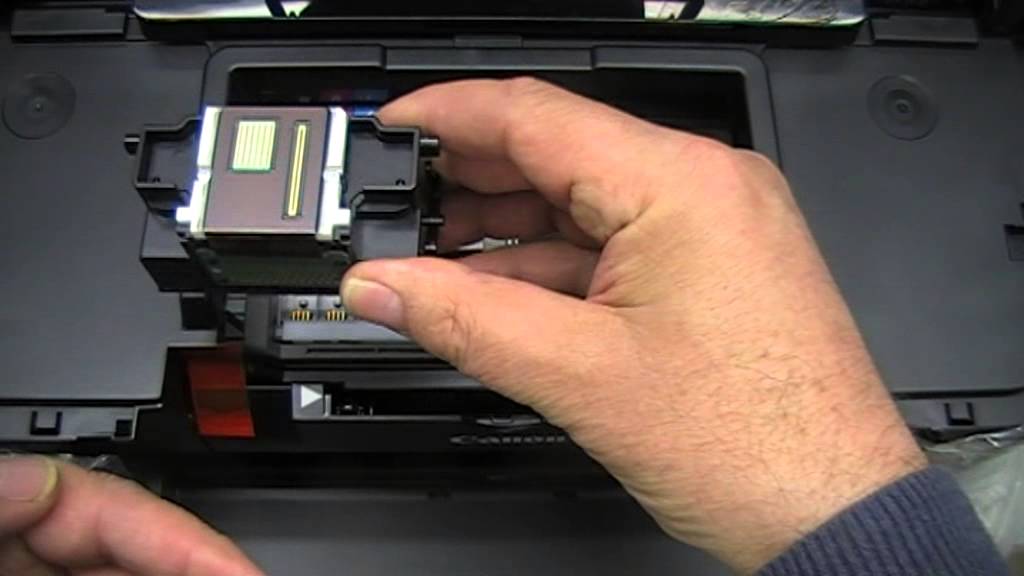
- Firstly, open the upper lid of your printer to get access to its print head compartment.

- On the right side, you will find the print head compartment which has all the cartridges.
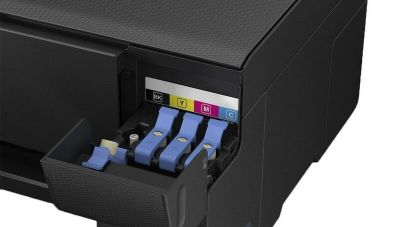
- Open the print head compartment.
- Remove the ink cartridge from your printer and then dip a cotton swab in hot water or isopropyl alcohol and rub it against the print head.
NOTE: Be careful, especially if you use isopropyl alcohol to clean your print heads: Some printers use rubber gaskets, and if you get isopropyl alcohol on the gaskets it could dry them out.
- For models where the print head is in the printer, drop 7 to 10 drops of isopropyl alcohol (91% denatured isopropyl alcohol – not ‘rubbing‘ alcohol) down the ink receptacle area where the ink actually flows from the cartridge into the head. Run a few self-cleaning utilities. If possible, allow the printer to sit a few hours or overnight and repeat the self-cleaning utility.
- If the hot water soak did not unclog the print head, place the cartridge printer head in isopropyl alcohol and allow it to soak overnight. Use a damp paper towel to wipe off the print head area and dry carefully. Try the self-cleaning utility again.
- Return the cartridge to the printer, turn the printer on and run the automatic cleaning utility. The ammonia in the glass cleaner should have loosened the clog enough to allow the cleaning utility to flush it out.