How to Connect Canon Printer to Mac
In this article, we have explained the ways by which you can easily connect a Canon printer to your Mac computer.
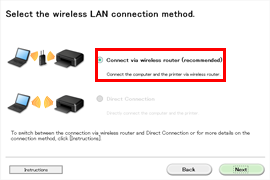
Steps to Connect Canon Printer To Wireless Network
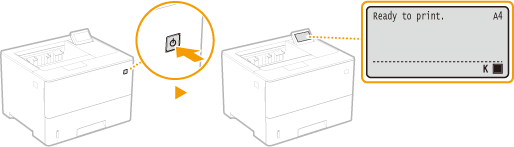
- Turn on your Canon printer.
- Make sure your router has a WPS button available. Also, make sure that your network is using the WPA or WPA2 security protocols.
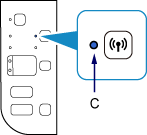
- Tap on the Wi-Fi button and hold it until the lamp blinks once.
- Once this is done, go to the router and click on the WPS button.
- Press the button for two minutes or else the connection will be interrupted.
- If the Wi-Fi light blinks, it means the printer is searching for available networks.
- After Wi-Fi is connected to the wireless router, the power lamp and Wi-Fi lamp will blink.
- Now wait for the connection to complete. Once connected, the power light and Wi-Fi lamp will stop blinking.
- Now you have to download Canon printer driver from here.
- After that install the driver setup by following the onscreen steps.
- After completion of setup,, your printer will be ready to use.
Method To Connect Canon Printer To Mac Using Wired Connection
Follow the below-mentioned steps to connect Canon printer to Mac using a wired connection:
- First of all turn on your Canon printer.

- Download Canon printer drivers from Canon’s website.
- Then install the driver by following the on-screen instructions.
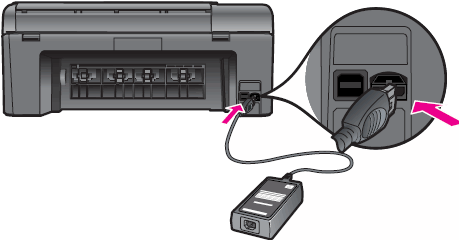
- Now connect your printer’s USB cable to your Mac device and printer.
- Once the driver installation is complete, click on the ‘Apple‘ menu and select ‘System Preferences’.

- Select and open the ‘Printers and Scanners‘ option.
- Add your Canon printer by clicking the ‘+’ option.
- Select your Canon printer model from the list of available printers and click ‘Add’.
- Follow the installation process. Your printer setup is now finished.