There are times when you may want to use an external keyboard with your laptop, perhaps because some of the keys on your laptop are worn out or you just want to use more features. This could be anything, but many users are not comfortable using an external keyboard when a laptop keyboard is enabled as it can be a challenge to pair an external keyboard with a built-in keyboard.
Some easy and free ways to disable your laptop temporarily and permanently –
Permanently disable laptop keyboard
If you want to permanently disable your laptop keyboard, you can try the method below. With this approach, your computer is tricked into using the wrong keyboard driver instead of the original. Once you restart your laptop, it will not install the drivers. Since the wrong drivers were installed, the keyboard will not work.
- Open Device Manager as you opened it in the last method.
- Next, choose the Update driver option for the keyboard that you want to disable.
- In the next window that appears, select “Browse my computer for driver software.”
- From the list of available drivers, select the option that says “Let me select from a list.”
- Make sure Show compatible hardware is unchecked.
- Last but not least, choose a driver that won’t work with your laptop keyboard.
- Just follow the onscreen instructions and install the wrong driver on your laptop.
- Your keyboard has been disabled once you are done. Restart the laptop after closing Device Manager. You will see that your laptop keyboard no longer works as soon as your computer starts up again. Also, you can install the supported drivers for your keyboard from Device Manager if you ever want to restore the functionality of your keyboard.
Temporarily disable laptop keyboard
If you just want to disable your laptop keyboard until you reboot, the steps are straightforward. Using Device Manager, uninstalling the drivers is all you need to do. If you are looking for a workaround or don’t mind restarting your laptop every time, this is a quick and easy solution to disabling the keyboard.
Let’s take a look at the step-by-step guide :
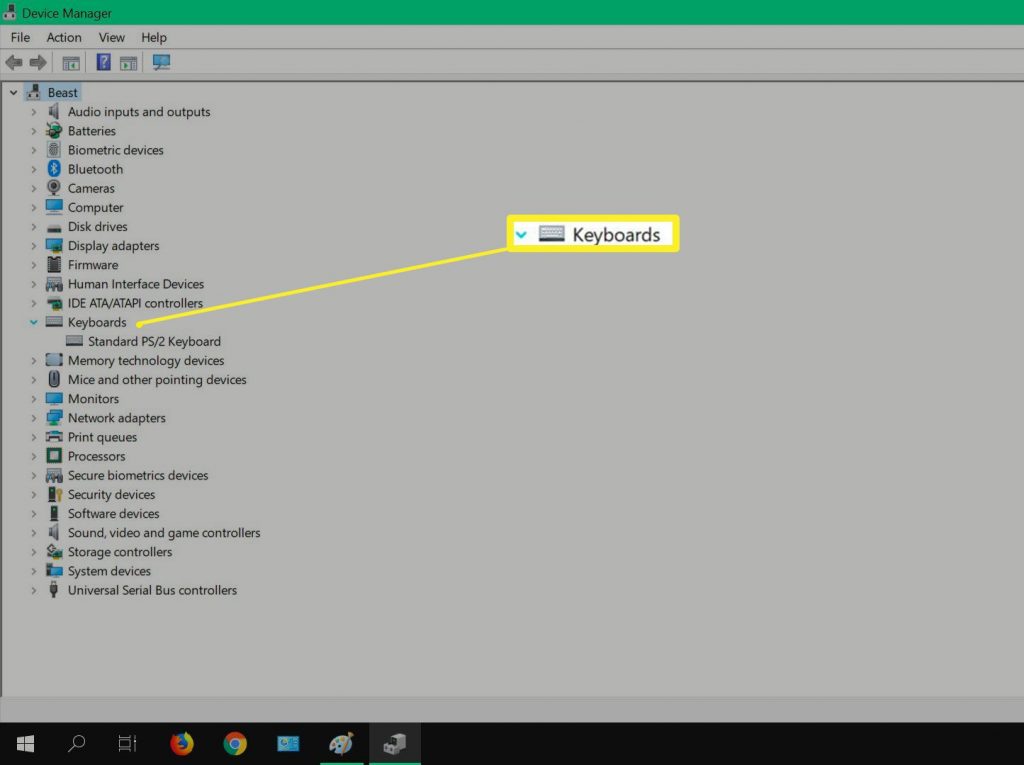
- First, open Device Manager by entering “devmgmt.msc” in the search box of the Start menu.
- Now, expand Keyboards.
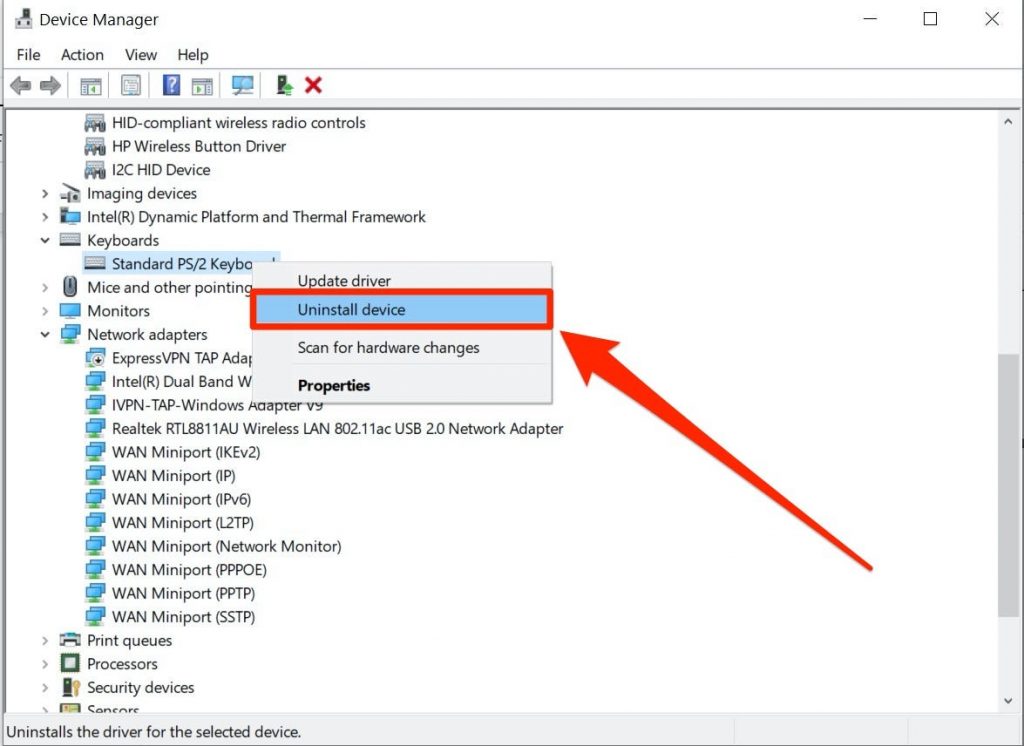
- Right click on Netbook Keyboard Device > Uninstall.
- You can re-enable it at any time just by restarting your laptop.
- When you uninstall a device, you will be asked multiple times to guarantee it. Make sure you don’t restart your laptop when you accept any of the suggestions. The laptop keyboard can be restored to its original working state by restarting the laptop.
Permanently disable laptop keyboard with group policy editor
The built-in Local Group Policy Editor can be used to prevent any action being taken by Windows. This will prevent your laptop computer from automatically installing keyboard drivers when your computer starts up at boot time.
To do this, all you need to do is identify the hardware ID of the laptop, which helps to simplify the process. When you’re done, use the Group Policy Editor to block anything related to that specific ID. Here is how you can disable laptop keyboard permanently by following this simple guide. Come on, let’s begin.
- Get Device ID on Device Manager > Keyboard Driver > Right Click Properties > Details > Property “Related Device ID“.
- Copy this value.
- Uninstall driver.
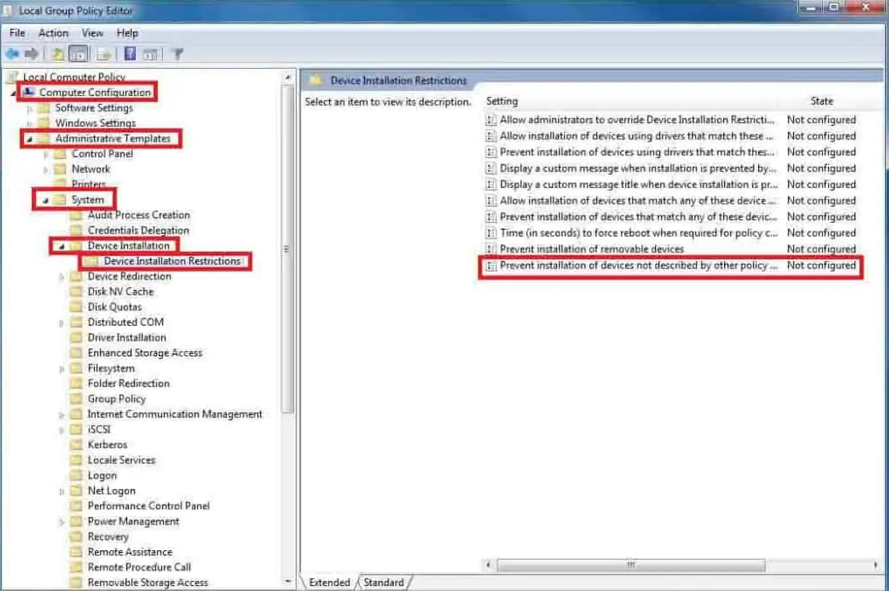
- Open Edit Group Policy and navigate from the left panel Computer Configuration > Administrative Templates > System > Device Installation > Device Installation Restrictions.
- On the same policy editor, select the one that says “Prevent installation of devices associated with this Device ID“
- Enable it, and paste the device ID into the “Options” list.
If you want to re-enable the laptop keyboard, open the Group Policy Editor and set its status to “Not Configured“.
Disable a Specific Key on Your Keyboard
Even if you don’t use any of the keys on your laptop keyboard, you can disable that key using any third-party software if you sometimes accidentally hit one of them. press down. Press down. Press. It is usually enough to completely disable a specific keyboard key to resolve such problems. Besides, it’s not going to be permanently disabled. You can easily turn it back on whenever you need to use it. To disable specific keys, I recommend you to use KeyTweak app and Simple Disable Key software.
If you want to disable any specific key on your laptop keyboard then follow the below steps carefully. The process for both programs is similar, and both are secure and easy to use.
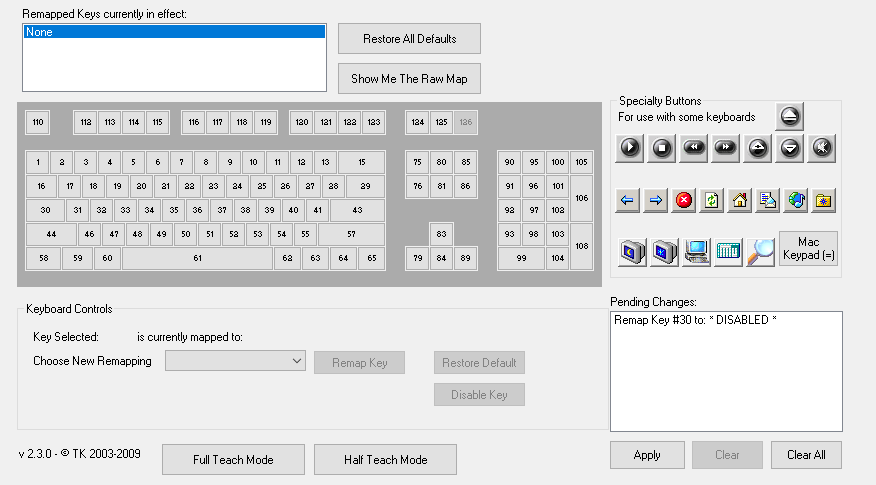
Kitwick app :
- Download Software Here!
- Once the program is downloaded, open it, then click Yes when prompted. Install the software by clicking I Agree.
- Upon downloading and installing this program, launch Keytweak, and accept any prompts.
- Click on the key you want to disable. In the keyboard control menu, you can see the numbers as well as the key names.
- For the changes to take effect, click Apply and then click Yes to restart your laptop.
Simple disable key :
- Download Simple Disable Key software and install it on your laptop.
- Once it is fully installed, double click on the icon to run.
- Once it opens, you need to select the field labeled Key Options.
- Now you have to select the key which you want to disable. It comes with an add key option to ease your process.
- When you select a key, be sure to press OK.