It’s not always as simple as adding an image to convey what you want in your presentation. Perhaps you might make a drawing of your own. On Google Slides, there are two ways to sketch, and we’ll show you both.
A Google presentation offers ways to create it, whether it’s as basic as a stick figure or a smiley face or something as complex as a new product idea or logo design.
Draw in Google Slides Using Scribble
You can draw directly on the slide to sketch the photo quickly. Then use the available tools to create the drawing the way you want.
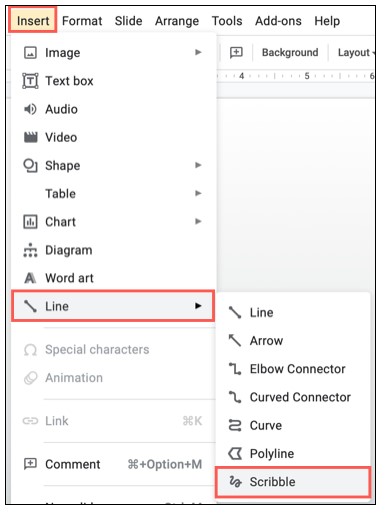
Open the slide show and select the slide you want to use. Go to the Insert menu, move the cursor to the Line and select “Scribble” from the drop-down menu. You can also use the line, arrow and other tools as you like.
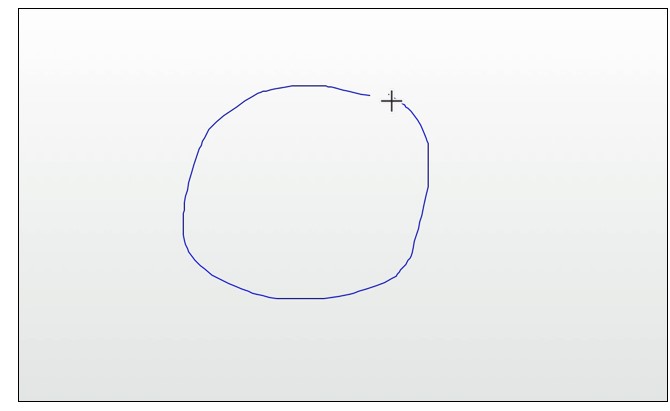
You will see that your cursor changes to a cross symbol. Use this to draw a slide.
Format Your Scribble Drawing
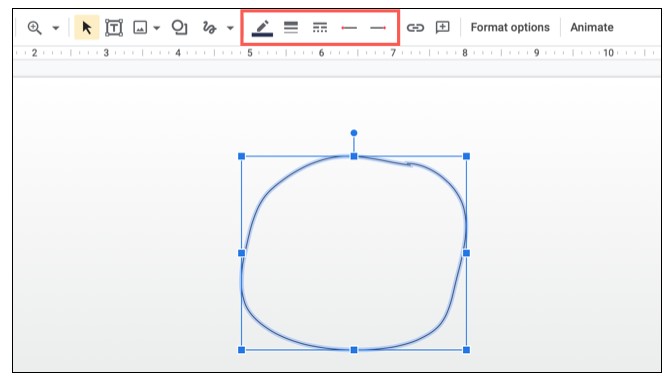
After drawing an image, you can use the toolbar to change the weight of the line, color, or line. Select the artwork so that you can see the object’s borders. Then select the toolbar option.
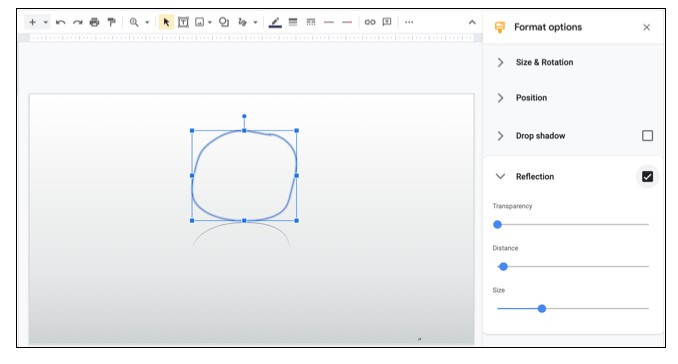
To resize or position or add a shadow or reflection, select the image and click “Format Options” on the toolbar.

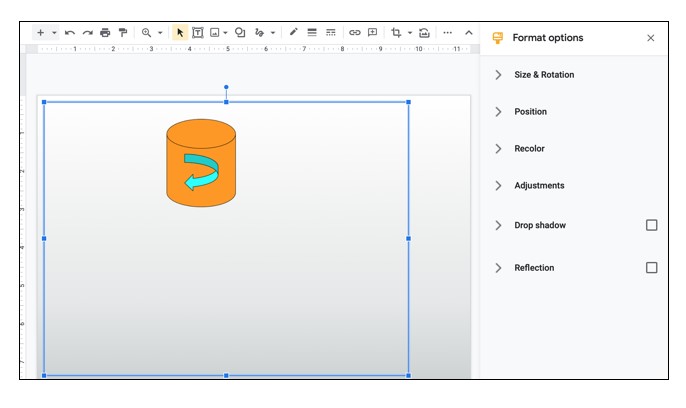
When the sidebar opens, expand the option you want to change. For example, you can select the Reflection check box, and then expand the section to adjust the transparency, distance, and size.
Close the sidebar by clicking the X on the top right.
Draw on Google Slides Using Google Drawings
When the sidebar opens, expand the option you want to change. For example, you can select the Reflection check box, and then expand the section to adjust the transparency, distance, and size.
At the time of writing, Google Slides do not offer the ability to simply insert artwork. So it still takes a few steps and you have several ways to do it.
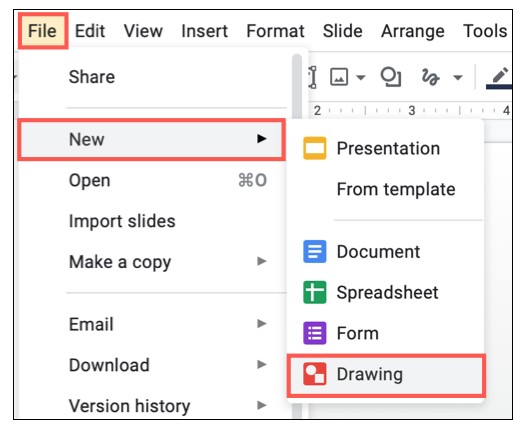
You can go directly to Google Draws to take a picture. Alternatively, click File> New> Drawing from the Google Slides menu to open Drawings in a new browser tab.
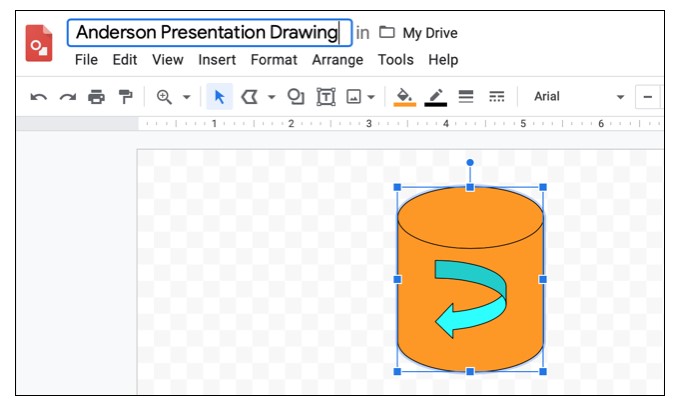
Draw your image, use the toolbar to format it the way you want, and don’t forget to name it at the top left.
Draw your image, use the toolbar to format it the way you want, and don’t forget to name it at the top left.
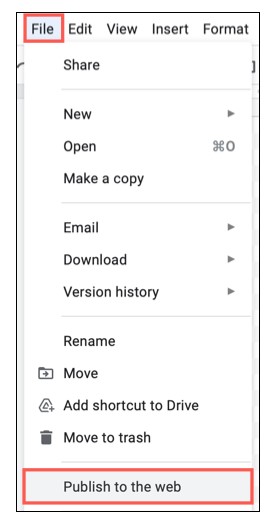
Option 1: Publish and Link to the Drawing
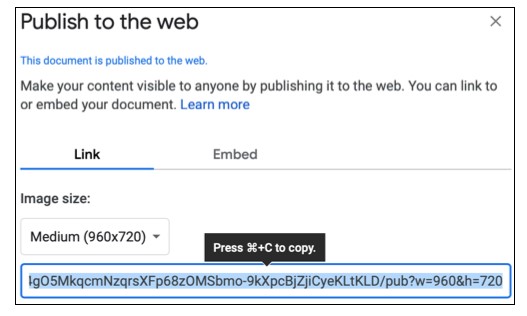
In the first method, you print the drawing, copy the link, and use the URL to paste the image into the slide. By publishing the drawing, it is publicly accessible to anyone who has a link. One of the benefits is that if you make changes to the drawing and republish it, the drawing automatically updates where it is attached.
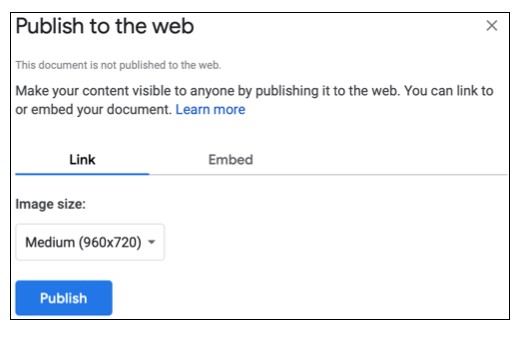
In Google Draws, click File> Publish to Web from the menu.
Select the Link tab and optionally pick a size. Click “Publish” and then “OK.”
When the link displays, copy it using Ctrl+C on Windows or Command+C on Mac.
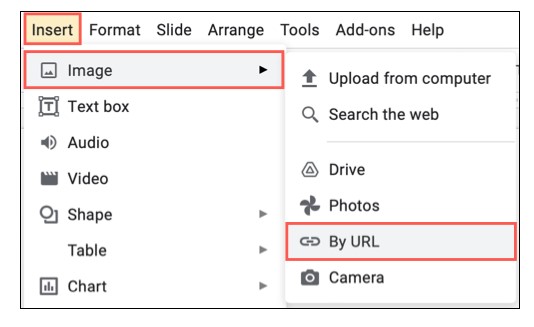
Return to Google slides and click Insert > Image > By URL from the menu.
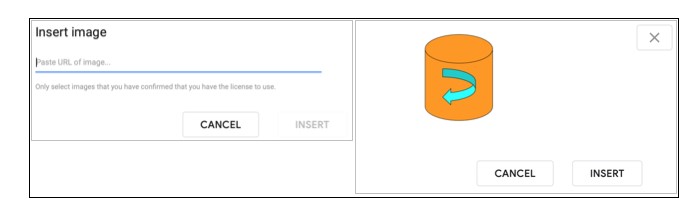
Place the link in the box using Ctrl + V on Windows or Command + V on Mac. Then click “Insert”.
Option 2: Download the Drawing and Upload It to Google Slides
Another way to access your Google artwork on Google Slides is to download the image and then upload it to your slide.
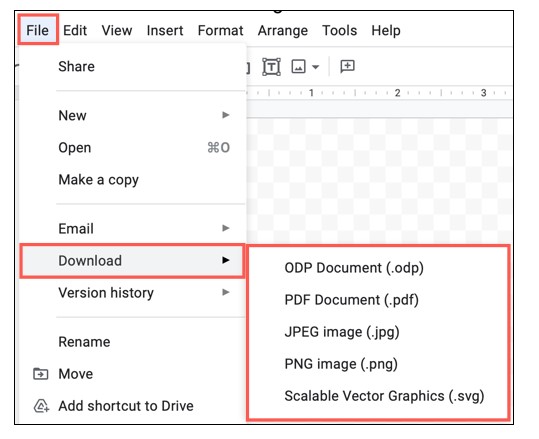
In Google Draws, click File> Download and select an image format, such as PNG.
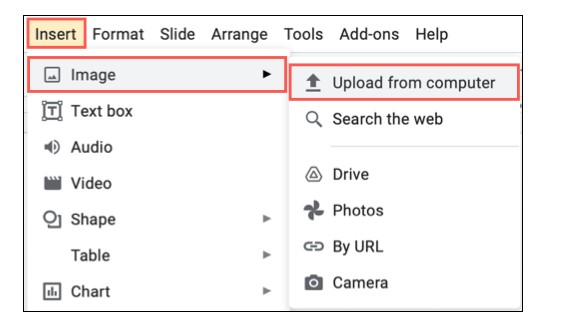
Return to Google Slides and click Insert > Image > Upload From Computer.
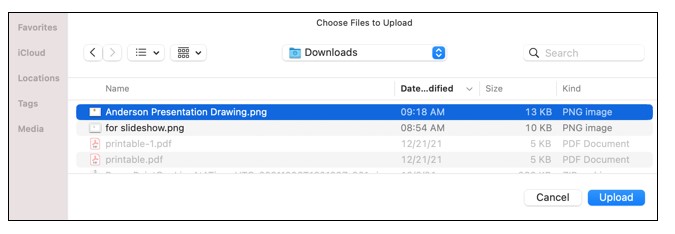
Locate the image and click “Upload.”
Format the Inserted Drawing
Once you enter a drawing using one of the two methods above, you can adjust the position or size or add a shadow or reflection as described above. Select it and click on “Format Options” on the toolbar.
It is said that a picture is worth a thousand words. So if you want to use something you have to do yourself, you can easily draw on Google Slides.
To learn more about Google Slides photos, learn how to add image placeholders to your slides or how to save objects as images.
Also Check – How to draw on google docs?