
How to fix an offline printer hp? If you have an offline printer hp and it’s not printing anything, you may be in trouble, because it can lead to more problems later on. It can be very frustrating to not be able to print out something as simple as an invoice or a shipping label when you’re in the middle of working on something important.
This error often appears when a printer hp is not turned on or properly connected to the network. If you’ve verified that the printer is turned on and ready to print, the issue may be related to the printer service on your computer.
How do you get your HP printer back online?
Perform the following tasks in the order given. Try using the printer after each task to see if the issue is resolved.
Basic Troubleshooting Steps-
- Make sure the printer is turned on and connected to the same Wi-Fi network as your computer.
- If it’s still not working, try restarting both your computer and the printer.
- If that doesn’t work, you can try unplugging the printer for a minute or two and then plugging it back in.
Run the Print Spooler Service-
If your printer is appearing offline, the first thing you should do is check if the Print Spooler Service is running. To do this:
- Go to Start > Type services.msc into the search box > Press Enter on your keyboard.
- Find Print Spooler in the list of services > Right-click on it and select Start.
Up-to-Date Printer Drivers-
Do this by going to the HP website and downloading the latest drivers for your model of printer. Once you have done this, try restarting your computer and see if the problem persists. If it does, then there are a few other things you can try.
Disable SNMP Status
- Open Control panel > Programs and Features.
- Click on “Turn Windows features on or off.”
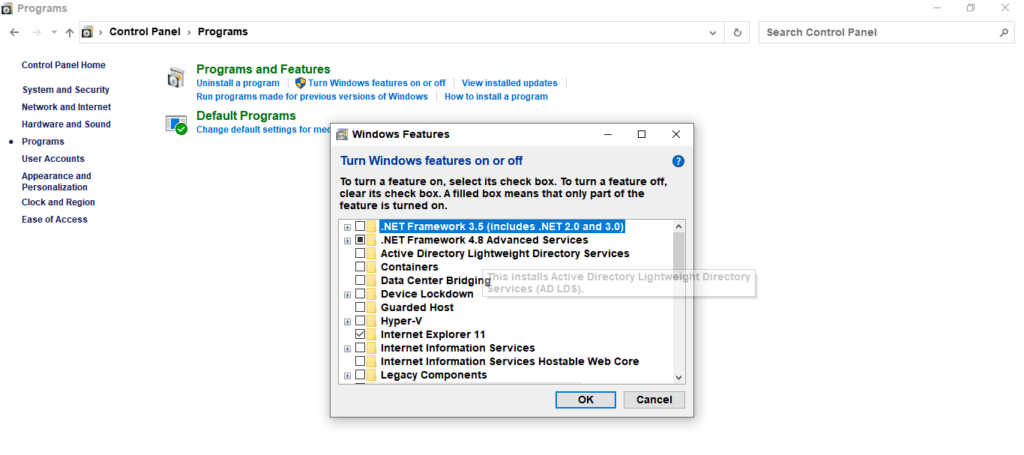
- Disable “Simple Network Management Protocol(SNMP)”
- Click ok.
Set your printer as the default-
- Press the Window + R key to open the Run box. In this Run box, type “control” and hit Enter. This will open Control Panel.
- In Control Panel select Devices and Printers.
- In the Printers section, right-click on your HP printer and select Set as default printer. Click on Yes if prompted.
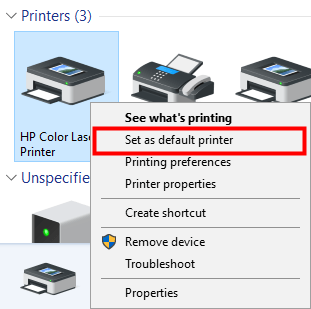
- There is now a tick below the icon of your HP printer. That means it is now set as the default printer.
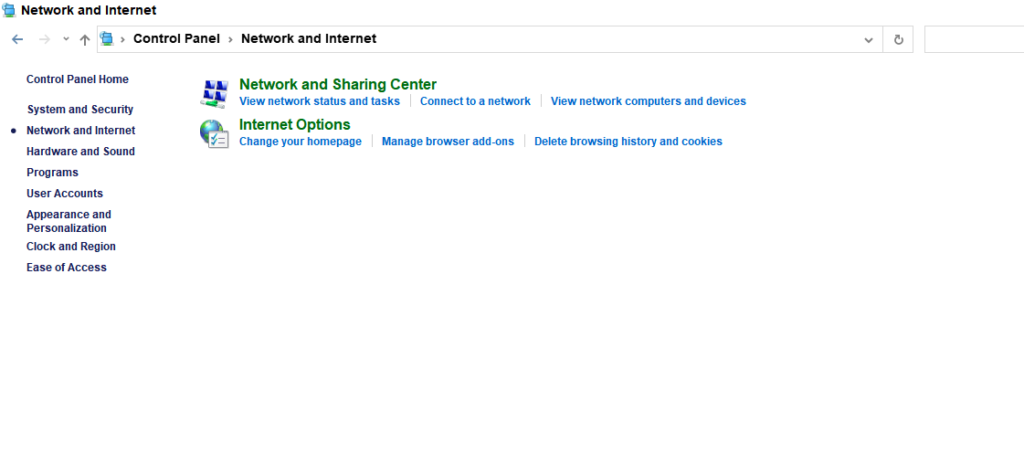
Reset Network Adapter Card Settings-
If your computer is unable to communicate with your printer, it may be due to a problem with the network adapter card settings. You can reset the settings by following these steps –
- Open the control panel in the start menu.
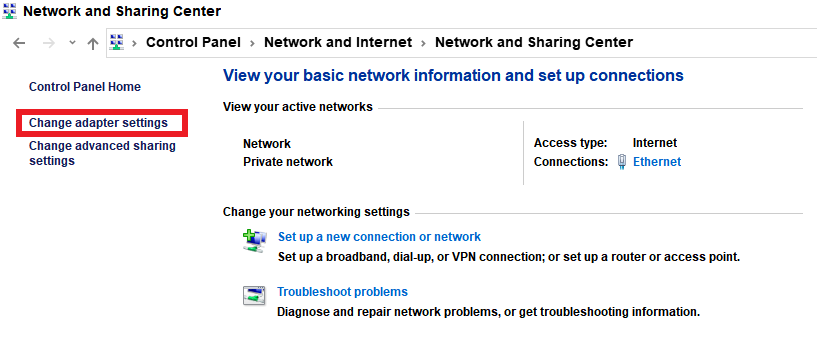
- Click on Network and Sharing Center.
- Click on Change Adapter Settings.
- Double click on the name of your current Network Connection (Wireless or Wired).
- Select Internet Protocol Version 4 (TCP/IPv4) and press Properties at the bottom of the window.
- Uncheck Obtain an IP address automatically and enter 192.168.1.10 for the IP address field and 255.255.255.0 for the Subnet mask field.
- Click OK twice to save changes