
A cell style in Excel is a combination of formatting options, including font size and color, number format, cell borders, and shading that you can name and save as part of a worksheet.
If you’ve spent hours, or even days, working on an Excel file that you’re preparing to share with a large group, you might not want to give everyone a copy of the file where they all Values change. If there are certain fields or values that you want to keep fairly constant, it’s easy to lock specific fields in your Excel file. However, there are some caveats. The first is that if you want to lock cells in more than one sheet, you must lock those sheets individually. And another is that you can only do this in Excel for Microsoft 365 and the desktop version of Excel, but not in Excel for Web.
Instructions to Lock Cells in Excel –
- Click the “Select All” icon in the upper left corner of your spreadsheet to select all cells in your Excel document.
- Right-click anywhere in your document to open the menu, and then click “Format Cells” in the menu. The Format Cells window is displayed.
- Select the “Security” tab, and then click to remove the check mark that appears next to the lock. After doing this click “OK“. The window will be closed. At this point, all cells in this specific worksheet are unlocked.
- While holding down the “Control” button, click to select all the fields you want to lock on this worksheet. Right-click one of the highlighted cells to open the menu, and then click “Format Cells” in the menu. The Format Cells window is displayed.
- Select the “Security” tab, and then click to place a check mark next to the lock. After doing this click “OK”. The window will be closed.
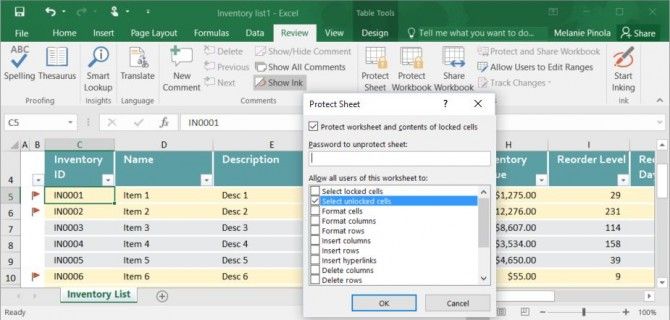
- After selecting all the cells you want to lock in the worksheet, right-click the sheet’s name to open the menu, and then click “Protect Sheet.” The Protect Sheet window is shown.
- Review the options associated with what you want to allow users of this Excel worksheet to do and modify it accordingly. In this example, I’ll leave the options to select all locked and unlocked cells checked. Make sure the box next to “Protect worksheet and contents of locked cells” is checked, and then enter the password someone will need to unprotect the sheet if they want to edit it. Click OK.” Enter the password again when prompted, and click “OK” again.
Related : transpose columns to rows in excel
Now, whenever someone tries to modify one of the locked cells, they will get a prompt that they need to unprotect the worksheet to do so.
How to turn on Cell Style ?
Excel has several built-in cell styles that you can apply to a worksheet or modify as desired. These built-in styles can also serve as the basis for custom cell styles that you can save and share between workbooks.
- Select the range of cells you want to format.
- On the Home tab of the ribbon, select the Cell Styles button in the Styles section to open the gallery of available styles.
- Select the desired cell style to apply it.
Lock and Protect protection of formula cells –
Before sharing a worksheet, one may want to lock and protect Excel formula cells. This is done to prevent entering an alphabet, a number or a space in these cells. Additionally, no one other than the worksheet creator is authorized to delete these cells.
A locked Excel cell can be edited or overwritten as long as it is not protected. To protect only the formula cells, follow these steps in the order outlined :
- Unlock all cells in the worksheet because they are locked by default.
- Lock the formula cell.
- Protect the formula cell by protecting the worksheet.
Related : how to unhide excel workbook
How to lock all cells in excel worksheet ?
By default, when you protect cells in a sheet or workbook, all cells will be locked. This means that they cannot be reformatted or deleted, and the content in them cannot be edited. By default, Locked cells can be selected, but you can change this in the Security options.
- Navigate to the Review tab.
- Click on Protect Sheet. In the Protect Sheet window, enter a password that is required to unprotect the sheet (optional) and any actions you want the user to allow.
- Click OK to protect the sheet.
When you or someone else tries to edit any locked cells, this message will appear :

The cell can only be unlocked if the sheet is unprotected (by going to the Review tab again, selecting “Unprotected Sheet” and entering a password if necessary).
Related : name box in excel , arrow keys not working in excel
How to lock specific cells in excel worksheet ?
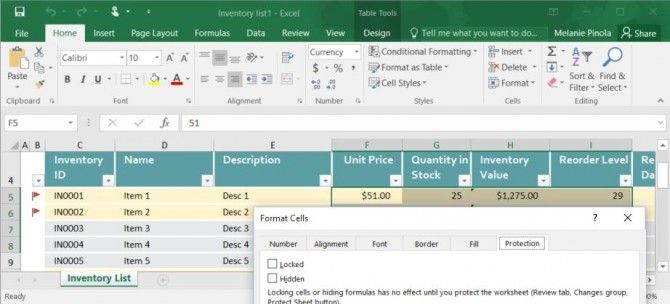
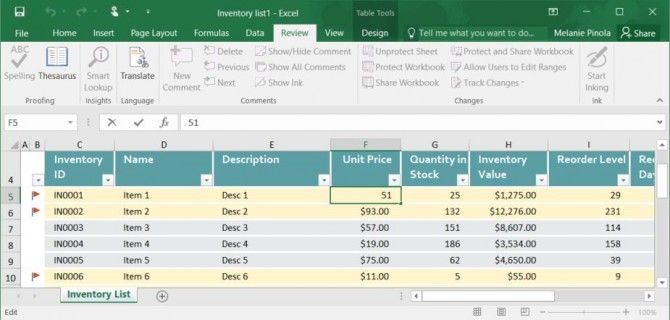
Sometimes this can happen if you want to prevent certain cells from being changed but still allow users to adjust other cells in the worksheet. In our example, an inventory list allows you to update unit prices and stock amounts, but not the item ID, name, or description. As mentioned above, all cells are locked by default when you protect the sheet. However, you can specify whether a certain cell should be locked or unlocked in the cell’s Format properties.
- Select all the cells that you do not want to be locked. These will be specific cells that can be edited even after the sheet is saved.
- Right-click your selection, choose Format Cells, and click the Protection tab. (Alternatively, under the Home tab, click the Expand icon next to Alignment, and go to the Security tab in the Format Cells window.)
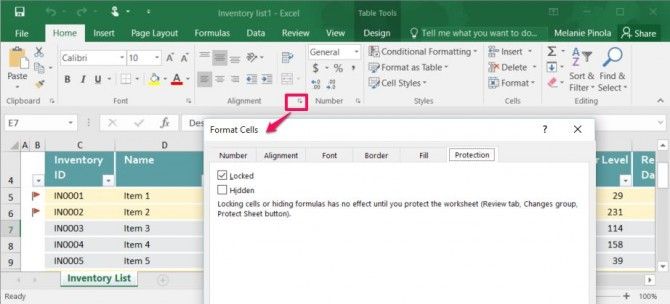
3. Uncheck “Locked” (which is checked by default) and click OK.
4. Go to Review > Protect Sheet and hit OK to protect the sheet. Any cells that you haven’t unlocked under the Format Cells option (step 3 above) will be locked, while the unlocked cells will be editable :
Note that locking (or unlocking) a specific cell will not take effect until you do step 4, protecting the sheet.