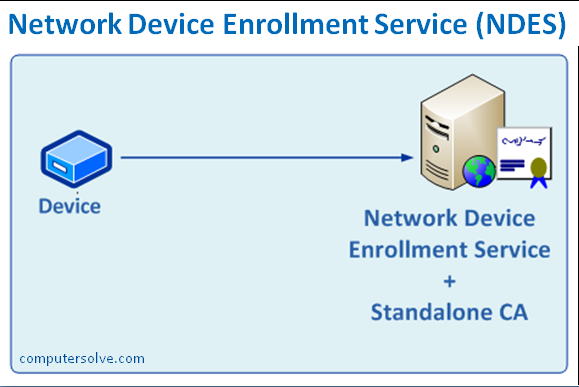
Network Device Enrollment Service (NDES) provides a security feature in Windows Server 2008 R2 and later Windows Server operating versions. NDES offers and manages certificates used to authenticate traffic and implement secure network communication with devices that might not otherwise possess valid domain credentials.
NDES allows software on routers and other network devices that are running without domain credentials to obtain certificates based on the Simple Certificate Enrollment Protocol (SCEP).
It is also a function of Microsoft PKI, AD-CS (Active Directory Certificate Services) based on SCEP. This is designed to enroll devices without other Active Directory domain credential to use certificates from Enterprise CAs. It also provides one-time enrollment passwords for devices, forwards device enrollment requests to the CA, receives enrolled certificates from the CA and forwards them to the device.
What are the key functions of NDES?
The Network Device Enrollment Service performs the following functions, such as:
- It generates and provides one-time enrollment passwords to administrators.
- Do submits of enrollment requests to the CA.
- It retrieves enrolled certificates from the CA and forwards them to the network device.
Installing Process of Network Device Enrollment Service
If you already have an Active Directory Certificate Services Server setup, if not you can deploy that and add in NDES at the same time.
You can either: Launch Server Manager > Manage > Add Roles and Features > Below Active Directory Certificate Services select Network Device Enrollment Service.
Or: From within PowerShell, you need to run the following command;
‘Install-WindowsFeature –Name ADCS-Device-Enrollment‘
Configuration of Network Device Enrollment Service
- First of all, create a domain user (we’ve called it SVC_NDES) > Add that user to the IIS_IUSRS group on the CA server.
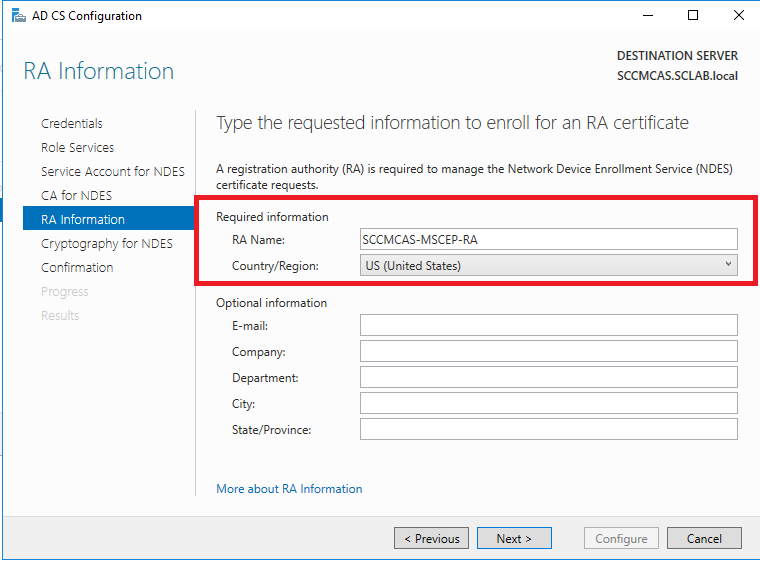
- Then from within Server Manager launch the post deployment configuration wizard. Now click ‘Next‘.
- Then select Network Device Enrollment Service,(if not already selected).
- At the next step, change the account details, to the service account you created.
- Then enter the details that will be used to enroll the RA certificate.
- Now, Accept the defaults > Next.
- Then ‘Configure‘. Click ‘Close‘.
- Now, Launch the Certificate Authority management console > Certificate Templates > Right Click > Manage.
- Then open the properties of the ‘IPSec (Offline request)’ certificate > Security Tab > Make sure the account you created (above) has the ‘Enroll’ permission as well. And you’re done!