
On your Mac you need to convert HEIC to JPG. you can read this article. HEIC is apple’s proprietary version of the HEIF or High-Efficiency Image File format. This newer file format is intended to be a better way to save your pictures, making your images smaller in terms of data while retaining high quality. HEIC is better than JPG. HEIC is a new image format, built to be more efficient than existing file types. It stands for High-Efficiency Image Container, and it’s a variation of HEIF (High-Efficiency Image File Format).

What are HEIC images?
HEIC takes its roots in High Efficiency Image File Format (HEIF) developed by the Moving Picture Experts Group (MPEG) as an improvement over the predominant JPG image format. HEIC files are, on average, half the size of JPGs, while offering better quality. HEIF and HEIC are also found in macOS versions from High Sierra (OS X 10.13) right up to Big Sur (OS X 11.1).
Three ways to convert HEIC to JPGs format on a Mac:
On your Mac you need to convert HEIC to JPG. If you’ve transferred some pictures from your iPhone and now have a handful of HEIC photos on your Mac, don’t worry. Before you delete those pics and transfer them from your phone again, check out a few of the apps that can open HEIC files. And if the app you want to use doesn’t support HEIC, there are a couple of easy ways to convert those files to JPG format.
First way: Convert HEIC to JPG using Preview
One of the easiest ways to turn a HEIC file into a JPG file on a Mac is to use the built-in Preview app.
Here’s how:
- Open the HEIC file in Preview.
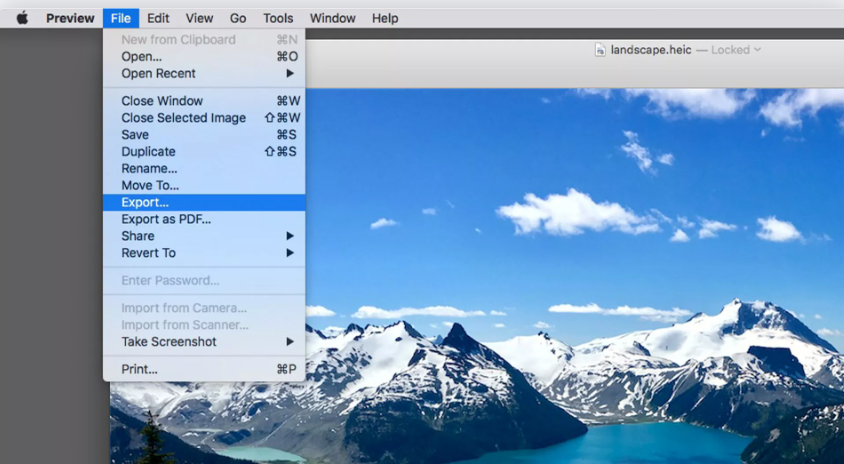
- In the top menu, Click File > Export.
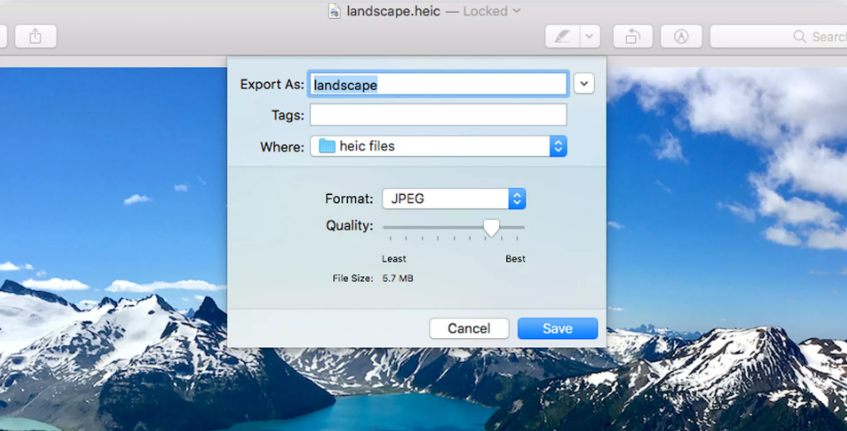
- From the Format drop-down menu, select either JPG format.
- Click Save.
- A new JPG version of your photo has now been created.
Second way: Convert HEIC to JPG using Photos
Apple’s Photos app can also be used to convert HEIC files to JPGs. Start by importing your HEIC images into Photos as usual. Just follow these steps to convert your picture:
- Open the Photos app and find the file you want to convert.
- Select the file.
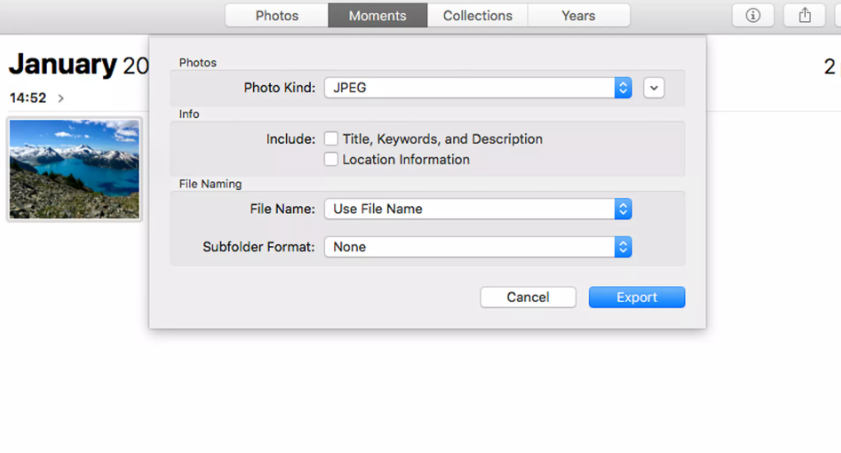
- Click File > Export > Export Photo.
- Choose JPG or PNG from the Photo Kind drop-down menu.
- Click Export.
- Select the location where you want to save your picture and click Export.
Third way: Convert HEIC to JPG with automator:
Automator handy productivity tool can also be used to convert HEIC files to JPG format.
- To use Automator, start by opening it from the Applications folder.
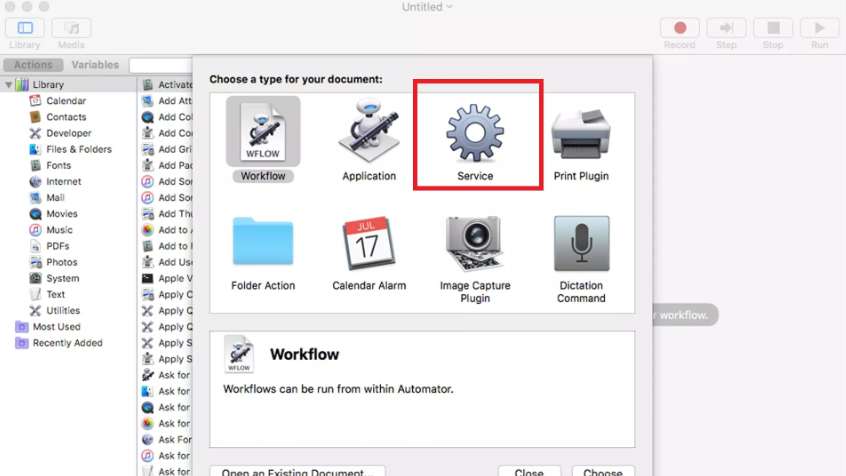
- Launch Automator and click New Document
- Select Quick Action > Choose.
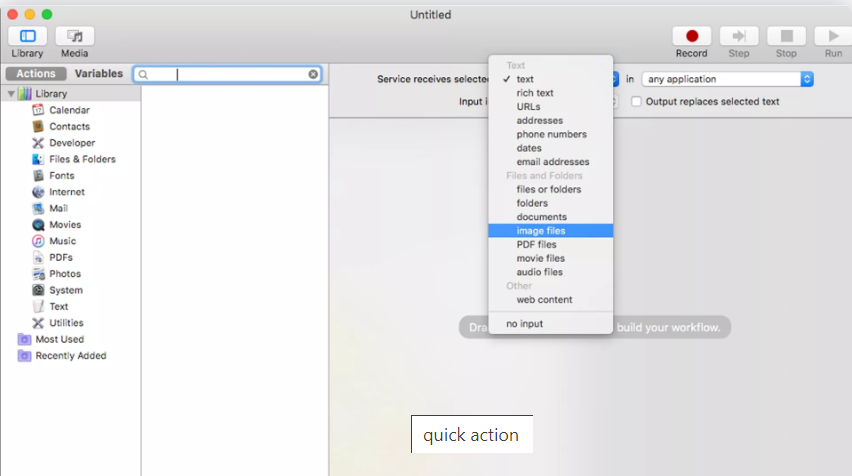
- Look for the Copy Finder Items action and double-click to include it. Choose the folder where you want the converted JPG images to be save.
- Search for Change Type of Images action and double-click to include that too. Select JPG in the dropdown.
- Click File > Save and name your Quick Action (e.g. change HEIC to JPG).
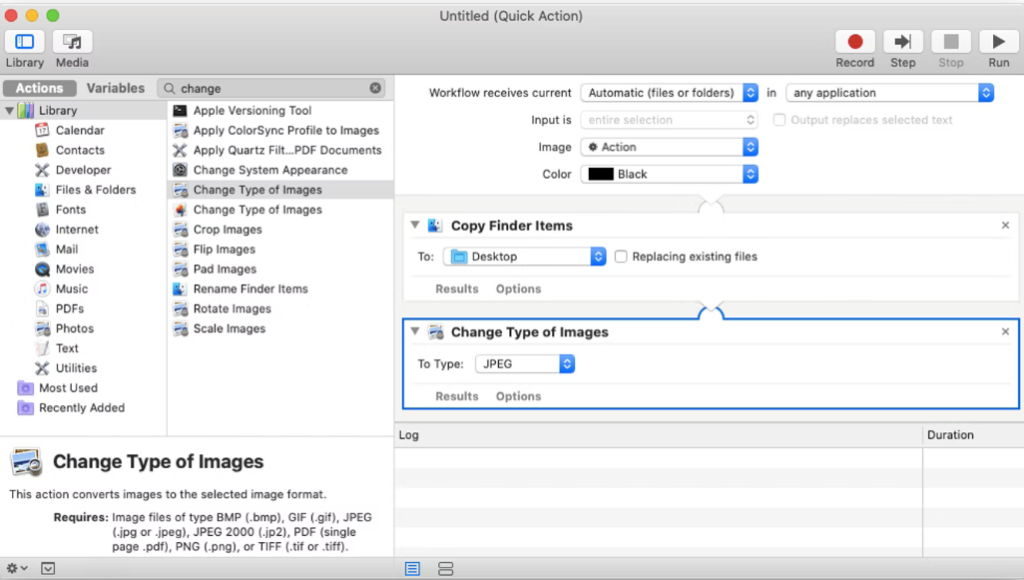
- Set the new image format as JPG under Change Type of Images.
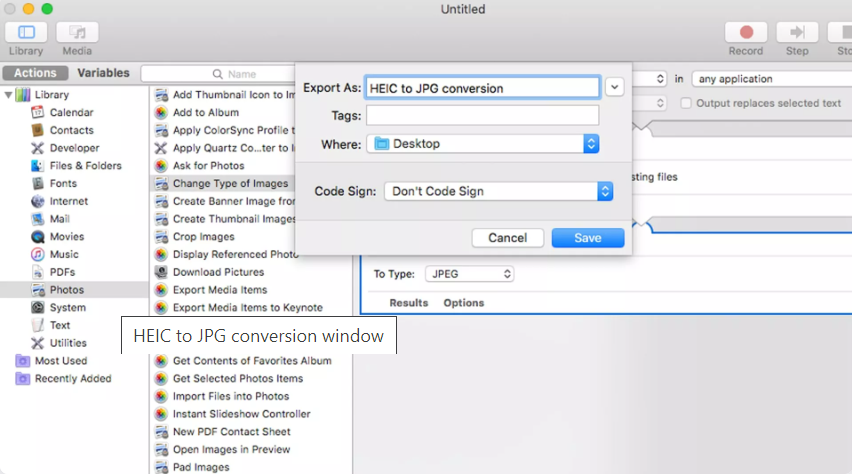
- Go to File > Export. Give your script a name, such as ‘HEIC to JPG conversion’, and click Save.
- Find your HEIC to JPG script and double-click it. You’ll be asked whether you want to install it. Click Install, and then Done.
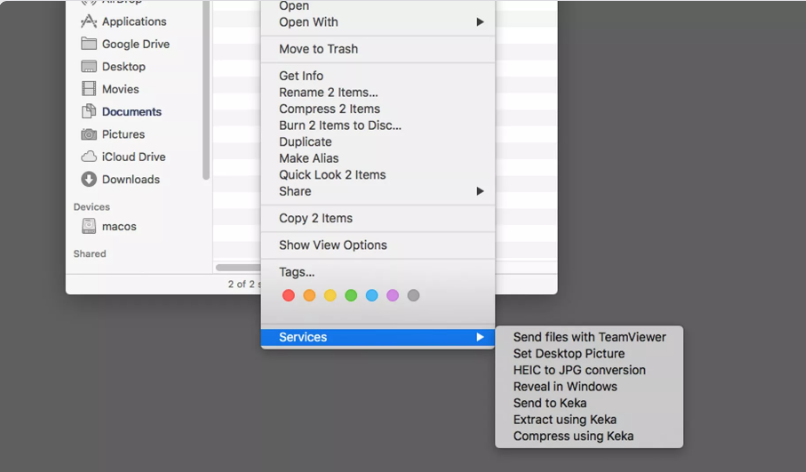
- Select some HEIC files, right-click them, and from the context menu choose Quick Actions or Services.
- Select and It will automatically run through the steps you defined and convert your images.
That’s all on how to convert HEIC to JPG on a Mac? when you convert heic to jpg then read above three ways. Here, we have provided every possible ways that you can try out.