If you are trying to print your document, but it keeps telling you that the printer is offline, don’t worry. The process of fixing it may be slightly different from one computer or printer to another, but the general approach will stay the same. In this article, we’ll take a look at how to fix the offline printer in Windows and Mac OS X. Let’s start!
Method 1: Disable the “Use Printer Offline” Option
The quickest and most straightforward method of bringing the printer back online in Windows is to uncheck the “Use Printer Offline” mode option in the Windows settings.
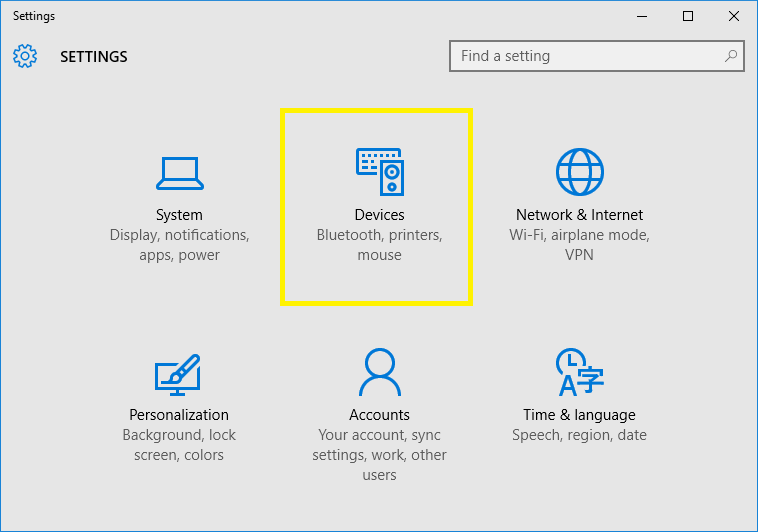
- Click on the “Start” button on your taskbar and click “Settings.”
- Click on Devices.
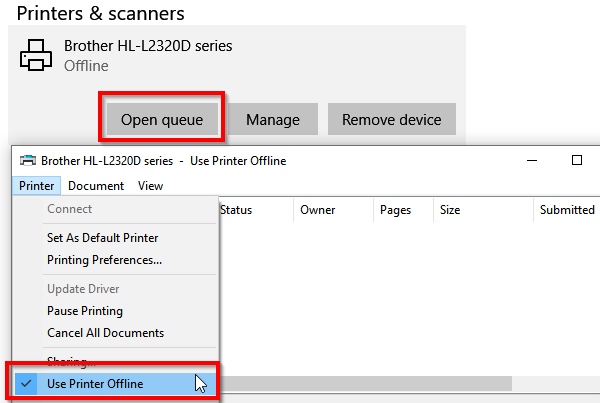
- On the left pane, click on “Printers & Scanners.”

- Select your printer and click on “Open Queue.”

- In the next window, click on “Printer” uncheck the “Use Printer Offline” mode option and wait until your printer goes back online.
Method 2: Restart Printer Spooler Service
Turning the Print Spooler service off and then turning it back on solves the problem for a lot of users as well. This service can cause this offline status issue. So, just restarting the service might solve the problem for you. It isn’t a permanent solution but it is a good workaround.
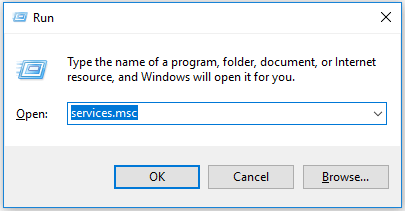
- Hold the Windows key and press R.
- Type services.msc and press Enter.
- Right-click on Print Spooler. Then click Restart.
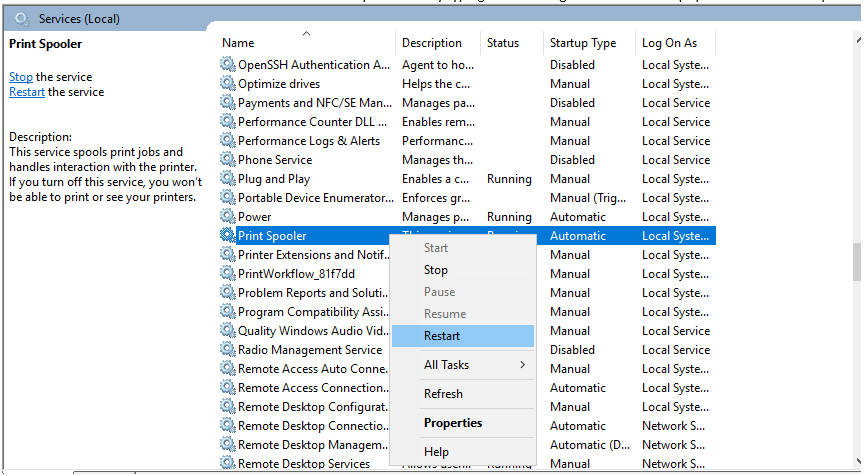
- Right-click on Print Spooler again and this time choose Properties.
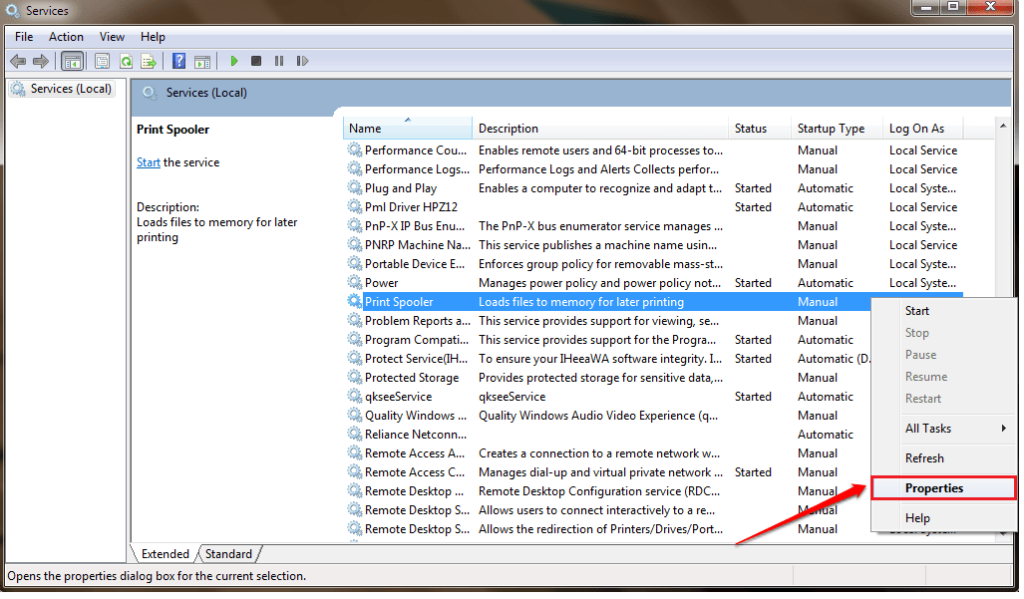
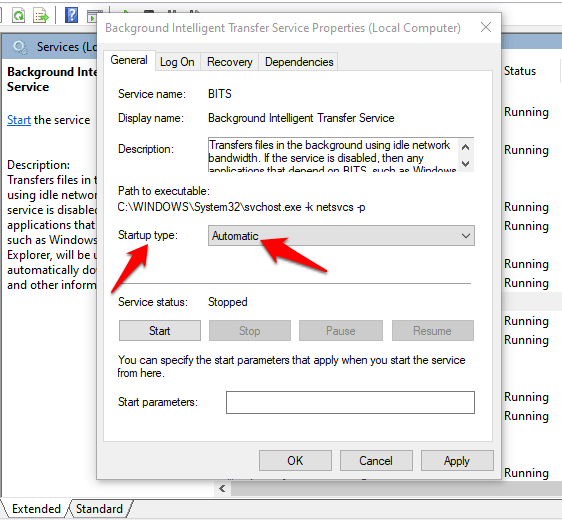
- Then set its Startup type to be Automatic. Click OK to save your settings.
- Restart your PC and try to print your file to see if your printer works.
Method 3: Adding a New Port
Adding a second printer device in Windows has worked for more than enough users. This will only work for the networked printers so keep that in mind.
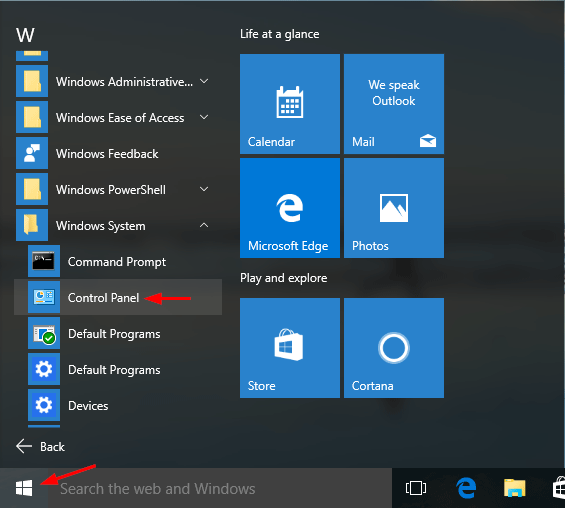
- Go to the start button and search for the control panel, click on it, and open it.
- Select Devices and Printers from the Hardware and Sound section.

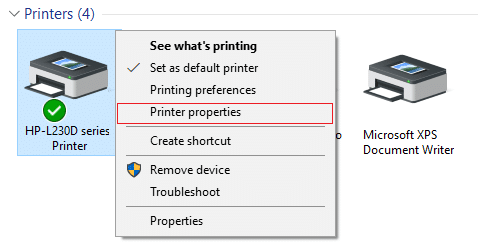
- Right-click your printer and select Printer Properties.
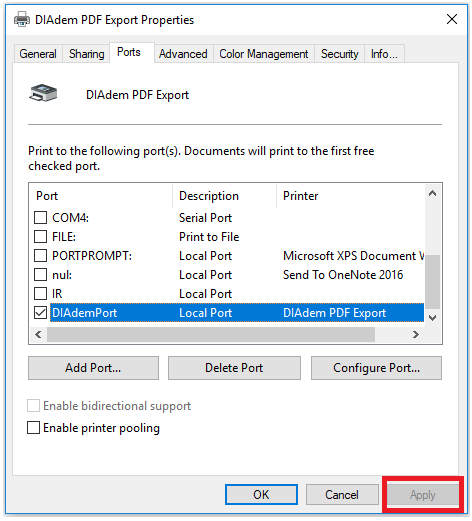
- Go to the ports tab and simply tap on the “Add Port” button at the bottom.
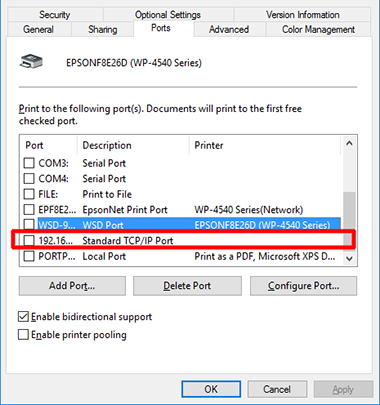
- Select Standard TCP/IP Port. Click New Port.
- A new wizard will start. Click Next. It will ask you to enter the required details. You can get it from the printer’s instruction manual. After entering it simply click on the Next button.
Method 4: Remove and Add the Printer
This is the best working solution for printer issues in Windows. Most of the time, removing and then adding the printer again via Settings resolves the issue. Here is how to do that.
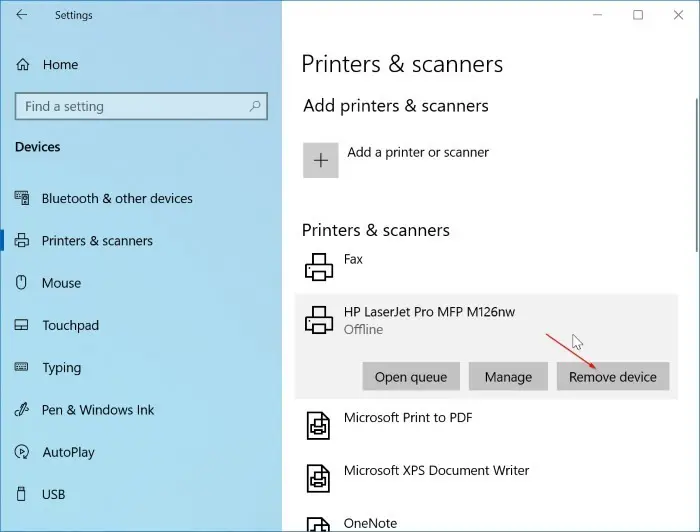
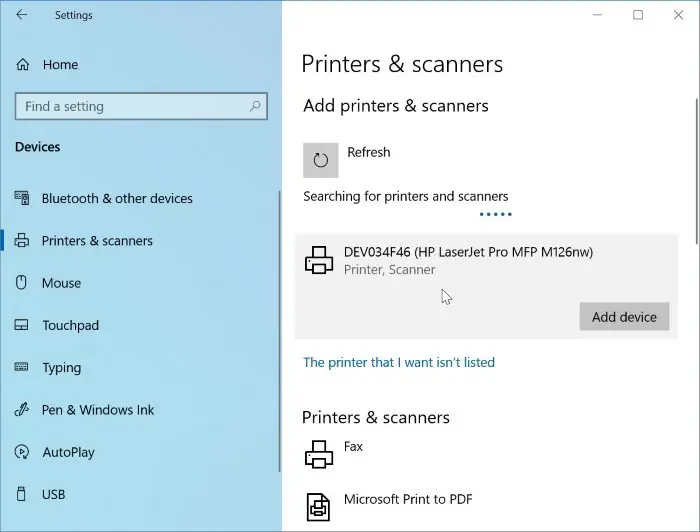
- Navigate to Settings > Devices > Printers & Scanners.
- Click on the Printer’s entry and then click the Remove device button to uninstall the printer from your PC. If you get the confirmation dialog, click Yes.
- Make sure that the printer is turned on and connected to your PC. Navigate to Settings > Devices > Printers & Scanners again.
- Click the Add a printer or scanner option. Once Windows discovers your printer, click the Add device button to install the printer.
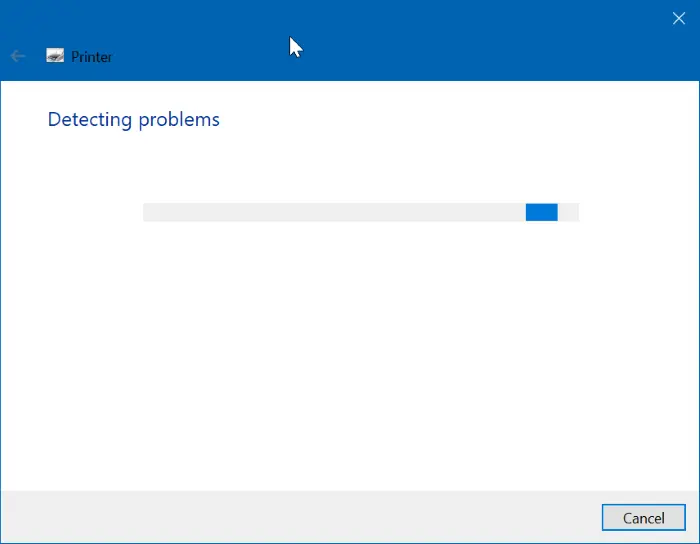
Method 5: Run the Print Troubleshooter
The window offers a built-in troubleshooter to diagnose and fix printer issues. Navigate to Settings > Update & Security > Troubleshoot page to find Printer troubleshooter. Run the troubleshooter and follow the on-screen directions to resolve the printer offline issue.
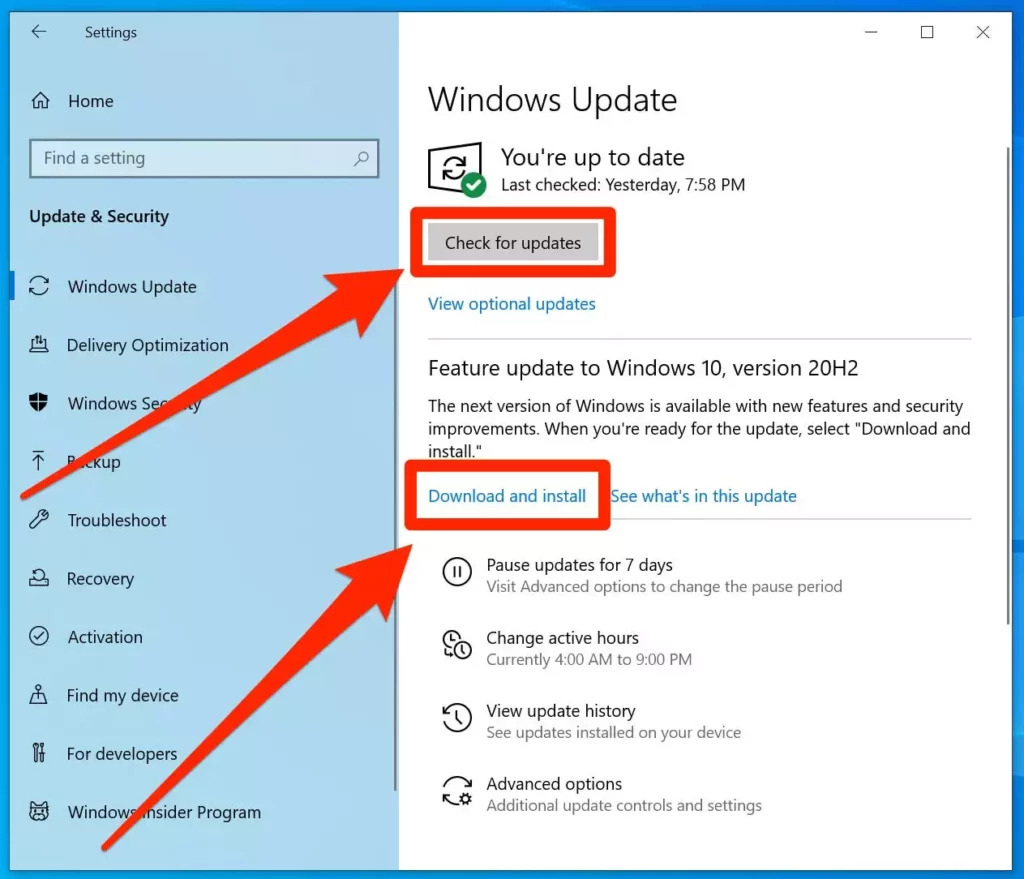
Method 5: Update the Window
- Press the key “Windows + I” from the keyboard, and open the settings window.
- Locate the “Updates & Security” option and simply click on it.
- Tap on “Check for updates” and it will automatically update if there are any updates available. It might work for you to resolve the problem of the Printer offline error.
Final Words:
Now, You can check the printer status once you are done with the above-given steps. If the problem isn’t solved after doing all methods wisely then try to restart computer and see if that solves the issue.