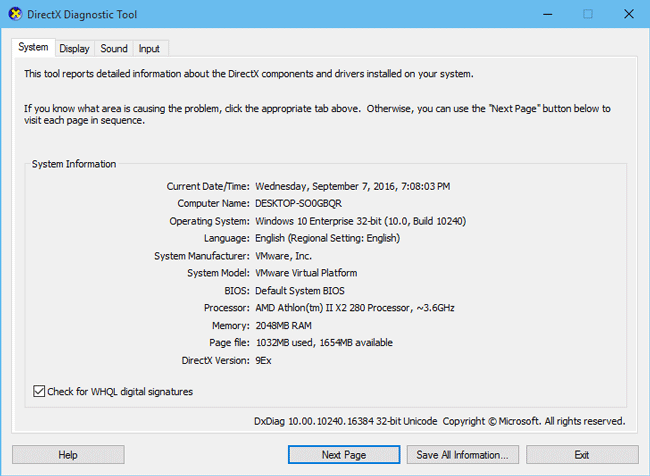
This tool is used to collect information about devices to help troubleshoot problems with DirectX sound and video. A support person can ask for this information, or you can post it in a forum when you ask for help.
In Windows, choose Start and enter dxdiag in the search box on the taskbar. Choose dxdiag from the results.
In Tools, select Save all information for an easily shared format.
Process to open DirectX Diagnostic Tool in Windows 10 –
You can activate the DirectX Diagnostic Tool in the following four ways :
Method 1 : Run DirectX Diagnostic Tool from Run in Windows 10
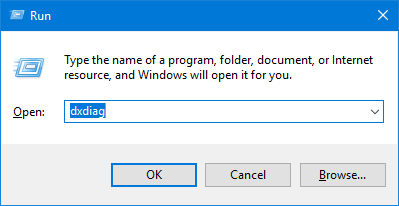
Press Windows Key + R to open the Run command box. Type dxdiag and press Enter.
This will open the DirectX Diagnostic Tool immediately. The System tab lists general information about your system and, most importantly, what version of DirectX you currently have installed. The Display tab shows information specific to your graphics adapter and monitor, and you can see which DirectX features are enabled.
Method 2 : Find and open it.
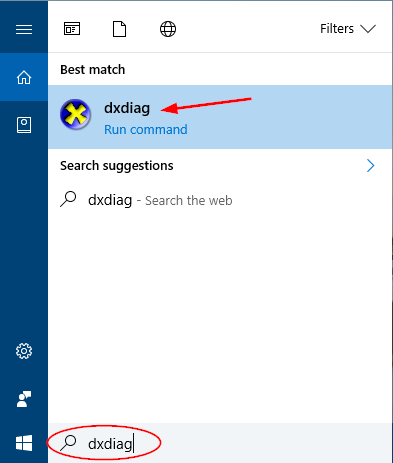
Type dxdiag in the lower-left search box on the desktop, and click dxdiag at the top of the list.
Method 3 : Run DirectX Diagnostic Tool in Windows 10 Using Cortana Search
You can also start the DirectX Diagnostic Tool by typing dxdiag into Cortana’s search box on the taskbar, and then clicking the dxdiag search result.
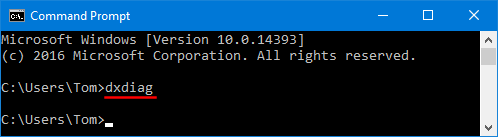
Method 4 : Run DirectX Diagnostic Tool in Windows 10 from Command Prompt
Open Command Prompt in Windows 10, type dxdiag and press Enter. This will also launch the DirectX Diagnostic Tool.
Method 5 : Open it via Run.

Display the Run dialog by using Windows+R, type dxdiag and tap OK.
Method 6 : Enable it in Windows PowerShell.
- Open Windows PowerShell through the Start menu.
- Input dxdiag and press Enter.