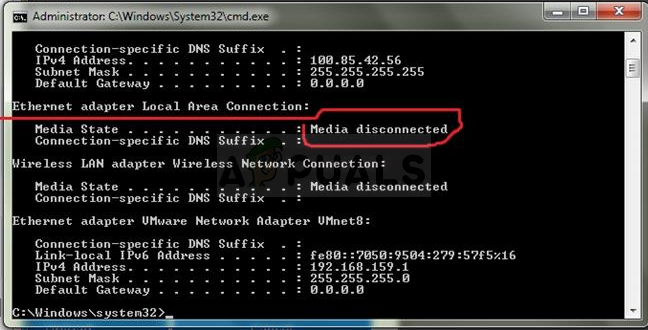
Media disconnected error is one of the widespread issues that occur on a Windows 10 computer. Media Disconnected error occurs after running ipconfig or ipconfig /all in Command Prompt to check your Internet connection.
How to Check Media Disconnected Windows 10 Error?
- Press the ‘Windows + R‘ key to open the run box.
- Type ‘cmd‘ and hit ‘Ok‘.
- On the Command Prompt Window, type “ipconfig /all” and press ‘Enter‘.
- Now you will see a long list of various network adapter details on the screen.
- In that list of network adapters, there will be an option called Media State for which, which will show as “Media Disconnected.”
How to Fix the ‘Media Disconnected’ Error in Windows 10?
Enable Network Adapter
- Use the Window + R keyboard shortcut to open the run box.
- Now, type devmgmt.msc and hit Ok.
- Then, double-click ‘Network adapters‘ to expand the list.
- Right-click on your network adapters that give you the error, and select ‘Enable device‘ from the context menu.
Reset WINSOCK and IP Stack
- Press the Windows + R key and type cmd and tap ok.
- On the Command Prompt Window, type “netsh winsock reset catalog” and press ‘Enter’.
- Now, type “netsh int ipv4 reset reset.log” and press ‘Enter‘.
- Type “netsh int ipv6 reset reset.log” and press ‘Enter’.
- Type “exit” and press Enter to close Command Prompt.
- Restart computer, after completing the process,
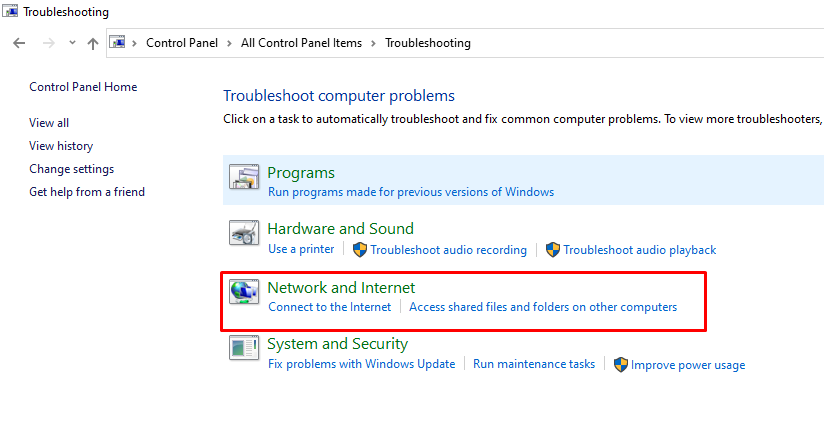
Run the Network Troubleshooter
- In the search box next to Start on the taskbar, type control panel.
- Select Control Panel from the list of results.
- In Control Panel Window, ensure to select view by large icons.
- Select ‘Troubleshooting‘.

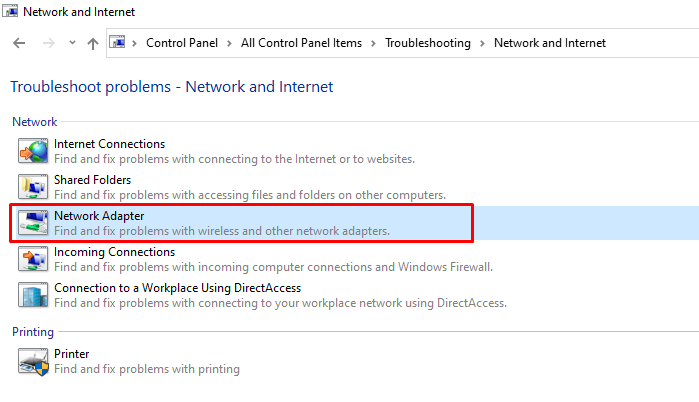
- Tap on Network and Internet.
- Click Network Adapter.
- Click on the ‘Next‘ button.
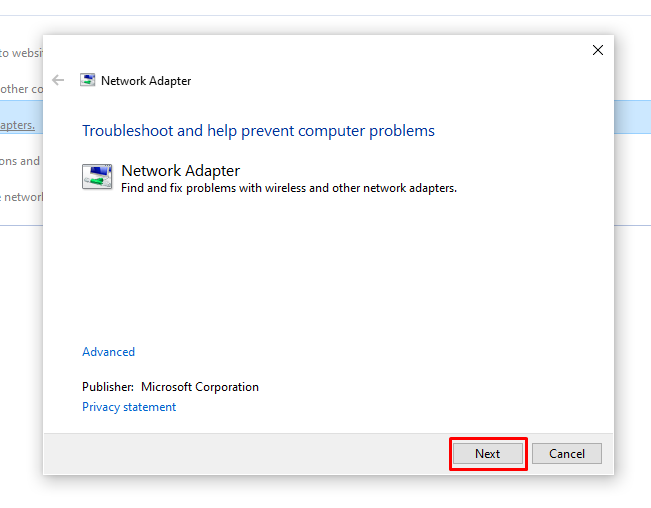
- Then follow the on-screen instructions to finish it and reboot your PC.
Disable Network Sharing
- Press the ‘Windows + X‘ key and then click ‘Control Panel‘ from the list.
- Select Network and Sharing Center > Change adapter settings.

- Right-click on your network connection and then choose ‘Properties‘.
- Tap on the Sharing tab, and uncheck the box next to ‘Allow other network users to connect through this computer’s Internet connection‘.
- Click the OK button and reboot computer.
Power-cycle the Modem, Router, and System
- Switch OFF the modem, router, and system.
- Switch ON the modem only and wait till all the lights are ON and stable.
- Switch ON the router and wait till all the lights are ON and stable.
- Connect any one device other than your Windows 10 system to your router and verify if the internet connection is working on it. If yes, Power ON the system and let it pick up the IP address.
Reset TCP/IP
- Press the ‘Windows + R‘ key and type ‘cmd‘ and hit ‘Ok‘.
- On the Command Prompt Window, type “netsh int ip reset resettcpip.txt” and press ‘Enter‘.
- After completing the process, Restart your computer.
Network Reset
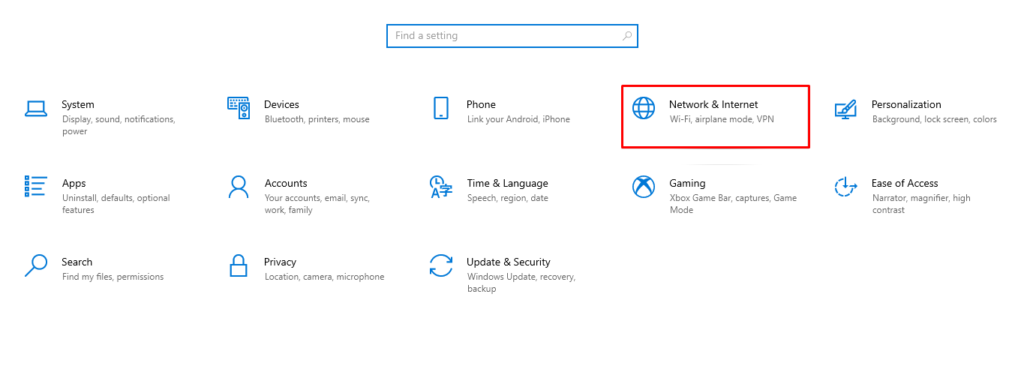
- Press the ‘Windows + I‘ key and then select Network and Internet.
- Click ‘Status‘ on the left panel and then click the ‘Network Reset‘ link.
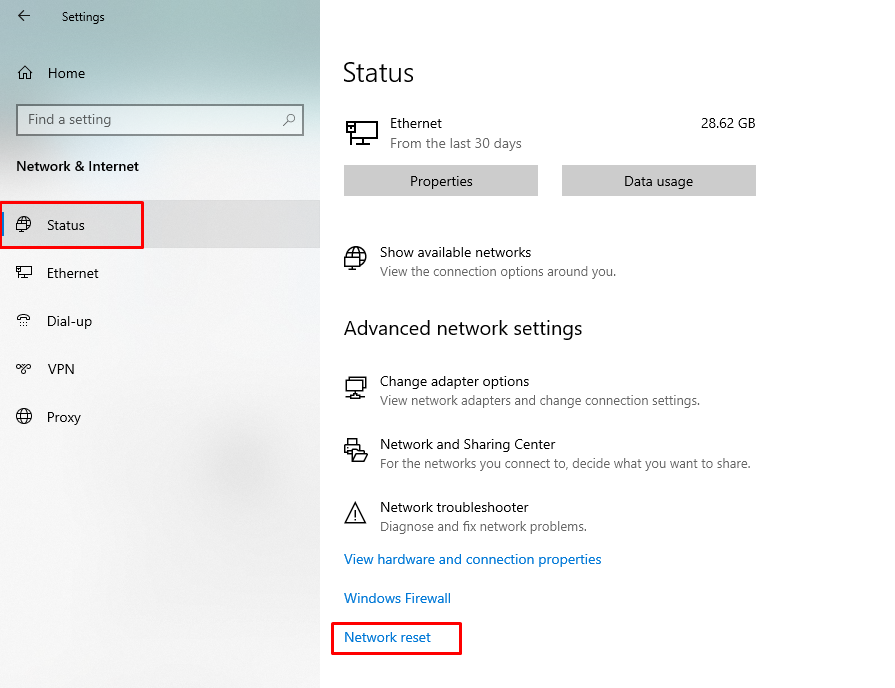
- Follow the procedure to reset the network.
- After completing the process, Restart your computer.
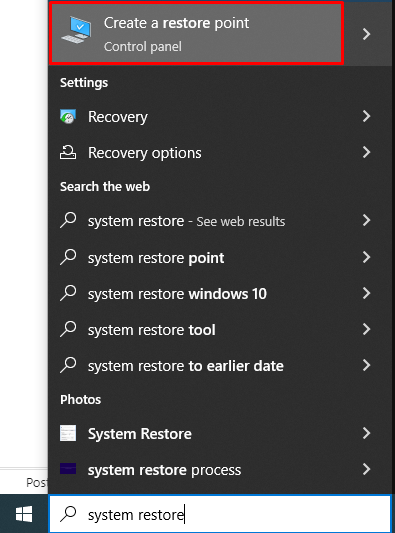
System Restore
- Press the ‘Windows‘ key and then type System Restore in the search box.
- Click on Create a restore point.
- Click on the ‘Turn on system protection‘ radio button.
- You can set it to any value you want as long as it’s at least a couple of gigabytes if you want to keep more restore points. Click on Apply and OK to apply the settings.
- Now, the system will create a restore point automatically whenever a new program is installed or an important change has occurred on your computer.