What is a Print Screen? A print screen, also known as a screenshot, is a way to take a snapshot of whatever’s on your computer screen. They’re often used in tutorials because they’re a fast and easy way to show what you’re explaining. You can do print screens by hitting Print Screen/SysRq on your keyboard.
The print screen allows you to take pictures of anything on your screen and save them as .png or .jpeg files on your computer or other devices. Here’s how to use the print screen function in Windows 10.
Steps to print screen on windows 10
The simplest method to take screenshots in Windows 10 requires a tap on the PrtScn key only. After this action, Windows will capture the entire screen. Here are the steps –
- First, navigate to the screen that you want to capture and make sure you have it in full view on your computer screen.
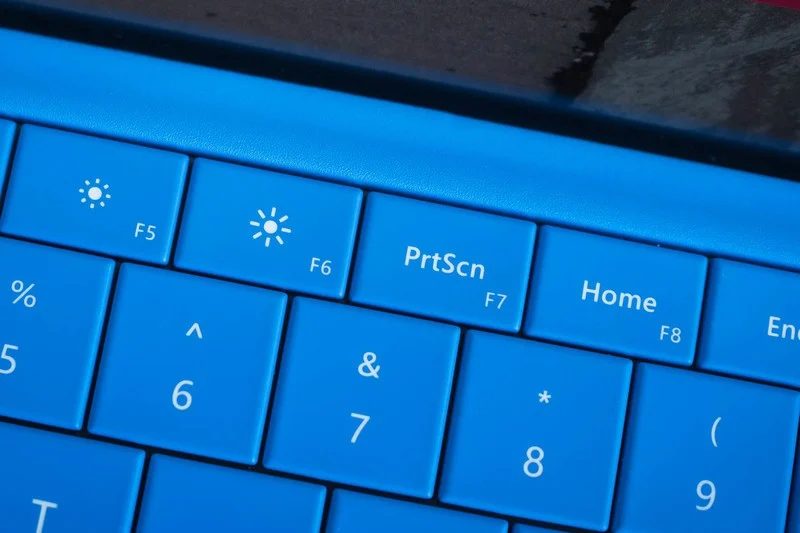
- Locate the Print Screen key on your keyboard. It’s usually in the upper-right-hand corner.
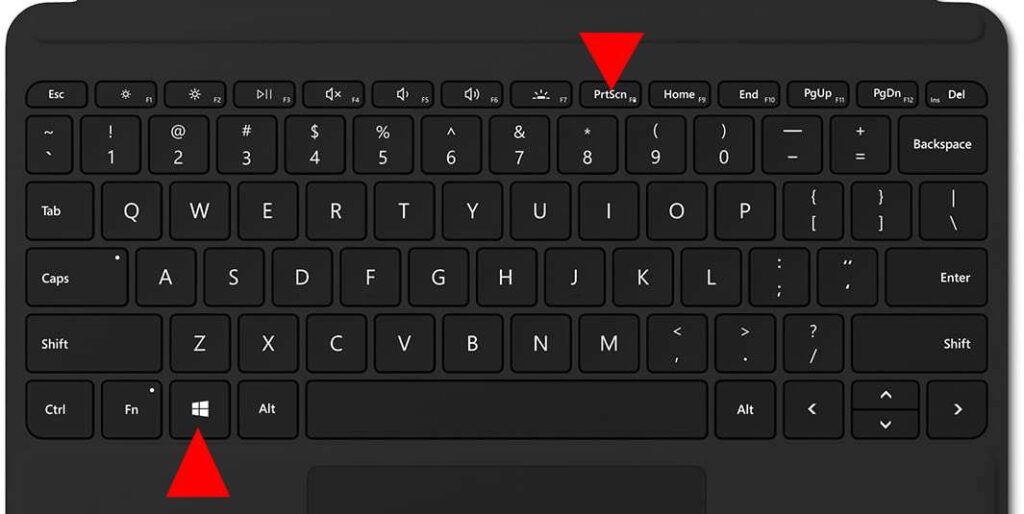
- Press Windows Key + PrtScn on your keyboard to take a screenshot of the full screen.
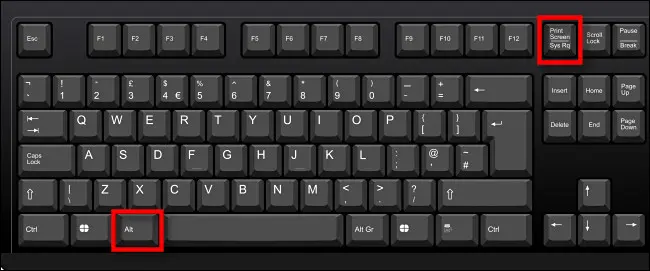
- Alternatively, you can press the Alt and PrtSc keys. This will copy the image to your clipboard.
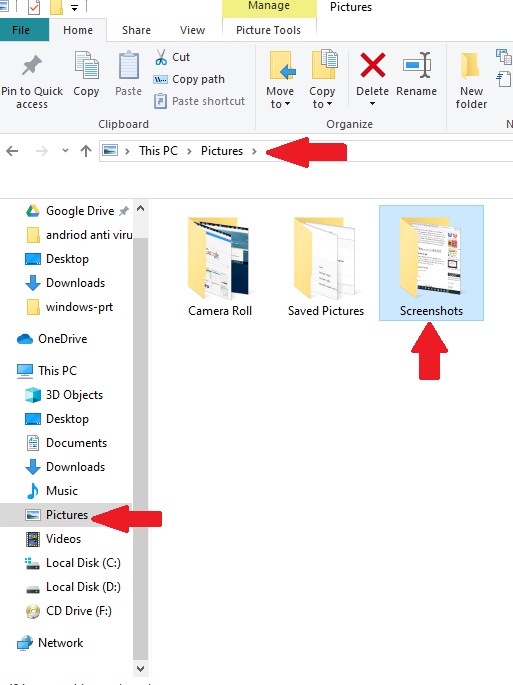
- The screenshot will be automatically saved to the Pictures > Screenshots folder.
Screenshot Using Snipping Tool in Windows 10
This is one of the oldest desktop apps in Windows 10 for taking screenshots. It provides several snipping options with a few editing tools as well.
- Open the Snipping Tool on your computer by clicking on Start > Snipping Tool.

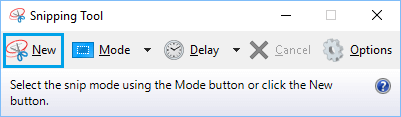
- On the Snipping Tool pop-up window, click on the New option (See image below).
- With Rectangular Snip you can take a rectangular-shaped screenshot by moving your cursor around the object or area you want.
- Release the Mouse Key and the screenshot will be copied to the Clipboard.
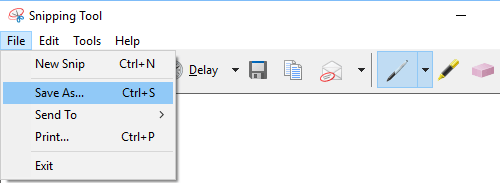
- Next, click on the File > Save As option within the Snipping Tool to save the screenshot to any location on your computer (See image below).
Screenshot Using Windows + Alt + PrtScn
This shortcut features on the Windows 10 Creators Update. The feature is located on the Game Bar, which allows gamers to take screenshots of a current game window.
- Press Windows + Alt + PrtScn to take Screenshots
- This shortcut features on the Windows 10 Creators Update. The feature is located on the Game Bar, which allows gamers to take screenshots of a current game window.
Screenshot Using Windows 10 Snip & Sketch
This is meant to replace the traditional Snipping Tool. As the name suggests, the main function of this tool is to modify the screenshots after you capture them. let’s see below!
- Press the Windows key, type Snip & Sketch, and then press Enter.
- Now, click the New button in the upper left corner. This will immediately launch a tiny box at the top of the screen.
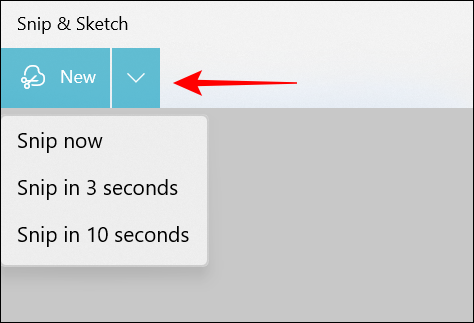
- Select the type of snip which includes “Rectangular”, “Freeform”, “Windows”, and “Fullscreen” respectively.
- Your image will be stored in the Snip & Sketch program, where you can add annotations or use the pencil or pen tool to draw on it.