Screenshots work great, but sometimes a quick how-to video can create a more powerful message. Using Microsoft Stream, you can create short screen recordings of up to 15 minutes, without any additional software, including your camera and microphone. Take help from the article we wrote to know how to record screens in Windows 10.
How to screen record on Windows 10?
On Windows 10, you can record your screen using the built-in tool – Game Bar. It was designed essentially for capturing PC and Xbox gaming sessions, but can also be used to record other apps and activities.
First, enable Game Mode on your system :
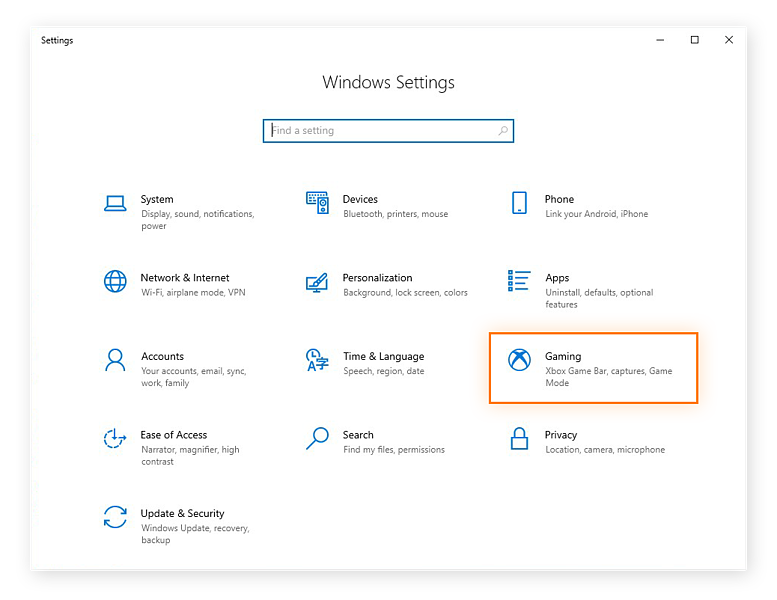
- Click on Start Menu and then select Settings.
- From the Settings window, click on Gaming.
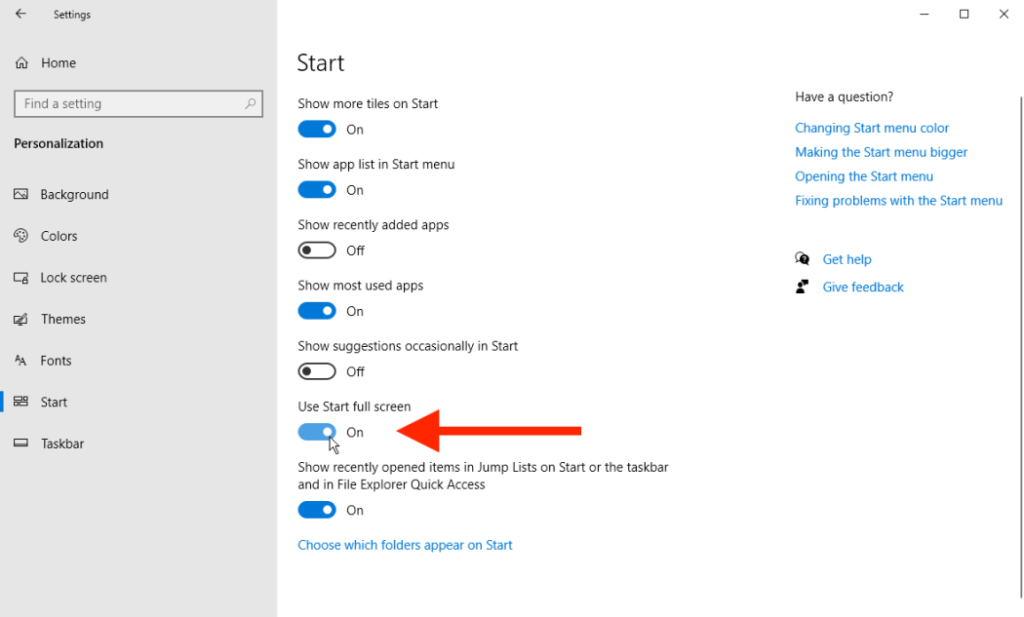
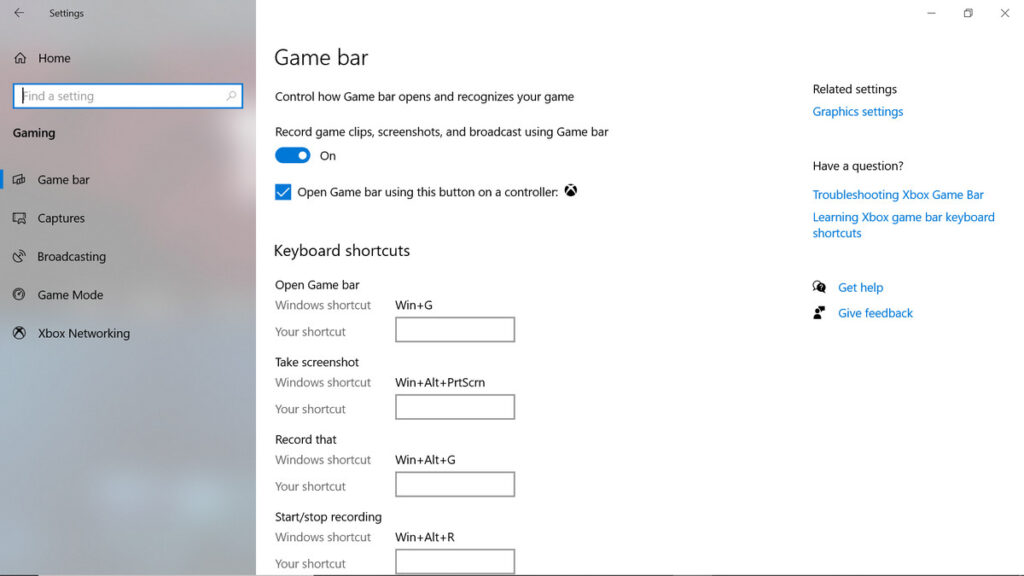
Tips: To check the maximum duration of screen recording, go to the Settings of the Game Bar. Click on Start Menu and hit Settings. Click on Gaming. Under Capture, you will find the option of background recording. Select 30 minutes to 4 hours from the Maximum recording time drop-down.
How to Use Game Bar to Screen Record on Windows?
Below is how to record on Windows 10 using Game Bar. You’ll need to set up the Windows Game Bar if you haven’t already. After setting it up, follow the steps below.
Related: how to record screen with obs
- Open the app or program you want to record and then press Windows + G on your keyboard. This opens the Game Bar overlay.
- In the Gamebar overlay, you’ll see several widgets including Capture, Audio, Display, and perhaps Xbox Social. There’s also the main toolbar at the top of the screen that corresponds to these widgets, so you can add or remove them at any time.
- To capture your screen, click the Record button in the Capture widget.
- After the recording starts, a recorder appears in the upper right corner of the page. Here you can view the recording time, press the stop button (the blue circle with a white square in the middle), or control your microphone.
- When you are finished, press the Stop button and a message flyout appears on the right side of the screen letting you know that you have made a recording. You can click on this message to access the recording or you can navigate to the recording in your video file.
Game Bar Limitation in Windows 10
Recording your screen on Windows 10 with Game Bar is easy, but there are some caveats.
- Some applications, such as file managers, cannot be captured with the Game Bar.
- You can’t capture your desktop; You will be capturing an app.
- If while you capture, another window appears above the window you are recording, it will not appear in your recording (but the movement of your cursor will).
- You can either use the apps from the Windows Store or use the apps that you have already installed on your computer.
How to capture a screen in Windows 10 using Powerpoint?
If you need to capture your desktop or capture multiple windows, Microsoft PowerPoint may be a better option for capturing your screen. It’s faster and more versatile to set up than using the Game Bar.
Related: webcam recording software
- Open a new presentation in Powerpoint and go to Insert > Screen Recording.
- The PowerPoint presentation will be minimized, and your desktop will appear. If you are not prompted to select the region you want to record, click Select Region and drag your cursor around the region you want to record. A red, dashed bounding box appears around the area you want to record.
- Once you’ve set the region, you can click the audio to turn the audio on or off, and click the record pointer to capture (or not) the pointer as it moves around the screen. can do. What can we do? What can we do? When you are satisfied with your settings, click Record.
- A short countdown will appear, and then your recording will go live. Your recording’s control panel may also be missing. If you press your cursor at the top of the screen, in the center, the Control Box will reappear.
- When you need to pause or stop your recording, you can choose Pause or Pause from the recording menu.
- Once you stop recording, you will be taken back to PowerPoint, and the recording will be inserted into the slide you selected. To save it to your computer, right-click the recording and choose Save Media As from the menu.
- Navigate to where you want to save the file and then click Save.