Windows 11 has been out for quite a while, and there’s a chance you might have installed it on your PC by now. Uninstall Windows 11 Because is no longer the unstable mess it was half a year ago at the time of its release.
Some users are still facing minor bugs and compatibility issues after upgrading to Windows 11. However, if you’re not liking the new operating system for any reason, you can easily uninstall it from your system in more ways than one.
How to uninstall the Windows 11 ?
Uninstall Windows 11 and go back to Windows 10 :
- Open the Recovery submenu of Settings.
- Click Go back and check off one or more reasons for your uninstall.
- Click “No, thanks” < Next < Next again < “Go back to Windows 10.”
- The system will now restart and go through a restoration process that should take a few minutes.
Uninstall Windows 11 using Media creation Tool :
- Download Microsoft’s Media Creation Tool.
- Open the tool and accept the license agreement.
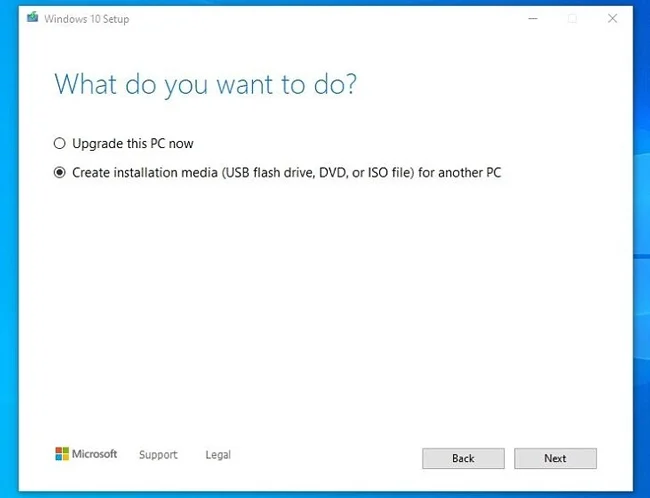
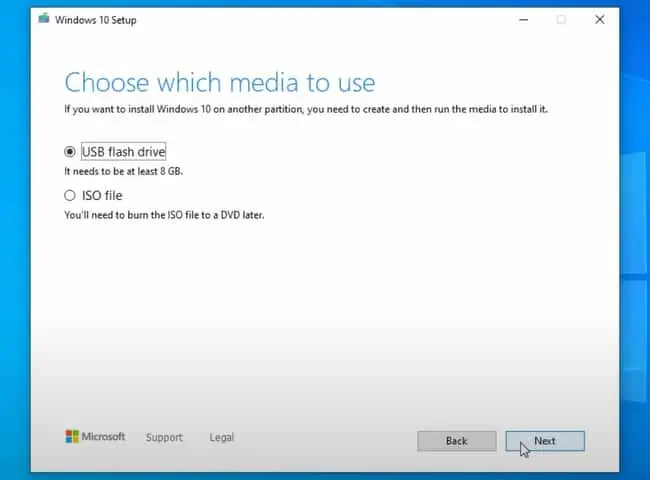
- Select Create Installation media for another PC and select the type of media to use.
- Once the installation media is created, reboot your Computer.
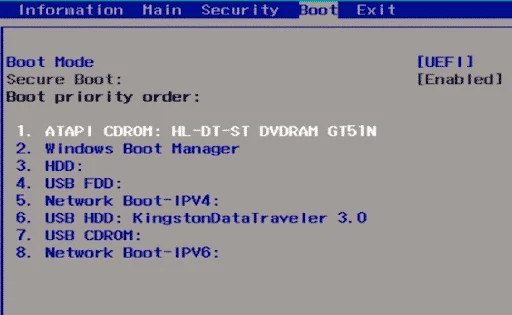
- Press the BIOS key and navigate to the Boot or Boot Order section.
- Move the USB or DVD media to the top of the list and save the changes.
- Configure the settings as you prefer and select Next < Install Windows.
- Click on I don’t have a product key.
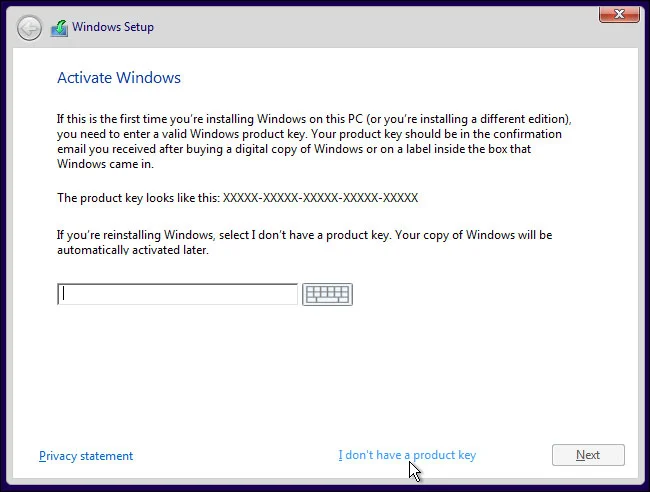
- Select the operating system and press Next.
- Accept the license terms and press Next.
- Select Custom: Install Windows only.
- In the partitions screen, select the partition where you want to install the OS.
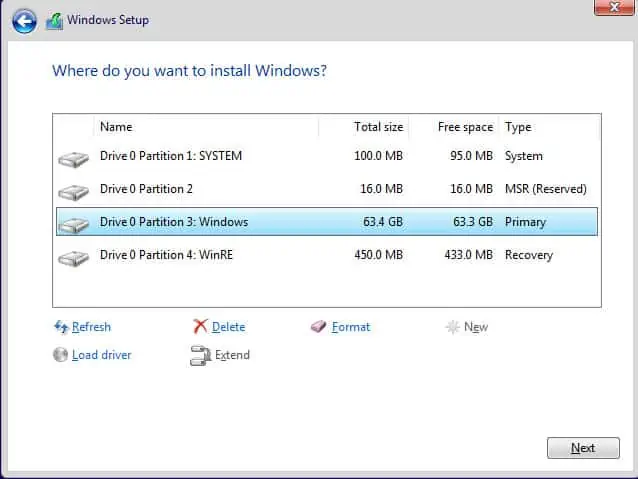
- The PC may restart a few times during the installation process.
- Finally, you’ll be prompted to configure the region, user account, privacy, and similar settings.
- Once you’ve done that, the installation is complete.
