
In this article, we will show you how to turn on or set up Wi-Fi on Dell laptops running Windows 10, Windows 8, and Windows 7. For this you need to read till the bottom.
Process to Connect a Dell Laptop to Wi-Fi :-
- Select the Windows Action Center icon in the lower-right corner of the system tray.
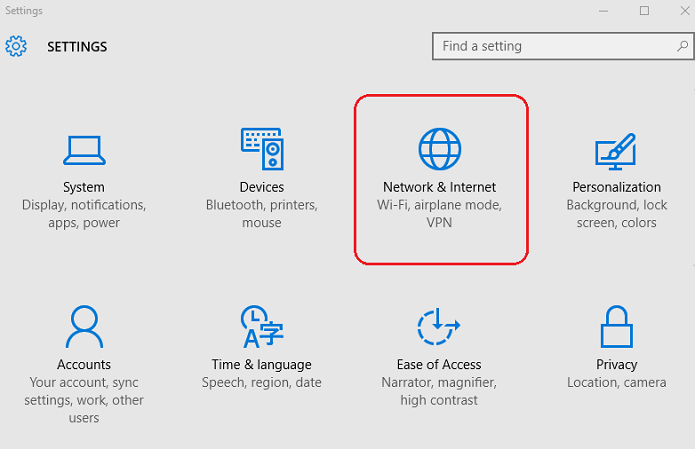
(You can also select the network icon in the Windows task tray, but it will look different depending on your connection status.) - In the Windows Action Center, choose Network.
- Select Wi-Fi. The icon will be highlighted when enabled.
- Select the Wi-Fi network you want to join and enter the password. Once you see Connected under the network name, you can start using the Internet.
Way to Disable Wi-Fi on a Dell :-
To turn off Wi-Fi, open Your networks and select Wi-Fi again to disable it. The icon will be grayed out when disabled.
How to Enable Wi-Fi on Windows 8 and Windows 7 ?
- On the Windows 8 Start screen, turn wireless devices on or off, turn on Wi-Fi, and turn off Airplane Mode.
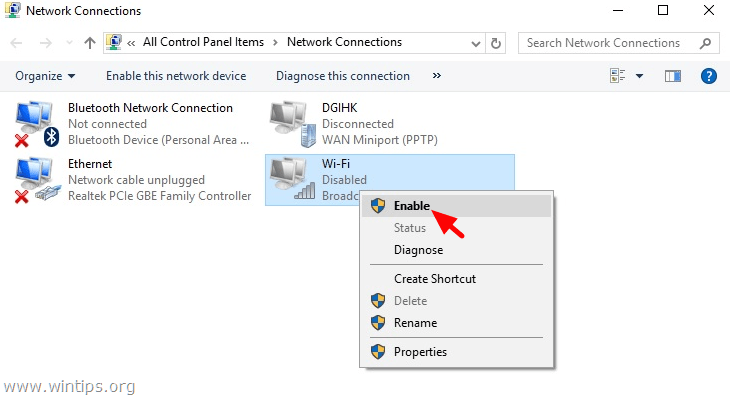
- On Windows 7, open Control Panel and go to Network and Internet > Networking and Sharing Center > Change Adapter Settings, then right-click the wireless network connection and select Enable.
How to turn on Wi-Fi With FN+F2 ?
On some laptops, you can turn Wi-Fi on and off with the keyboard shortcut Fn+F2. If it’s an option on your PC, you’ll see the Wireless icon on the F2 key.
Where Is the Wireless Icon ?
Your Dell laptop has a physical wireless icon light near the battery indicator light. It turns on when Wi-Fi is enabled and turns off when it is disabled.
The network icon appears in the Windows system tray. When Wi-Fi is disabled, you will see an X or symbol. When your device is in Airplane Mode, it looks like an airplane.