If this happens to you, your ASUS laptop won’t turn on but the light is on, don’t worry. It is common. This can happen with any laptop brand. Our team has tested a few methods to solve this problem and they have been successful. We are going to share the solution of the same test with you.
Why does it happen that the ASUS laptop does not turn on but the light is on ?
There are many problems where your laptop won’t turn on but the power light is on, charging, charging light comes on, keyboard lights up, caps lock flashes, fan turns on, etc. Sometimes, the laptop does not turn on, even when plugged in.
In most cases, these are for the battery. If your laptop battery is damaged or damaged, it is unable to provide power to the laptop. But, sometimes the computer system can be responsible for laptop not turning on. This can also happen because of external hardware.
How to recover data if your ASUS laptop won’t turn on ?
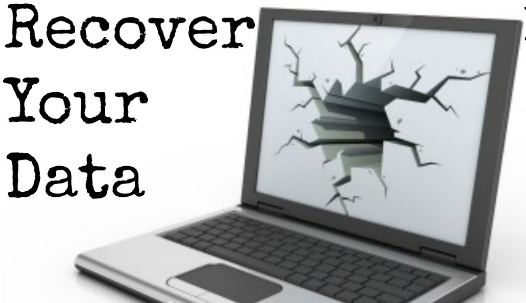
Before ASUS laptop troubleshooting, it’s better to move files from your ASUS laptop first. I’ll show you how to use two programs to get data off a broken laptop.
The whole recovery process includes two stages.
The First Way : Turn to MiniTool Power Data Recovery
Method 1 : make a bootable disk.
- Find another computer and go to this page to select the license for MiniTool Power Data Recovery. (You can use the trial version to experience the software. But if you want to recover files, you need an advanced version with snap-in WinPE Bootable Builder.)
- Install the software on the computer and register it with your license.
- Launch Power Data Recovery and click on the bootable version icon at the top right.
- In the MiniTools Media Builder window, click WinPE-based media with the MiniTools plug-in.
- Choose media destination from ISO file, USB flash disk, and CD/DVD; The latter two options are recommended. (Before this step you better connect a USB drive/CD/DVD.)
- Wait for the disk creation process to complete.
- Click Finish in the bottom right. Now, properly remove the bootable disc from this computer.
Method 2 : Use a bootable disk to recover files from hard drive.
- Find USB Flash Drive/External Hard Drive and connect it to your ASUS laptop which will not boot.
- Connect bootable disc (USB drive/CD/DVD) and restart ASUS laptop.
- Look carefully at the screen and press the button that appears on the screen to enter the firmware settings (BIOS or UEFI).
- Navigate to the option that determines the order of boot devices (the option has a different name on different laptops).
- Modify the boot sequence to accommodate this bootable disk that you created in the first place; Then, quit the Firmware Settings utility and save the changes.
- Wait for the boot process to finish and then you will see the following interface.
- Please select the first option from the MiniTool PE Loader window.
- Now, you will see the main software interface. Simply select and hold Logical Drives.
- Take a look at the drive shown below it and choose the one that contains the data you need. (You can also select the device next to it and choose a disk overall to scan and recover data from a laptop hard drive.)
- Click on Scan button and wait.
- More and more files and folders will be found and listed by the software. You can browse through them carefully to select the one you need (add a check in the square box at the front of the file).
- Click the Save button in the lower right corner to bring up the directory selection window.
- Look for the drives you can select as the destination (since your ASUS laptop will not boot, you should select the connected USB drive/CD/DVD in step 1; you should make sure it has enough free space) .
- Click the OK button at the bottom of this window to confirm.
- Just wait until you see a notice window (it says Congratulations! The selected files have been saved at your specified location).
- Click on the OK button on it. And if you have got all the files you need then you can close the software now.
The second way : Use MiniTool Partition Wizard
Furthermore, it involves two steps.
Step 1 : You should follow above given instructions to create MiniTool Partition Wizard bootable disc. Click here to purchase a license for MiniTool Partition Wizard.
Step 2 : Use a bootable disk to copy the partition/disk.
- Connect an external hard drive (with a larger capacity) to an ASUS laptop that won’t power on.
- Connect the bootable disc you just created and restart your laptop.
- Repeat Step 3~Step 5 mentioned above to change boot order safely.
- Wait until you see MiniTool PE Loader.
- Please click on the first option to launch the software.
- Select the desired partition/disk from the right pane.
- Click on Copy Partition Wizard/Copy Disk Wizard from the left pane.
- Follow the on-screen instructions in the wizard to copy the partition or disk to the external hard drive you connected in Step 1.
Asus laptop won’t turn on but the light is on so how to fix it ?
Given below are some steps, follow them properly and get the solution to the problem.
- Press (Fn +F7) to turn the display on/off, which may vary by model. Please check the user manual to be sure.
- Make sure your laptop has enough brightness to show the display. Press the (Fn + F6) keys to adjust the brightness.
- How To Fix ASUS Laptop Light Won’t Turn On.
- We are going to share several methods to force restart ASUS laptop, if one method doesn’t work for you, then try another.
Way 1: Check Performance
- To see if it is a problem with the laptop display, connect an external monitor to your laptop.
- Press Fn + F8 to toggle between laptop display and external monitor.
- If the external monitor has no response, ignore this method and try another method.
- If the display is fine on the external monitor, visit the official ASUS support site. Then, download the graphics driver and install it.
Way 2: Hard Reset
- Remove all external devices like USB mouse, internet cable, keyboard, HDMI, memory card, CD-ROM etc.
- Plug the device into the AC adapter to charge it directly.
- Then, remove the laptop battery.
- To force shut down, press and hold the Power button for 20 seconds (until the power light turns off).
- Unplug the AC adapter.
- To reset CMOS, press and hold the Power button for at least 40 seconds.
- Reinstall the battery and plug in the AC adapter.
- Then, restart your laptop.
Way 3: Restore RAM
- If Method 1 and Method 2 don’t work for you, remove the RAM.
- Install it again after a few minutes.
- Check the RAM slot to see if the RAM is properly seated.