Map drives let users easily and quickly navigate a network. Using map drive on pc, you can simply click to access network resources, whether you’re working in Windows Explorer, My Computer, software application dialog boxes example., Open and Save. This article explains how to map a network drive using Windows 10, 8, and 7.
What are the advantages of a network drive?
- A map network drive and its files can be shared with many people.
- Permissions can specify the people you want to be able to view or edit the files.
- Network drives are a central storage location that makes them easier to back up and mirror.
- NAS and SAN solutions can make adding storage easier.
How to map a network drive on Windows?
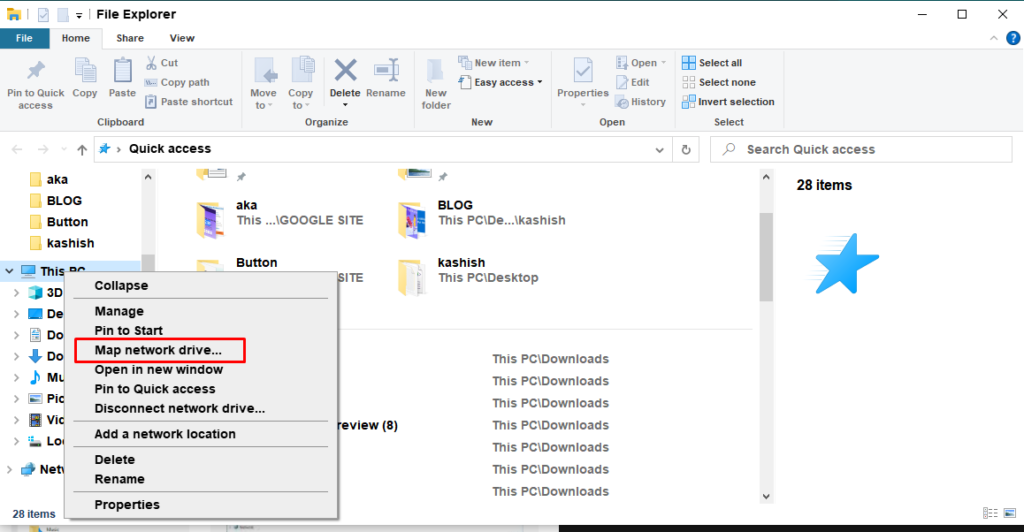
- Open your Start menu and find File Explorer.

- Right-click on This PC and select Map network drive. This should open a Map Network Drive wizard.

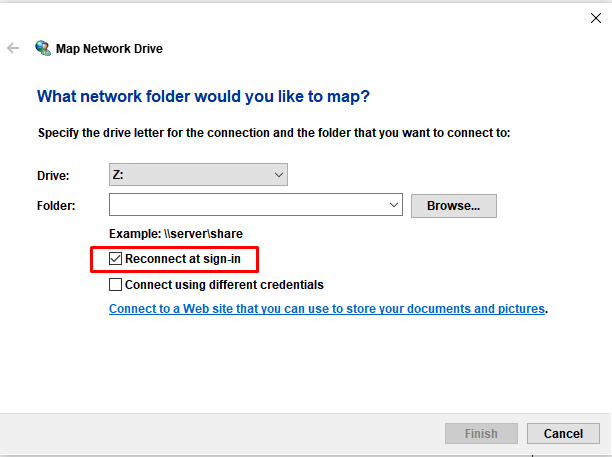
- Select the drive letter you want to use for the network path as the folder.

- Click the Browse button to select the folder you want to connect to and click OK.

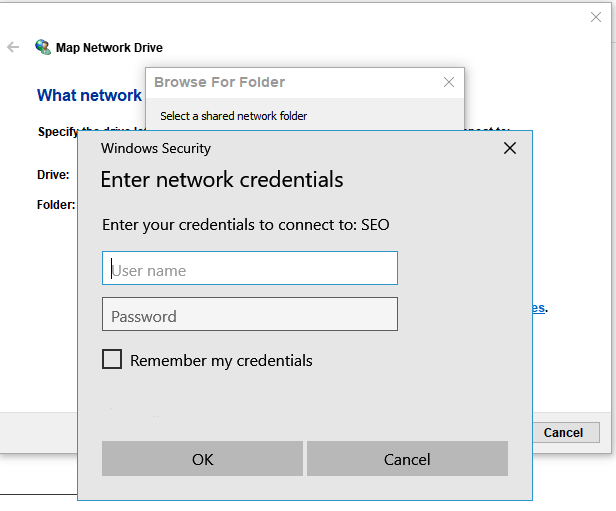
- Fill in the username and password to map the shared folder if prompted.

- Ensure “Reconnect at Sign-in” is checked. Click Finish.

How do I map a drive in the command prompt?
- Search for Command Prompt and click the top result to open the console.
- Type the following command to map a drive assigning drive letter manually and press Enter:
Note: In the command, replace “D” with the drive letter not already in use you want to use. Then replace DEVICE-NAME-OR-IP and SHARED-FOLDER for the computer name or IP address of the device hosting the shared folder and the name of the shared.
- Type the following command to map a drive assigning drive letter automatically and press Enter:
Note: In the command, the (*) is the option that allows the system to assign any drive letter that is not already in use. Then replace DEVICE-NAME-OR-IP and SHARED-FOLDER for the computer name or IP address of the device hosting the shared folder and the name of the shared.
