In this tutorial you will learn everything you need to know about the Task Host window.
Find out why it appears when you try to shut down your computer and how it works properly.
While it’s usually easy to fix, in some cases you’ll need to use a more advanced solution, such as going to “Local System Control Panel” or “Current User Control Panel,” to resolve an issue that prevents Windows from shutting down.
As such, most people become aware of the Task Host window when they try to shutdown computer while programs are running in the background.
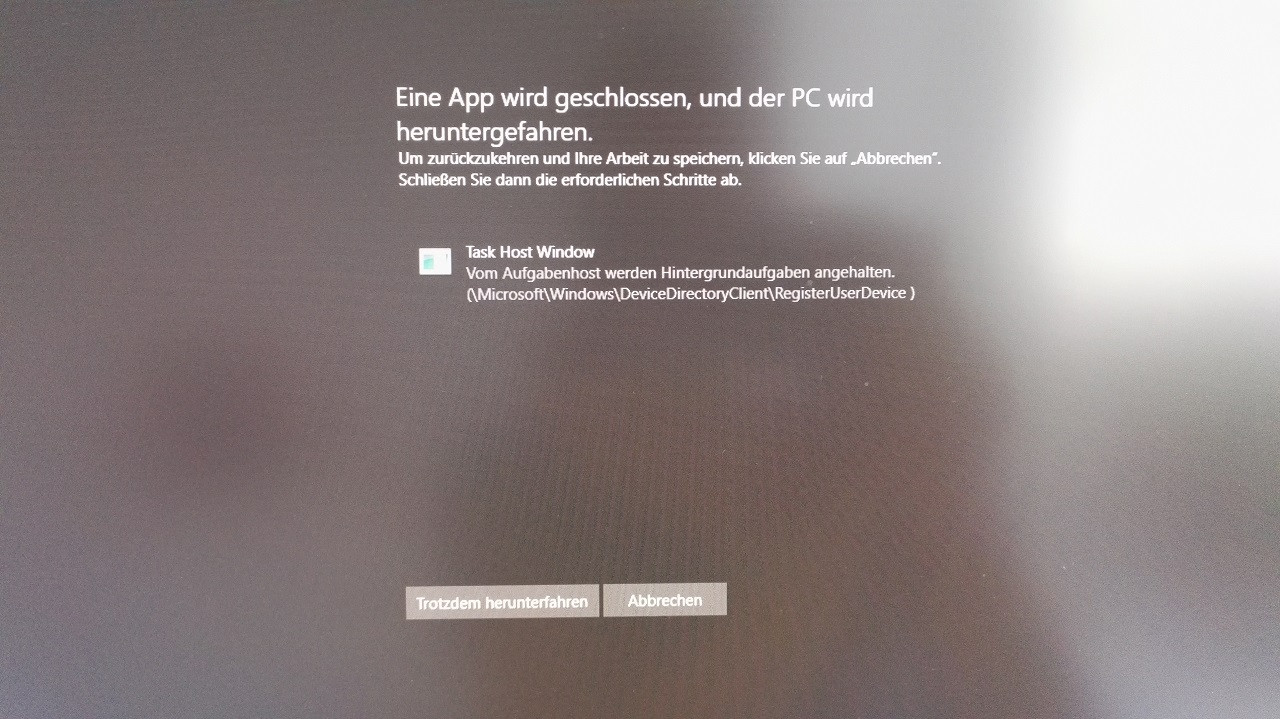
In principle, if a program is still open when you try to shut down your computer, the operating system will open a window asking you to quit the program or give you the option to shut it down anyway. For system security, you must close all running programs before you shut down your Windows computer.
Normally, shutting down Windows without shutting down the program is fine. However, if you are working on a draft in Word or an Excel spreadsheet, for example, you should go back and save your work before closing Windows, because you may lose data if you do not do so.
What is Task Host Window?
Not to be confused with Host Process for Windows Tasks, Task Host Window is a Windows program that runs in the background to help protect your computer from unwanted shutdowns, so it usually shows up when you’re trying to shut down your Windows PC. Sometimes it also pops up when you’re trying to reboot your computer.
Also, in case you were wondering, Task Host Windows is not a virus.
This is how it works. When you try to shutdown or reboot your Windows computer, task host interrupts either the shutdown or reboot process to check if all programs were appropriately closed prior to shutdown. This is done in order to avoid data corruption or data loss. So, to avoid data loss, the pop up shows you which programs are running so you can go back and close them before shutting down or rebooting your pc.
According to Microsoft customer service, you should close all running programs before shutting down or rebooting your Windows-based computer.
With that said, Task Host Window is a feature, not a bug, and certainly not a virus.
Method 1 – Launch Windows Update Troubleshooter
- Click on the Start button and then on the gear icon to open your PC’s settings page.
- Select the Updates and Security option and then click on the Troubleshoot button to open the Troubleshooters page.
- Scroll down and click on the Windows Update Troubleshooter to run it.
This should fix the problem, but if it doesn’t, proceed to the next step.
Method 2 – Restart InstallService Service
- Open Windows Services Manager.
- Scroll down and right-click on InstallService and select “Restart.”
- Reboot your Windows PC.
If restarting InstallService service doesn’t work either, proceed to the next step.
Method 3 – Turn Off Hybrid Shutdown/Fast Startup (Recommended)
Windows Hybrid Shutdown/Fast Startup is used to speed things up, however, this functionality may also be the culprit. You can turn off hybrid shutdown/fast startup like this:
- Press Win+R to open the Run window.
- Now type the command powercfg.cpl.
- Select “Choose what the power button does.”
- Click on “Change settings that are currently unavailable.”
- Deselect “Turn on fast startup.”
Some people get it wrong in step 3, Choose what the power button does, because sometimes they can’t seem to find the option which is located in the left pane. Keep this in mind as this is important to note because Method Three is one best ways to fix the problem.
Did turning off hybrid shutdown/fast startup fix the issue? If it didn’t, proceed to the fourth and probably final step.
Method 4 – Reduce Shutdown Time
If none of the previous solutions fixed the problem and task host is still stopping background tasks, you may want to try this out:
- Press Win+R to open the Run window.
- Type regedit and press enter or click OK to open the registry editor.
- Now navigate to the following path: HKEY_LOCAL_MACHINE/SYSTEM/CurrentControlSet/Control.

- In the right pane double click WaitToKillServiceTimeout and change the value to either 2000 or 5000.
- Now navigate to the following path: HKEY_CURRENT_USER/Control Panel/Desktop.
- Highlight desktop in the left pane and right click in the blank space in the right pane, then choose New > String Value, and name the String Value WaitToKillServiceTimeout.
- Now in the right pane, right-click WaitToKillServiceTimeout and edit the value to either 2000 or 5000 and press enter apply the change.
- Exit the registry editor and reboot your computer to check if the issue has been solved.
Although step 3 and step 4 may seem complicated, they’re not. Actually, according to several users, opening the registry editor and navigating to the user control panel desktop path to edit the WaitToKillServiceTimeout is the fastest and easiest way to fix the issue.
However, even though the problem may be the same for all users, not every user can apply the same procedures to fix this problem.
For some, just opening the the Run window, typing regedit, and pressing enter to launch the registry editor and navigating to certain paths such as machine system currentcontrolset control and HKEY current user control to change the WaitToKillServiceTimeout value simply won’t work. That’s why we’ve decided to share several solutions, because if one solution doesn’t work, you’ll have to choose another one that does.
Method 5 – Modify Account Settings
If opening the registry editor and navigating to the local machine system currentcontrolset to change the WaitToKillServiceTimeout values doesn’t work either, try this solution instead:
- Press Windows + S and type “account” in the search bar.
- Click on “Manage your account.”
- In account settings, go to “Sign-in options” and turn off “Use my sign-in info to automatically finish setting up my device after an update or restart” by unchecking the option.
- Try to restart your Windows computer to see if the problem has been solved.
Users affected by the latest update will be glad to know that following these steps will likely fix your problem. However, if following these steps does not fix the issue move to Method 6.
Method 6 – Run a Windows Defender Online Scan
If nothing seems to work, then you may have malware or viruses on your computer that are preventing Task Host from initiating shutdown. You can use Windows Defender, which is Microsoft’s default antivirus for Windows, to perform a scan and fix the issue:
- Press Windows + I to launch the run prompt dialog box.
- Select “Update and Security” and then click on the “Windows Security” option located in the left pane.
- Select “Virus and Threat Protection” settings and then click on the “Scan Options” button.
- Now select the “Windows Defender Offline Scan” option and click “Scan Now” to perform a system scan.
- Try to shut down your computer again.
Method 7 – Install Delayed Update
The Task Host Windows is Preventing Shutdown message sometimes pops up when a new update file has been downloaded to your computer but it can’t be installed. You can open and run the Windows Update Troubleshooter to fix the problem. Here’s what you need to do:
- Press and hold Windows + I at the same time to open the settings.
- Select the “Update and Security” option.
- Now select the “Troubleshoot” option in the left pane and click on “Windows Update.”
- Select the “Run Troubleshooter” option.
- Wait for the troubleshooter to automatically find the cause and then fix it.
- Once the update has been installed, check to see if the problem has been fixed.
You can try the solutions mentioned above one by one to fix the “Task Host window prevents shut down on Windows” issue. One of them can help you a lot!