Changing process of your apple id on iPhone contains parts such as first signing out of your existing apple id and then signing in with a new id, this whole process can be done in simple set of steps. This should not take more than 3-5 minutes, and you’ll be up and running with the new apple id right away. Here’s how:
Part 1
Sign Out of Apple ID on iPhone
In this part when you sign out an apple id, you need to follow given steps :
- Launch the ‘Settings’ app on your iPhone.
- For iOS 13, tap the apple id name & photo at the top of the screen and if you’re running iOS 12 or earlier, then you should tap on icloud.
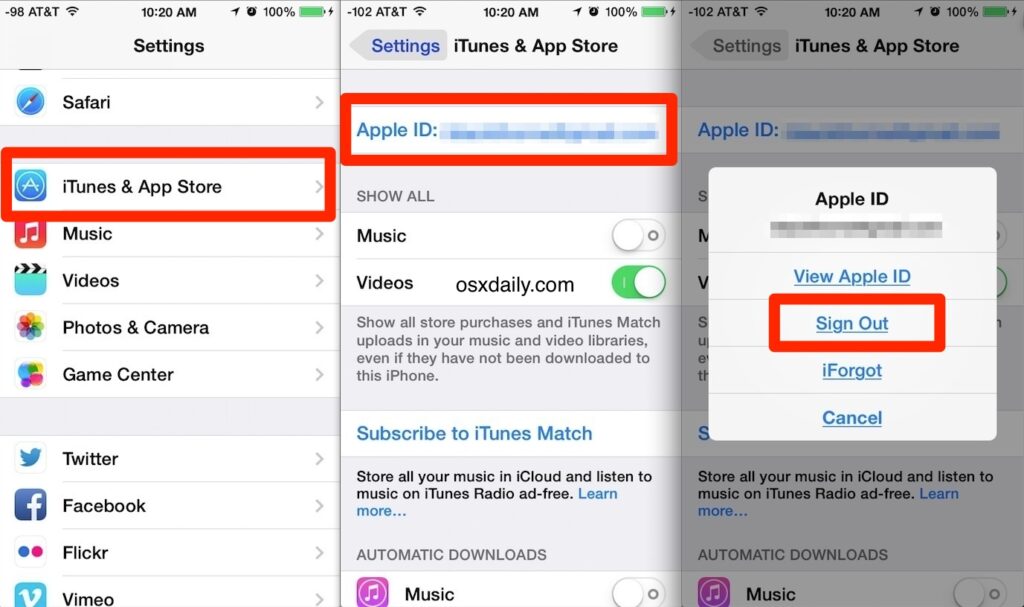
- Scroll down a bit and then tap on the ‘Sign Out’ link, you use the same account for icloud and the iTunes Store, you’ll be asked to enter your apple id password. And while you use two different accounts, you’ll be given options like this:
- Sign Out of icloud and Store/ Sign Out of icloud
- Sign Out of Store
- Then select which data from icloud you want to keep or delete using the toggle switches. Then choose ‘Sign Out’ again to remove the apple id from your iPhone. And you’ll sign out of your apple id.
Part 2
Sign In with a Different Apple ID on iPhone
Now you have managed to remove the apple id that was previously being used on an iPhone, at the next step let’s see, how we can sign in with a different apple id on the iOS device.
- For this to happen, launch the ‘Settings’ app on your iPhone. Then select the ‘Sign in’ to your iPhone link at the top of the screen. If you see a name or photo here, follow the steps as given in the ‘Part 1’ section.
- To go in this way, enter the required email address or phone number associated with the different apple id you want to Sign in with. Then enter the password.

- In the condition when you already have some data on your device such as contacts, calendars etc. you will be asked if you want to merge that data with this new apple id you are signing in with. Then tap ‘Merge’ if you want to merge data otherwise tap on ‘Don’t Merge’.
If you follow such steps as given above you’ll successfully change an apple id on iPhone.
How to make a new apple id ?
If you are setting up your first apple id or you are creating a new one, you can follow the instructions or steps given below :
- Firstly, open ‘Settings’ and then tap ‘Sign in’ to your iPhone.
- Now tap ‘don’t have an apple id’ or ‘forgot it’ option.
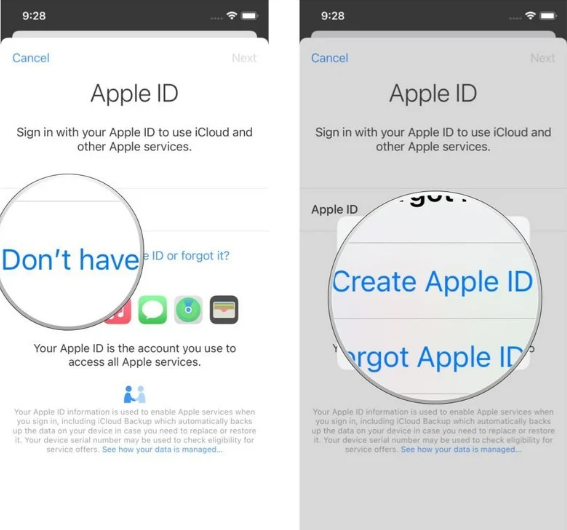
- At the next step, tap create apple id in the pop-up menu.
- Then enter details such as your name and date of birth and tap ‘Next’.
- Then enter your email address. You can also tap ‘Don’t have an email address’ option to get a icloud email address, which you can use as your apple id.
- After that, enter a password. This will be the password for your new apple id, so be sure to choose something you can remember easily.
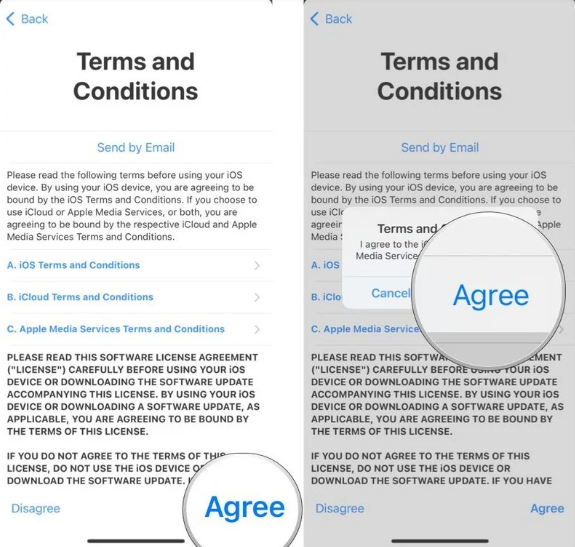
- Then tap ‘Agree’ on the ‘Terms and Conditions’ as shown on the screen. Then choose Agree again on the pop-up menu to confirm the whole process.
