Pictures are important. Whether you have a website or use social media, consumers love pictures – no matter what device they use. If a site uses poor image quality or its pages take too long to load because the image files are too large, some consumers will be killed immediately. On the other hand, high-quality images that are easy to load can improve a brand’s reputation.
Your business needs to know the basics of resizing and editing images. You don’t have to be a graphic design expert; Image editing and photo compression is something that anyone can easily find out.
— >> Broken Image Icon
What is Photo Compression?
Photo compression or image compression is a process that reduces the file size of an image so that your computer’s memory is small without compromising image quality. Compressing photos is not a complicated process and is a great way to save your computer’s memory.
Why do we need Image Compression?
Photo compression saves space on your computer and makes it easier to send by e-mail or publish it on the web, because photos take up less memory. Compression is a useful tool, especially if you need to edit an image for your website or marketing post on social media. Because compressing photos is not too difficult, there is no reason to avoid the process due to initial ignorance.
1. How to Reduce Image Size Using Microsoft Paint?
Microsoft Paint is included with every Windows, making it easier to navigate when you need to reduce the image file size.
Microsoft Paint also provides basic graphics editing tools, as well as the ability to open and save images in most standard formats. To quickly reduce the size of your JPEG, follow the steps below.
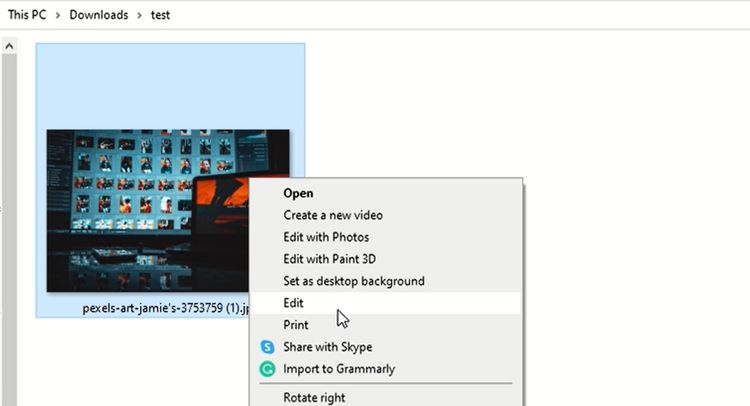
- Find the image you want to edit, right-click on it and select Edit. This will open the Paint image.
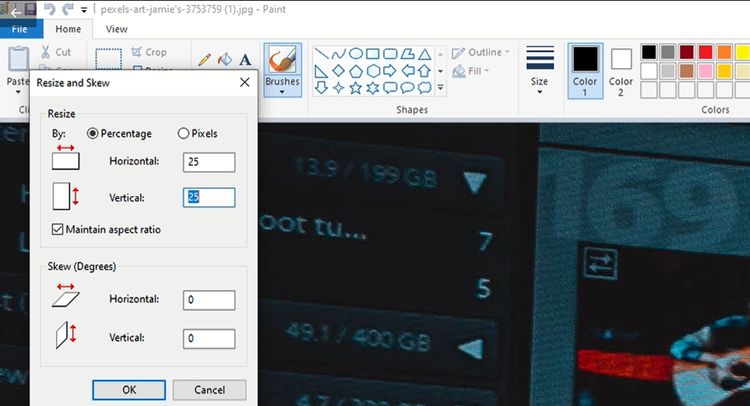
- On the Home tab, click Resize.

- In the Resize dialog box, select and move the Maintain aspect ratio check box. In this way, the resized image has the same aspect ratio as the original photo. If the Maintain aspect ratio check box is selected, simply enter a horizontal value (width) or a vertical value (length). The next field in the updated area is updated automatically.
- Select whether to reduce the image by percentages or pixels.
- Enter a percentage value or a pixel value to reduce the width of the horizontal frame, or enter a percentage value or a pixel value to reduce the length of the vertical frame.
- Click the OK button.
- Choose File> Save As. Select a file format for your image.
- Enter a file name and select Save.
2. How to Reduce Image Size Using Preview?
Every Mac running OS X or later has a preview installed. Preview is an image and PDF viewer. In addition to the ability to view and print images and PDF files, these image formats can also be edited.
This is a quick and easy way to reduce the image size. To update your image using the preview, follow the steps below.
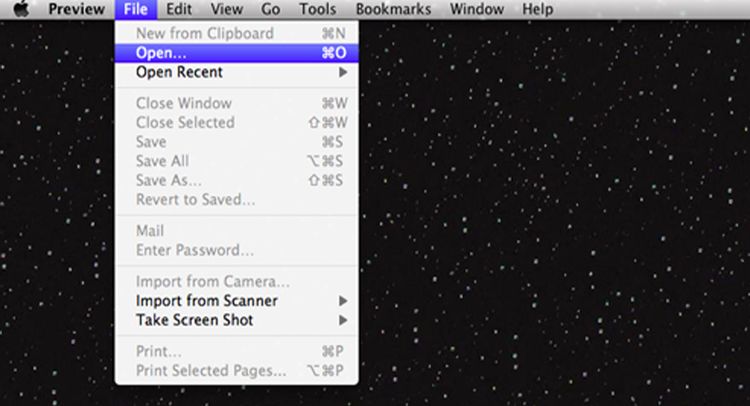
- Open the preview image by launching Preview in the Applications folder. Alternatively, when you click on the image, you can select Ctrl and then choose Open> Preview.
- From the Tools menu in the menu bar, select Fit to Size.
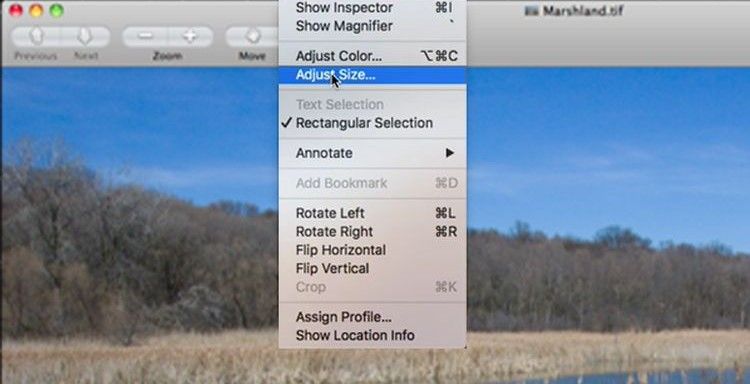
- In the Image Measurement pop-up window, select whether you want to make adjustments by percentage or size.
- Adjust the width / height and resolution. If you change these values, the Result Size section tells you how big your new file is.
- Click OK to see what the updated image will look like.
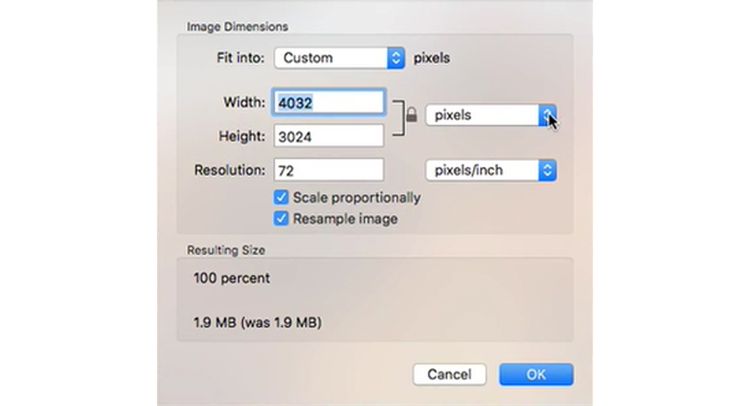
- Choose File> Save As and make a new copy of your JPEG.
- Enter a file name for the image and click Save.
3. How to Reduce Image Size Using the Image Size App?
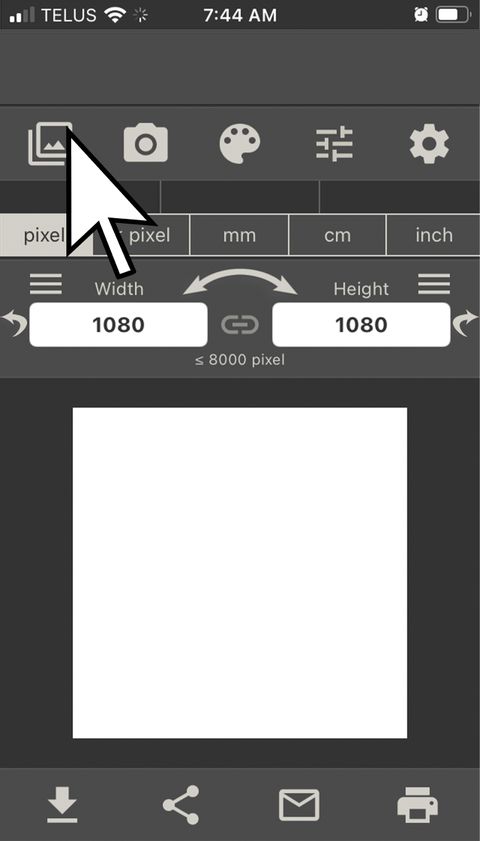
The Image Size application allows you to resize the image to any size you need. You can set the output format in pixels, millimeters, centimeters, or inches. It also allows you to save the aspect ratio of the image as needed.
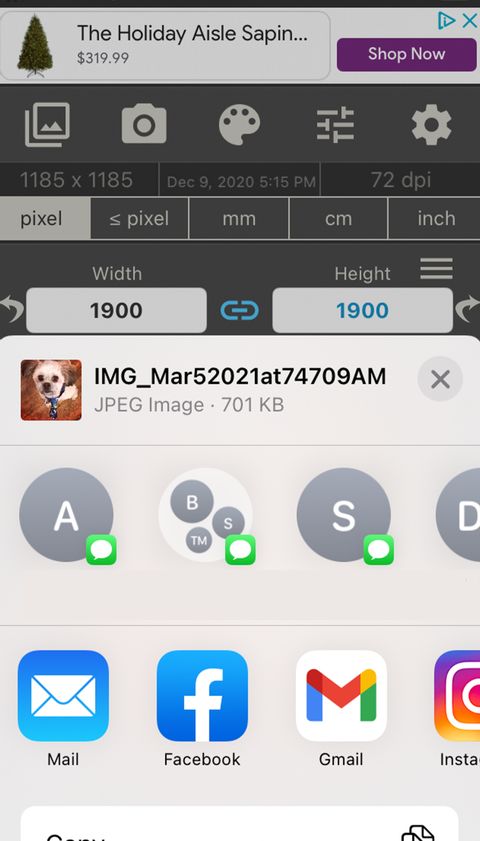
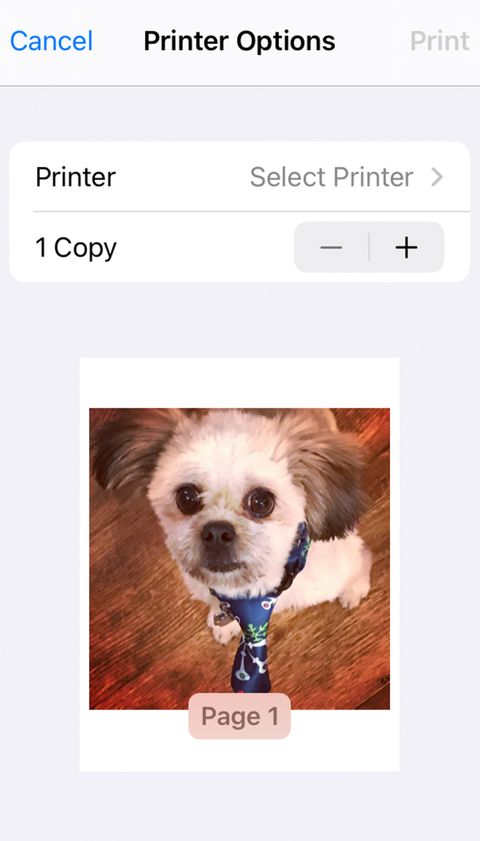
This application gives you the ability to save, email, print or share the final image. Follow the steps below to start resizing photos on your iOS device.
- Download and install Image Size on your device.
- Open the image using the Gallery icon, or take a photo using the Camera icon.
- Select Select to confirm the selected image.
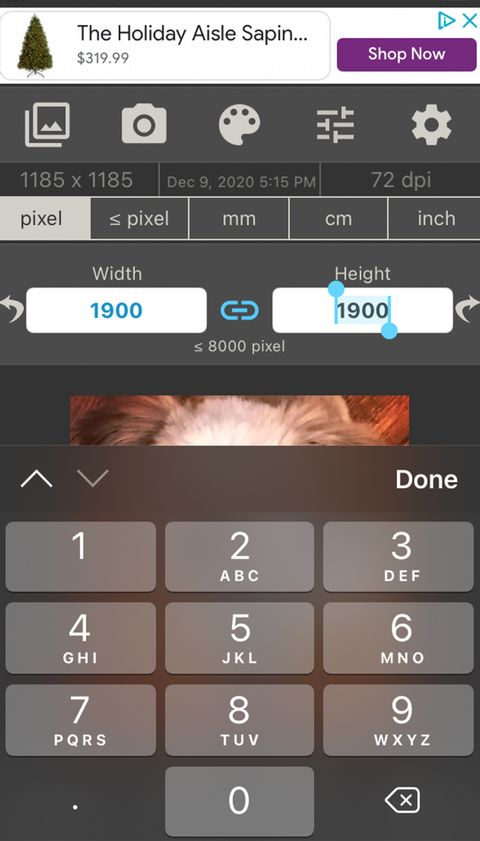
- Enter the desired output size in the Width and Height fields.
- To maintain the aspect ratio, select and find the string between width and height. You can also adjust your units of measure to suit your needs. Below the image, you can see the original size compared to the new image size.
- Once you have the correct image size, you can choose to save, print, send, or share the image.
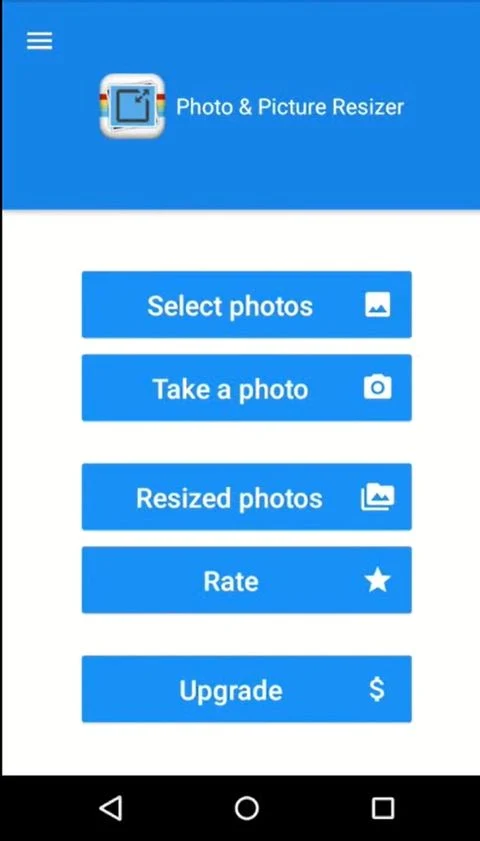
4. How to Reduce Image Size Using Photo & Picture Resizer?
If you want to replace photos directly on your Android device, Photo & Picture Resizer is a great choice.
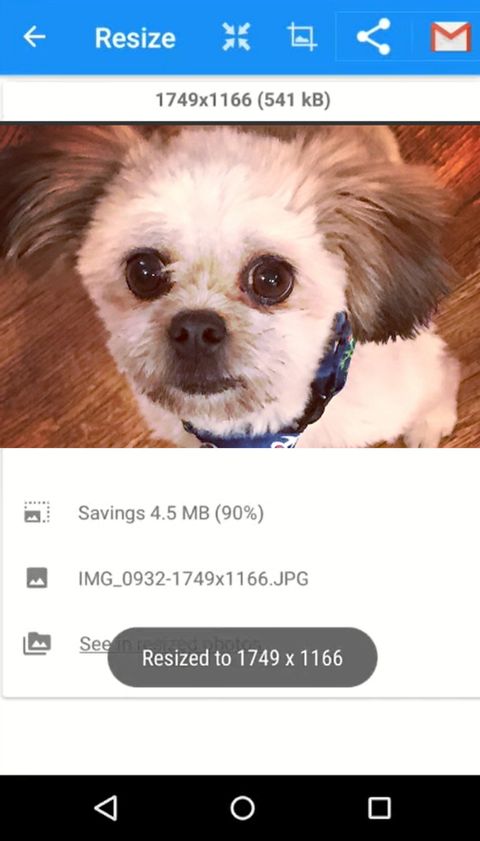
With this application you can easily reduce the size of the image without losing quality. You do not have to save the updated photos manually because they are automatically saved in a separate folder.
- Download and install Photo & Picture Resizer on your device.
- Open the photo with the Select Photos button, or take a photo with the Take Photo button.
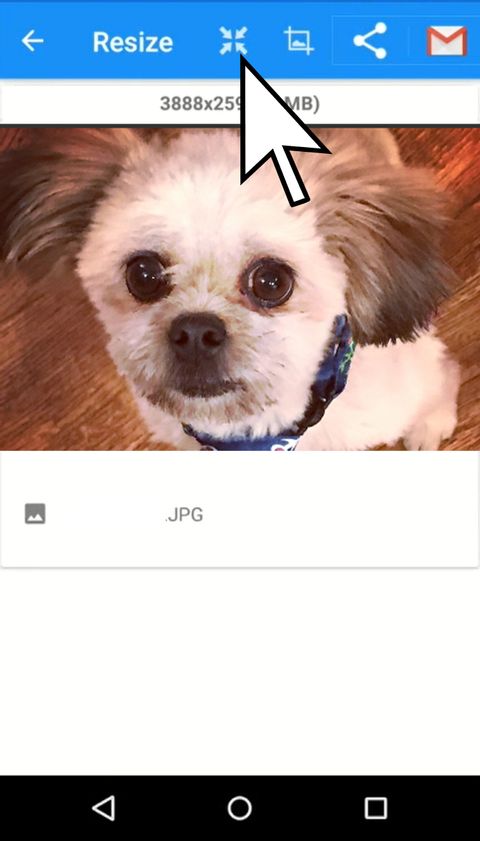
- Select one or more images to resize.
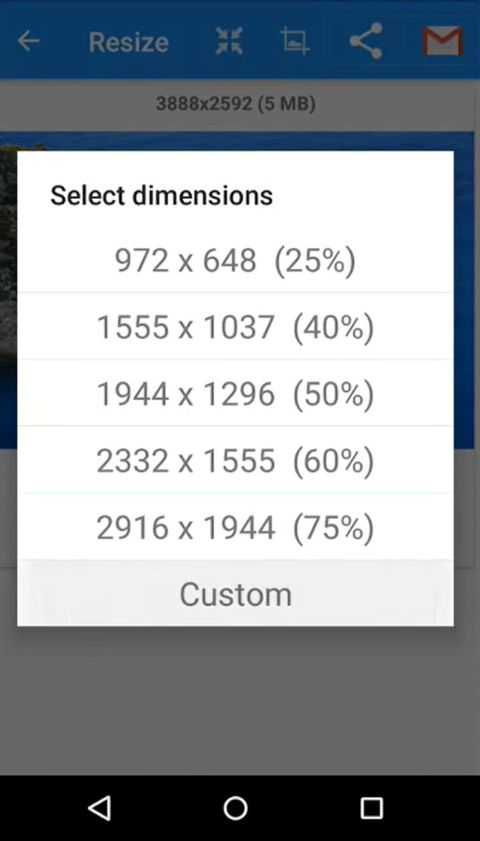
- Select one of the dimension options in the Select Dimensions window. You can select Custom, but it is recommended that you select one of the recommended resizing.
- Your newly modified images are automatically saved in the Images / PhotoResizer folder. You can choose to email or share your image on one of the many online platforms.
How to Reduce Image Size Using Shutterstock’s Online Image Resizer?
Shutterstock’s Free Image Resizer is one of many websites that can help you resize images. The best part is that you can easily access it from your browser. To change your pictures in seconds, follow these steps.
- Open the Shutterstock Image Resizer.
- Upload an image or drag it to the box in the first step.
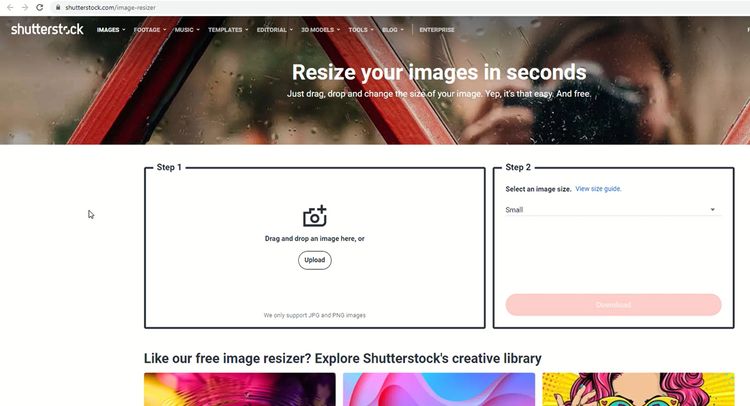
- Select the desired image size. You can use preset sizes or provide your own dimensions.
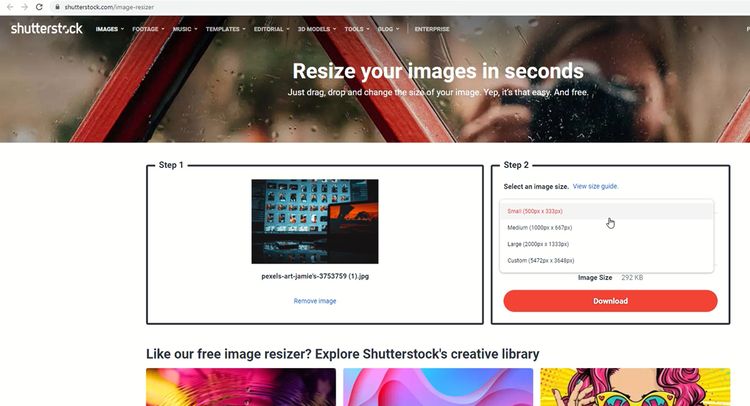
- Select Download to save the file to your computer.
This article is an introduction to JPEG optimization, although it may help answer the question “how to reduce JPEG file size.” There are many tools available in the form of online tools, plugins and add-ons, such as the JPEG file size reduction API. Choose the one that is easy to use and the most suitable for your case.

