Remote Desktop Protocol (RDP) has been a feature of Windows since the XP Pro days. To Windows 10 Enable Remote Desktop means to give remote access to the devices, users will need to enable remote desktop on Windows 10 first.
In the following article, we’ll explain how to enable RDP on Windows 10.
WAY 1 : Set up and Use Remote Desktop Protocol (RDP)
Set up the PC you want to connect to so it allows remote connections:
Step 1: Go to Start > Settings > System > About and look for Edition.
Step 2: Select Start > Settings > System > Remote Desktop, and turn on Enable Remote Desktop.
Use Remote Desktop to connect to the PC you set up:
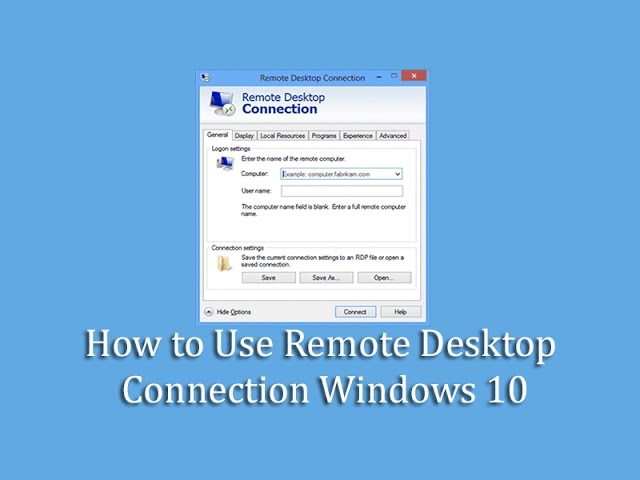
On your local Windows PC: In the search box on the taskbar < type Remote Desktop Connection < select Remote Desktop Connection. In Remote Desktop Connection < type the name of the PC you want to connect to< select Connect.
On your Windows, Android, or iOS device: Open the Remote Desktop app and add the name of the PC that you want to connect and Select the remote PC name that you added, and then wait for the connection to complete.
WAY 2 : Enable Remote Desktop Protocol using Settings App
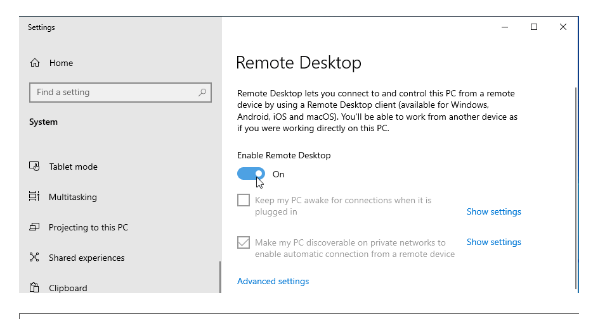
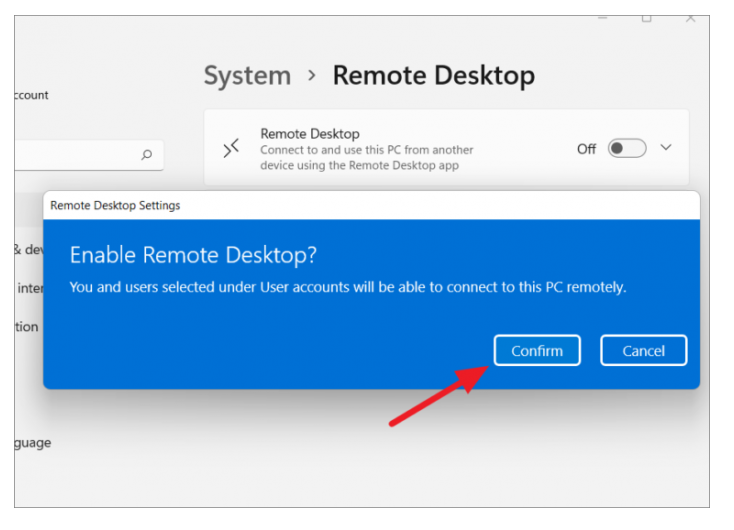
Step 1: Open Settings on a Windows 10 device and select “System”.
Step 2: Click “Remote Desktop”.
Step 3: Toggle the “Enable Remote Desktop” switch to “On”.
Step 4: Hit “Confirm”.
OR
Step 1: Select Start and then click the Settings icon on the left.
Step 2: Select the Remote Desktop Connection option.
Step 3: Click on the enable Remote Desktop option.
Step 4: Click Show settings to enable.
Step 5: Add users who can connect remotely by clicking Select users that can remotely access this PC.
Step 6: Members of the Administrators group automatically have access.
WAY 3 : Enable Remote Desktop Protocol using Control Panel
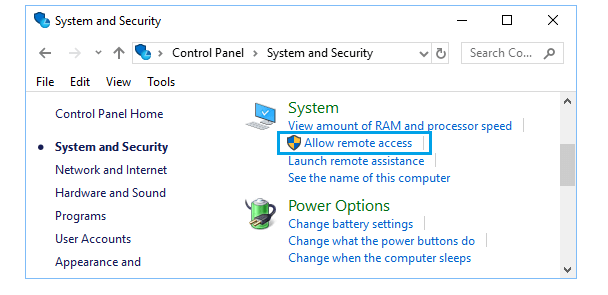
Step 1: Click the Start menu from your desktop, and tap on the Control Panel.
Step 2: Select “System and Security”.
Step 3: Click Allow remote access, located under the System tab.
Step 4: Under the “Remote Desktop” section, select the Allow remote connections to this computer option.
Step 5: Click Add from the System Properties box.
Step 6: Type your myLSU ID and information for anyone else you would like to add.
Step 7: Hit “Apply” and then “OK”.
Step 8: Finally Remote Desktop Connection is successfully “DONE”.
OR
Step 1: Use Group Policy setting to Enable RDP
Step 2: Click Start Menu > Control Panel > System and Security > Administrative Tools.
Step 3: Create or Edit Group Policy Objects.
Step 4: Expand Computer Configuration > Administrative Templates > Windows Components > Remote Desktop Services > Remote Desktop Session Host > Connections.
Step 5: Enable users from connecting remotely using Remote Desktop Services.
WAY 4 : Set up Remote Desktop Connections
Step 1: Open the Remote Desktop app.
Step 2: Click the Add button in the top right.
Step 3: Tap on the PCs option.
Step 4: Under the “PC name” section, specify the TCP/IP address of the remote computer.
Step 5: Under the “User account” section, click the + (plus) button in the top right.
Step 6: Confirm the account information to sign into the remote computer.
Step 7: Under the “Display name” section, specify the ‘account settings’ name.
Step 8: Click the Save button.
Step 9: Under the “Display name” section, specify the connection’s name.
Step 10: Click the Show more option.
Step 11: Select additional settings as necessary.
Step 12: Click the Save button.
Step 13: Under the “Saved Desktops” section, click the connection to start a remote session.
Step 14: Click the Connect button.
Step 15: It will finally connect Remote Desktop.
Should I enable Remote Desktop?
If you only want to access your PC when you are physically using it, you don’t need to enable Remote Desktop. Enabling Remote Desktop opens a port on your PC that is visible to your local PC network. You should only enable Remote Desktop in trusted networks, such as your home.
You should ensure that every account that has access to your PC is configured with a strong password.
How do I know if Remote Desktop is enabled?
Navigate to HKEY_LOCAL_MACHINE\SYSTEM\CurrentControlSet\Control\Terminal Server and to HKEY_LOCAL_MACHINE\SOFTWARE\Policies\Microsoft\Windows NT\Terminal Services.
If the value of the fDenyTSConnections key is 0, then RDP is enabled.
If the value of the fDenyTSConnections key is 1, then RDP is disabled.