Stop Code Inaccessible Boot Device is a type of BSOD errors. Stop Code Inaccessible Boot Device Error mainly occurs in Windows 10. It is a typical “blue screen of death” (BSOD) error with the code 0x0000007b. These errors occur during Windows startup, Windows 10 upgrade, Windows, or Windows 10 reset. This error message often stops computers from booting correctly. The Inaccessible Boot Device error refers to a BSOD error message that occurs when the Windows 10 operating system fails to access the system partition while trying to start up.
Why Stop Code Inaccessible Boot Device Error occurs?
- Drivers are Corrupted, outdated, or misconfigured.
- Hardware conflicts resulting from system updates or changes.
- Due to Malware.
- A damaged hard disc.
Methods to Fix Stop Code Inaccessible Boot Device
1. Uninstall the Recently Installed Packages
To fix Stop Code Inaccessible Boot Device error, you must uninstall the recently installed packages. Follow these steps to uninstall recently installed packages on your device :
- Press ‘Window+I’ keyboard key to open ‘Settings’.
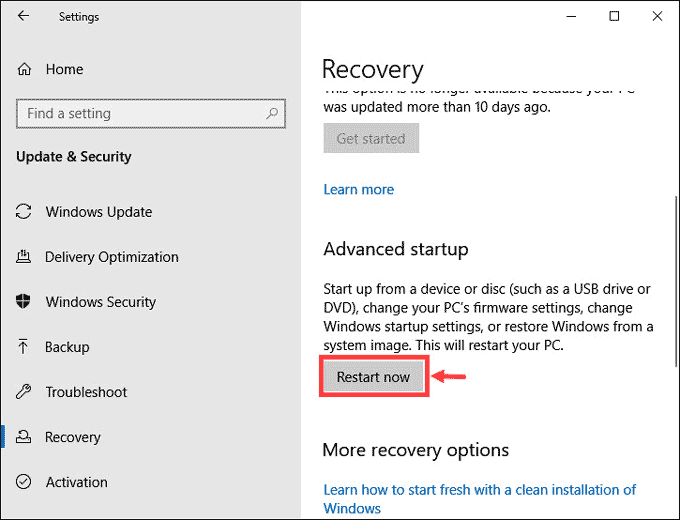
- Click on ‘Update & security’ and then click on ‘Recovery’ option.
- Click on the button ‘Restart Now’ of ‘Advanced Startup’ title.
- Once a blue screen appears, go to the command prompt using this path press Window+R key, type ‘cmd’ and hit ‘Enter’.
- On the command prompt application, type “dir c:” and press ‘Enter’.
- Now, type the command “Dism /Image:c:\ /Get-Packages” and hit ‘Enter’. You will see a list of all the packages along with the date & time of their installation.
- Check the name of the recently installed package. Type the command “dism.exe /image:c:\ /remove-package /[package name]” and press ‘Enter’.
- After complete process, restart your PC.
2. Update Device Drivers
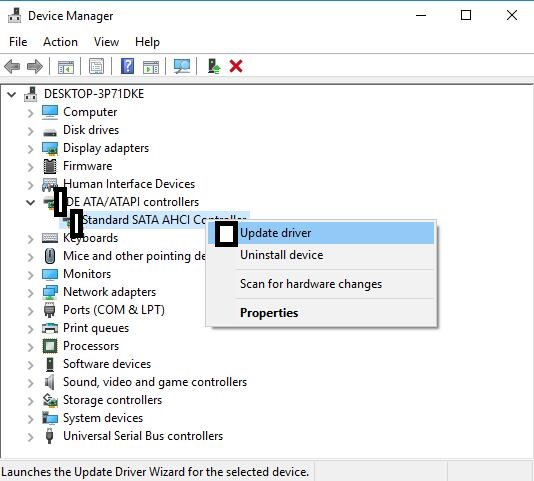
The driver “Standard SATA AHCI Controller” is the cause for error. To fix Stop Code Inaccessible Boot Device error, you must up-to-date your device drivers. Follow these steps to update drivers on your device :
- Press ‘Window+X’ keyboard key to open ‘Power User Menu’.
- Click “Device Manager”.
- Click to expand ‘IDE ATA/SATA controllers’ and right click on ‘Standard SATA AHCI Controlle’. Select ‘Update Driver’ from the context menu.
- Select ‘Search automatically for updated driver software’ option.
- Follow the instructions that display on your screen to update the device driver.
- After complete updating process, restart your PC.
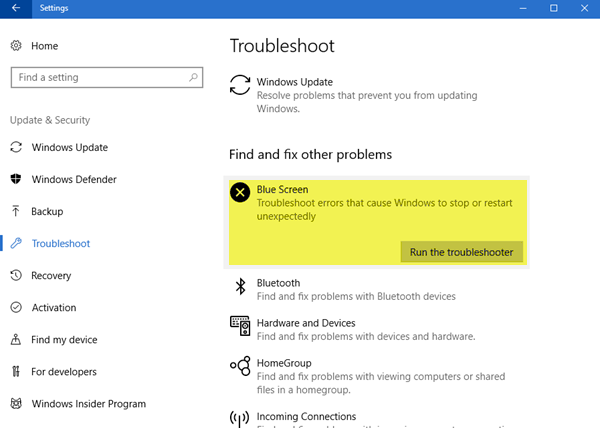
3. Add Blue Screen Troubleshooter Button
Follow these steps to add ‘Blue Screen Troubleshooter’ button :
- Press ‘Window+I’ keyboard key to open ‘Troubleshoot’.
- Click on ‘Update & security’ and then click on ‘Recovery’ option.
- Click on the button ‘Run the troubleshooter’ of ‘Fix and fix other problems’ title.
- After complete process, restart your PC.
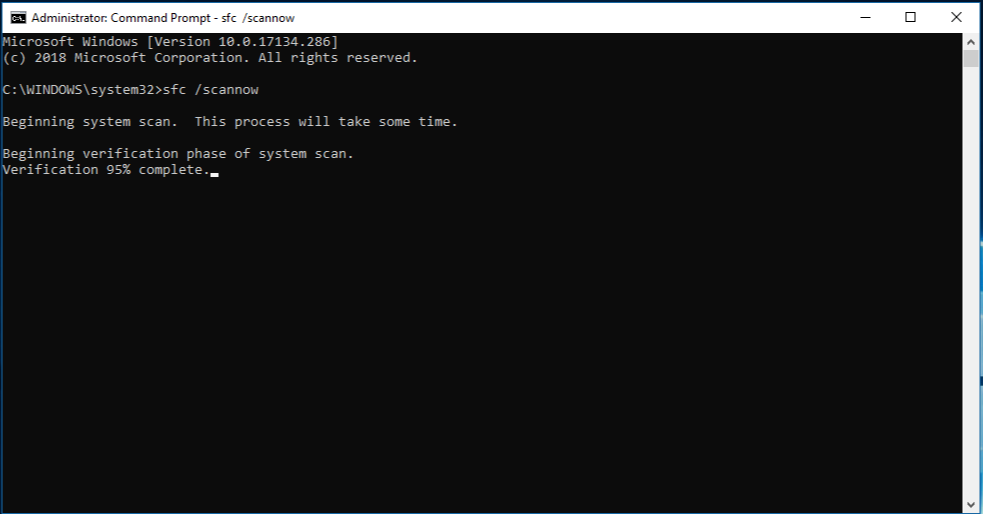
4. Run the SFC Scan
Follow these steps to run the SFC scan :
- Press Window+R key, type ‘cmd’ and hit ‘Enter’.
- On the command prompt application, type “sfc /scannow” and press ‘Enter’.
- Now, type the command “DISM /Online /Cleanup-Image /RestoreHealth” and hit ‘Enter’.
- After complete scanning process, restart your PC.
5. Remove Update Pending Software
Follow these steps to remove Update Pending software on your device :
- Press ‘Window+I’ keyboard key to open ‘Settings’.
- Click on ‘Update & security’ and then click on ‘Recovery’ option.
- Click on the button ‘Restart Now’ of ‘Advanced Startup’ title.
- Once a blue screen appears, go to the command prompt using this path press Window+R key, type ‘cmd’ and hit ‘Enter’.
- On the command prompt application, type “reg load HKLM\temp c:\windows\system32\config\software” and press ‘Enter’.
- Now, type the command “reg delete HKLM\temp\Microsoft\Current Version\Component Based Server” and hit ‘Enter’.
- Type “reg unload HKLM\temp” and press ‘Enter’.
- Type the “dism/image: \ /get-packages” command and You will see a list of all the packages with the tag “Install Pending”.
- Check the name of the Install Pending package.
- Type “MKDIR C:\temp\packages” and press ‘Enter’.
- Type the command “dism / image : C: \ remove package / [Package Name]:/scratchdir:c:\temp|packages” and press ‘Enter’.
- After complete process, restart your PC.
6. Scan the Hard Drive
Follow these steps to scan the hard drive :
- Press ‘Window+I’ keyboard key to open ‘Settings’.
- Click on ‘Update & security’ and then click on ‘Recovery’ option.
- Click on the button ‘Restart Now’ of ‘Advanced Startup’ title.
- Once a blue screen appears, go to the command prompt using this path press Window+R key, type ‘cmd’ and hit ‘Enter’.
- On the command prompt application, type “bootrec.exe /rebuildbcd” and press ‘Enter’.
- Now, type the command “bootrec.exe /fixmbr” and hit ‘Enter’.
- Type “bootrec.exe /fixboot” and press ‘Enter’.
- After complete process, restart your PC.
7. Enable Safe Mode
Follow these steps to enable safe mode :
- Press and hold on the ‘Power’ button to turn your system on and press it again to turn it off. Repeat this process twice or thrice to begin Automatic Repair.
- Once the Automatic Repair begins, click on ‘Advanced Options’> ‘Troubleshoot’ > ‘Advanced Options’ > ‘Startup Settings’ and Click ‘Restart’.
- Now, click ‘Enable Safe Mode’.
8. Reset Windows
Take a full backup of your important files before reset Windows. Follow below steps to reset Windows :
- Press and hold on the ‘Power’ button to turn your system on and press it again to turn it off. Repeat this process twice or thrice to begin Automatic Repair.
- Once the Automatic Repair begins, click on ‘Troubleshoot’ > ‘Reset this PC’ > ‘Remove everything’ and follow the instructions that display on your screen to reset Windows.
- Select the drive where your Windows is installed and reset it.
- This process will take a time. Wait for till complete this process.
9. Enable AHCI Mode
You can enter the BIOS by pressing either the Delete key, the Escape key or the Function key during the boot process, then you will choose the advanced options and locate the set AHCI mode. Switch the AHCI Mode value to Enabled.
10. Disconnect External Hardware
If the external hardware connected to your computer such as speakers, printers, scanners, USB drives, etc. is not working properly, the driver can cause problems related to the Stop Code Inaccessible Boot Device Error.
To solve this problem, restart the computer by removing the external hardware. If your computer runs fine after removing the external hardware, it means that one of your hardware is causing the problem. Check each device, after identifying the correct device, reinstall/update the driver for it.
Here we described all the methods related to How to Fix Stop Code Inaccessible Boot Device. Hope you have got your problem’s solution! Thanks for reading this article. If you want to know more details about How to Fix Driver Power State Failure in Windows 10. Click Here