
Snip & Sketch is a Windows 10 app that was introduced with the October 2018 Update. The app can be used to take screenshots (snip) and make changes to the resulting images (sketch). The Snip & Sketch app refers to screenshots as snips.
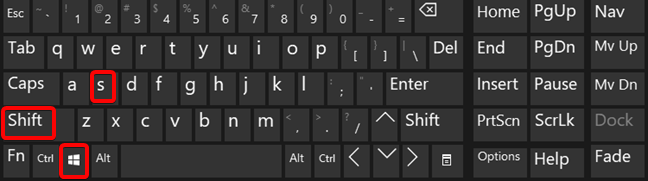
The quickest way to screenshot Window 10 with Snip & Sketch is by pressing the keyboard shortcut Windows Key+Shift+S.
Where is Snip and Sketch on My Computer?

How to Set up Snip & Sketch?
In order to copy your screen in Windows, you first need to set up the tool, following the steps outlined below:
- Open Snip&Sketch app from your Windows program list
- Click on the 3 horizontal dots in the upper right corner, and select “Settings”.
- Click on “Use the PrtScn button to open screen snipping”
- Accept the prompt to switch apps when it appears
- Scroll down the Keyboard menu that appears until you reach the option to enable Print screen
- Click on the blue toggle to enable the Print Screen shortcut, and you are ready to go.
Checkout >> How to rotate screen on Chromebook
How to open the Snip & Sketch app in Windows 10
- Click or tap on its shortcut from the Start Menu.
- Open Snip & Sketch is to use search. In the search field on your taskbar, enter the word snip and then click or tap the Snip & Search result.
- If you have opened the Snip & Sketch app, you should see a window similar to this one:
- You are now ready to take a screenshot or to edit an image using Snip & Sketch.
How do you take a screenshot on a computer?
How to Use Snip and Sketch?
- Step 1: while viewing whatever screen you want to capture, press the print screen button on your keyboard.
- Step 2: Open whatever program you wish to have the image pasted into (Word, Google Docs, Paint, PhotoShop, Facebook, Twitter, Trello, WordPress…the list goes on)
- Step 3: press Ctrl+V on your keyboard or right-click and select Paste.
How to Edit in Snip & Sketch?
- Once you take a snip, the editing tools let you annotate and customize your screenshots.
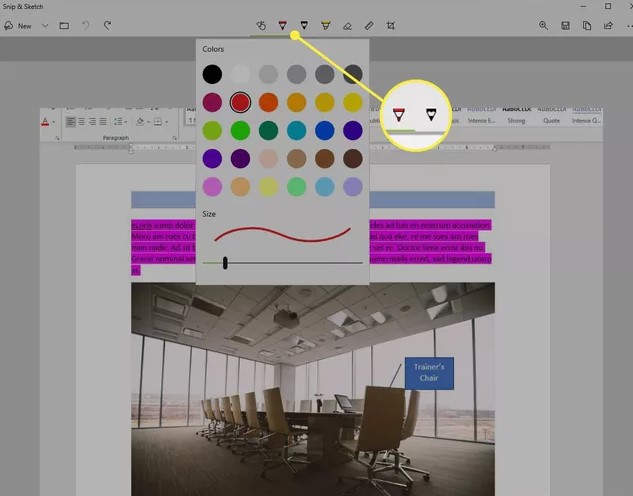
- Select the Ballpoint Pen or Pencil to write or draw on the snip. Select either tool twice to open the color palette and select a different color or size.
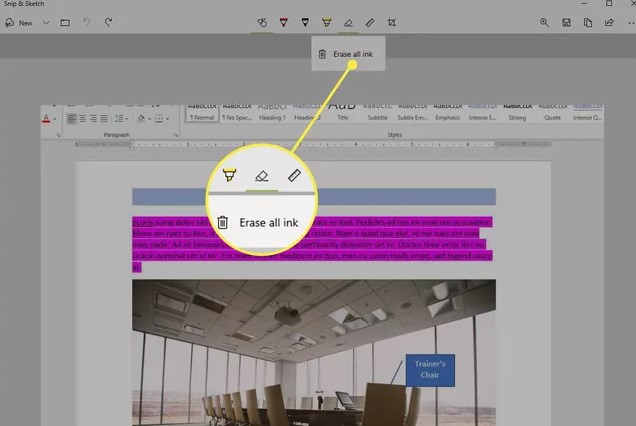
- Select the Eraser tool and drag it on the snip to remove specific strokes. Click it twice and select Erase All Ink to erase any annotations you have made.
- Select the ruler or protractor tools to make it easier to draw straight lines or arches. Select the button again to hide the tool.
- Select the Crop button and use the dragging handles to crop the image.
- Select the Save icon to save the screenshot.
>> How to do a Screenshot? <<
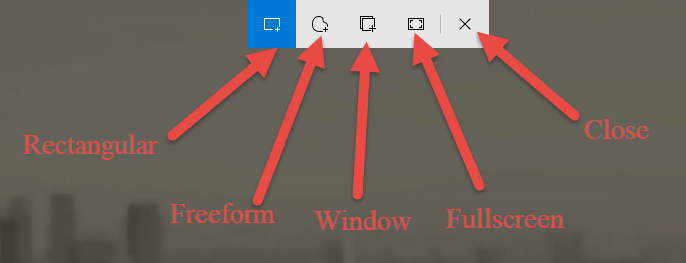
Modes for Snip & Sketch
| Free-form snip | Draw a free-form shape around an object. |
| Rectangular snip | Drag the cursor around an object to form a rectangle. |
| Window snip | Select a window, such as a dialog box, that you want to capture. |
| Full-screen snip | Capture the entire screen. |
Also Read –