In this article, I’ll explain how to screenshot on windows so you can start taking screenshots on your computer or laptop in no time! No matter what type of device you have (i.e. laptop, desktop, tablet, smartphone), you can use these methods to learn how to screenshot on windows with ease.
Print Screen button
- Press the “Print Screen” key on your keyboard. It’s usually labeled “PrtScn“.
- Select the area you want to take a screenshot.
- Then paste the screenshot into an image editing program like Paint or Photoshop.
- Once it’s open in that program, use whatever tools are available.
- Now, save the screenshot by going File > Save As and name it.
Using Snipping Tool
Another great method for taking screenshots on Windows 10 and 11 is using the Snipping Tool which can be found in Accessories.
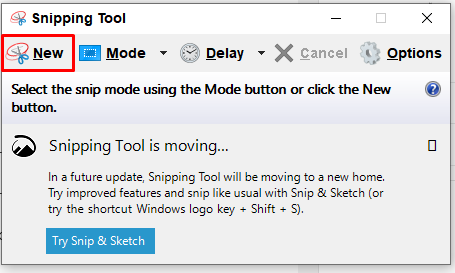
- To open the Snipping Tool, select Start, enter the snipping tool, then select it from the results.
- Click New to take a screenshot.

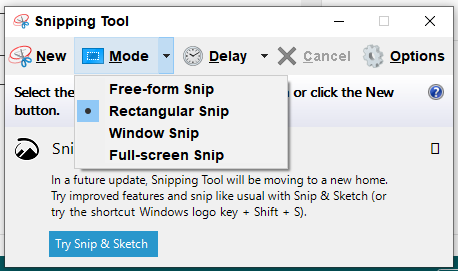
- Rectangular mode is selected by default. You can change the shape of your snip by choosing one of the following options in the toolbar:
- Rectangular mode: Drag the cursor around an object to form a rectangle.
- Window mode: Select a window, such as a dialog box, that you want to capture.
- Full-screen mode: Capture the entire screen.
- Free-form mode: Draw a free-form shape around an object.

Use Game Bar
If you’re a PC gamer, you’ve probably used the Game Bar to take screenshots of your gameplay. Well, did you know that you can also use it to take regular screenshots of your desktop? Just open the Game Bar (by pressing Windows Key + G) and then press the camera icon to take a screenshot or use the default keyboard shortcut Windows+ Alt + PrtScn to snap a full-screen screenshot. It automatically saves in your Pictures folder.
Use the PrtScn key with OneDrive
One of the best things ever to hit screenshots in Windows, having arrived in 2015. As with the plain old Print Screen key, you can save the entire screen or the active window with Print Screen or Alt-Print Screen, respectively.
- Click or tap the OneDrive icon in the taskbar or notification area.
Tips: If you don’t see the OneDrive icon, OneDrive might not be running. On a PC, go to Start, type OneDrive in the search box, and then click OneDrive in the search results.
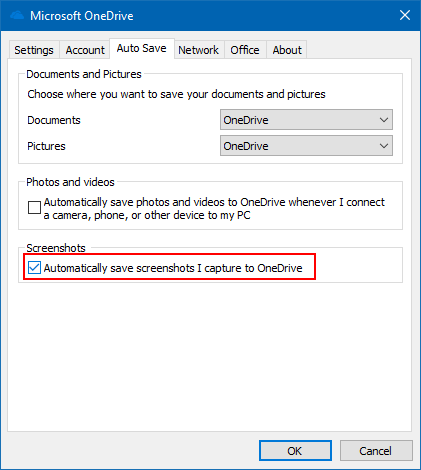
- Click the More > Settings > Backup tab.
- Under the “Screenshots” section, check the Automatically save screenshots I capture to the OneDrive option. Click OK.

Once you complete the steps, open the settings on your preferred screenshot application, and you should now be able to register the shortcut using the Print Screen button.
Third-party screenshot apps
If you want more features than the Snipping Tool or Grab, or you want to be able to take screenshots without opening an additional program, you can download a third-party screenshot app. Apps like Snagit (Windows/Mac), LightShot (Windows/Mac), CloudApp (Windows/Mac), and Jing (Windows only) all have free versions that are feature packed and easy to use.
